I vividly remember the moment I realized my dream of a sleek, modern, curbless shower was turning into a nightmare. Water pooling, cracked tiles, mold lurking in corners—what went wrong? It was a harsh wake-up call that even the most well-intentioned renovations can go sideways if you’re not careful. I learned the hard way that the devil is in the details, especially with a design as minimalist and open as a curbless shower.
Why Your 2026 Shower Might Be Ruining Your Home
If you’re planning a new bathroom or remodeling an existing one, a curbless shower seems like the perfect upgrade—clean lines, easy access, and a modern aesthetic. But without proper planning, it can become a source of ongoing water damage that rots your floors and walls over time. I found out that ignoring specific pitfalls early on can cost you thousands in repairs later. Today, I’ll share the most common mistakes that tend to sneak under the radar— mistakes I *personally* made—and how you can avoid them. Trust me, preventing these errors is easier than fixing a soggy, rotting floor decades down the line.
The Biggest Skepticism
Many homeowners doubt that minor details can make or break their shower’s longevity. They think that a few sealants or a quick drain fix will do the trick. I was skeptical too—until I watched my carefully curated bathroom turn into a mold-infested sledgehammer project. One early mistake I made was overlooking the importance of proper waterproofing around the drain — a mistake that can lead to water seeping into subfloors and causing rot. Curious if your current setup might be vulnerable? It’s worth exploring the common pitfalls before they become full-blown disasters. For an in-depth look at layout issues that cause water damage, check out [this guide on curbless shower layouts](https://floorcraftstore.com/5-curbless-shower-layouts-to-prevent-2026-water-damage).
Stay tuned, because the next sections will reveal exactly what to watch out for and how to keep your renovation protected against rot, mold, and costly repairs. If you’ve ever experienced water pooling or soggy floors after a shower, you’re not alone—and there are practical steps you can take to prevent it.
Start with a Solid Waterproofing Foundation
Before laying tiles or installing drains, waterproof the entire shower area, including the floor and walls. Use a liquid membrane or membrane mat designed for wet areas—think of it as putting on a waterproof suit for your bathroom. I once skipped this step and paid dearly when water seeped into the subfloor, causing mold and rot. Applying multiple coats ensures no water leaks through tiny gaps, much like sealing a can of paint thoroughly.
Design the Drainage System Effectively
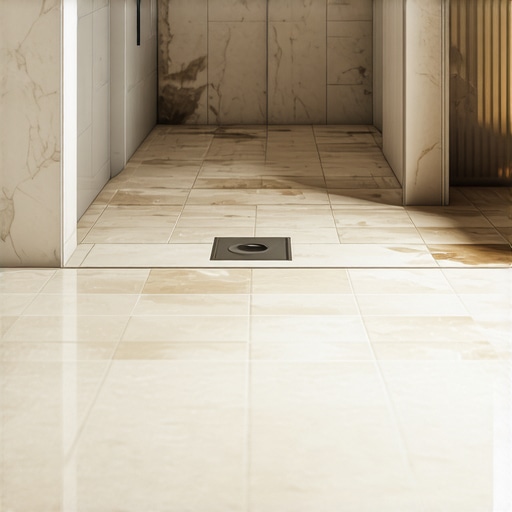
Proper drainage is critical. Use a linear drain aligned with the slope of the floor to direct water straight to the drain. Imagine draining a bathtub — water flows downhill, so your floor must slope gently towards the drain without creating low spots. I recommend consulting this guide to get the slope just right. An improperly sloped floor can cause standing water, defeating the purpose of a sleek, open design.
Level the Subfloor for Consistent Support
Subfloor unevenness is like a wobbly table — everything on top becomes unstable. Use a self-leveling compound to create a flat surface before installing shower bases. I once had a concrete slab with slight dips that caused laminate flooring to buckle after a few months. Running this leveling process smoothed out the surface and prevented future movement. Think of it as flattening a wave so your materials lay uniformly.
Choose and Prepare Your Flooring Materials Carefully
For the walls, porcelain or ceramic tiles with appropriate waterproof grout work best. Use a primer to enhance adhesion, preventing tiles from cracking or popping loose over time. For the floor, waterproof vinyl or textured tiles prevent slips but require proper underlayment. When installing laminate flooring, ensure you run the laminate with proper expansion gaps and seal these gaps meticulously to prevent water ingress. I learned this the hard way when a small spill led to swelling and warping.
Seal All Critical Connections and Joints
Every seam, especially around drains and between walls and flooring, needs tight sealing with a waterproof caulk or specialized sealant. Don’t overlook areas behind the drain or at the edges of niches—these are prime leak zones. I once assumed the drain could be left unsealed because it ‘looked fine,’ but cracks developed within months, leading to water damage that took weeks to repair. Use high-quality, flexible sealants and apply them carefully, like icing a cake, ensuring no gaps are left behind.
Test and Monitor for Leaks Before Use
After installation, conduct a flood test: plug the drain, fill the shower base with water, and observe for at least 30 minutes. Check for damp spots or drops of water around seals and joints. Think of it as a stress test—sort of like taking a new car for a test drive before long trips. I remember spending an afternoon watching water slowly seep in from a poorly sealed niche; fixing it early saved me from a much larger mess later.
Many homeowners believe that simple measures like quick sealants or superficial leveling will guarantee long-term durability in their flooring and shower setups, but this oversimplifies the complexity involved. For example, a common myth is that laying tiles without thorough waterproofing won’t lead to problems, yet experts agree that inadequate waterproofing is the leading cause of water damage in showers—it’s not just about sealing edges but ensuring comprehensive membrane application, as detailed in this guide. Similarly, many assume that subfloor leveling is a straightforward step, but minor dips or uneven support can cause laminate flooring to warp or creak within months, highlighting the importance of precise preparation, which you can learn about in this article. An advanced mistake I often see in floor leveling is neglecting to account for moisture content; moisture barriers and proper drying protocols are critical to prevent future issues like mold growth and floor deformation. Failing to recognize the need for a proper slope in shower drainage can lead to standing water and subsequent mold or rot, even if your tile work looks perfect initially. For expert drainage setup tips, refer to this resource. When it comes to laminate installation, a recurring error is installing planks without maintaining appropriate expansion gaps, which can cause buckling as temperature and humidity fluctuate—something that’s often overlooked by DIYers. To avoid these pitfalls, consider reading these expert fixes. What all these issues have in common is the underestimated significance of detail and adherence to best practices, which can make or break your project’s longevity. For a deeper dive into mastering these nuances, check out expert renovation tips. Have you ever fallen into this trap? Let me know in the comments.
Keeping It Running: Tools I Trust for Long-Term Results
Maintaining quality in bathroom renovations, flooring, and carpets hinges on having the right tools and adopting consistent maintenance routines. For shower waterproofing, I rely heavily on a high-quality silicone sealant gun, which allows me to apply caulk precisely in tight corners and seams. This simple device ensures that every joint is sealed effectively, preventing water ingress and mold buildup over time. When it comes to floor leveling, a professional-grade self-leveling compound is indispensable—I prefer products like these advanced leveling compounds because they create a smooth, durable foundation that resists cracking and warping, especially critical after years of use.
For ongoing inspections, a moisture meter like the Tramex MM-1 helps me monitor humidity levels beneath flooring and inside walls. Regular checks with this device catch potential issues before they escalate into costly repairs, such as subfloor rot or mold growth. Digital inspection cameras are also invaluable; I use a flexible probe camera to peek behind inaccessible areas, ensuring that seals and membranes remain intact—more on this technique here.
Future-Proof Your Finishes with Smart Maintenance
Looking ahead, I predict that the trend will shift towards proactive, sensor-enabled maintenance tools that can alert homeowners of leaks or moisture buildup instantly. Integrating IoT devices that monitor temperature and humidity levels could become standard, extending the lifespan of showers, floors, and carpets by catching issues early. Currently, the most effective approach remains routine inspections and immediate attention to any signs of damage. I recommend setting up a monthly inspection schedule using these tools—regularly testing drain seals with a drain seal tester can prevent unexpected leaks.
How do I maintain my flooring and shower systems over time?
The key to lasting performance is consistency. Clean your shower drains and seals with gentle, pH-neutral cleaners to prevent buildup that can compromise waterproofing. Use a microfiber cloth to wipe down surfaces and check grout lines for cracks—addressing small issues promptly stops them from becoming major problems. For floors, I use a damp mop infused with a mild detergent weekly, and periodically check for uneven spots that might indicate subfloor movement. Investing in an annual professional inspection can identify hidden issues early. Remember, the challenge lies in catching wear and tear before it causes significant damage—think of it as giving your home a health checkup. To deepen your understanding, read about common pitfalls in this expert article. For your next project, try implementing a moisture meter check post-installation; it might save you thousands in repairs down the line.
Lessons That Stayed with Me Beyond the Tiles
- One hard-earned lesson was realizing how overlooked details—like a tiny crack in the waterproofing membrane—can lead to years of frustration. Investing extra time in sealing and inspecting every joint before tiling revealed itself as a game-changer, saving me thousands in repairs.
- Another insight was understanding the importance of a gentle slope towards the drain. I had initially assumed a flat floor would suffice, but the standing water was a clear reminder that proper drainage design needs attention—it’s the silent hero for a leak-proof bathroom.
- My third revelation concerns choosing quality materials. Cheap grout or sealants seemed tempting, but experiencing mold growth and grout cracking proved that premium products are a worthy investment for durability and peace of mind.
Smart Resources for Confident Renovations
For those ready to take their bathroom upgrades to the next level, I highly recommend exploring this comprehensive guide on curbless shower layouts—it provides invaluable insights into effective layout planning. When it comes to waterproofing, this resource on waterproof membrane application demystifies the process and highlights common pitfalls. I also trust these expert tips on laminate installation to prevent future gaps and squeaks. Equipping yourself with knowledge from reputable sources is the keystone to a successful, long-lasting renovation.
Build Confidence in Your Craft — Your Home Will Thank You
Embarking on a bathroom or flooring project might feel daunting at first, but remember: every expert once started as a beginner. Taking the time to understand subtle nuances—like ensuring a proper slope or sealing every joint—can transform a good renovation into an exceptional one that lasts for decades. Think of each step as a promise to your future self, protecting your home from water damage, mold, and costly repairs. I believe in your ability to master these details, and I invite you to start today. Your home’s durability and beauty depend on it.
http://Sarah%20Mitchell
This article really hits home. I recently renovated my bathroom with a curbless shower, and I made sure to pay close attention to waterproofing and drainage. However, reading these detailed tips makes me realize I could have possibly overlooked some nuanced details, especially around the slope consistency and sealing joints more carefully. I’ve noticed water pooling in certain spots despite my efforts, which has me thinking about rechecking the slope and seals. Does anyone have recommendations for best tools to monitor moisture levels regularly, or tips on how to identify potential leak spots early? It’s clear that consistent maintenance and monitoring are crucial, especially as materials age. I’d love to hear from others—what’s worked for you in maintaining a leak-proof shower long-term, beyond the initial installation? This kind of ongoing vigilance seems essential to truly protect one’s investment and avoid those nightmare scenarios of mold and rot.