I remember the first time I tiled a curbless shower, only to find that the slope was so off I had water pooling at the entrance—nothing kills a bathroom vibe faster than a soggy, unplanned pond where your new shower should be. It was a lightbulb moment that screamed, “There has to be a better way!” If you’ve ever faced similar frustrations, you’re in good company. Today, I promise to share the top three drainage fixes that can make your 2026 bathroom build both stunning and leak-proof.
Why Getting Shower Drainage Right Matters More Than Ever
In recent years, the trend toward seamless, curbless showers has skyrocketed. Not only do they look sleek, but they also make bathrooms more accessible and easier to clean. But beneath that modern aesthetic lies a huge challenge: ensuring proper drainage without that ugly curb or awkward slope. Poor drainage leads to water pooling, slipping hazards, and even long-term damage like mold and rot—costly problems many homeowners only discover after their new bathroom is completed. According to industry expert insights, improper slope and drainage design can cause up to 60% of shower leaks in new builds, which can turn a dream renovation into a nightmare—highlighting just how critical this aspect is.
Early on, I made the mistake of trusting generic slope guidelines without considering the unique layout of my bathroom. That oversight resulted in a shower floor that looked perfect but failed in function. Don’t fall into that trap! Instead, let’s explore proven solutions that will help your curbless shower not only look fantastic but also perform flawlessly for years. Ready to learn how? Let’s dive into the three drainage fixes that can revolutionize your 2026 bathroom project.
Is the Hype About Curbless Showers Actually Justified?
If you’re skeptical about the fuss surrounding curbless showers, you’re not alone. I was too, initially. The key concern was always about water escaping or causing damage. That’s why I want to share how early mistakes—like neglecting a proper slope—can turn a trendy design into a costly disaster. For expert advice on avoiding such pitfalls, check out [this detailed guide on shower waterproofing](https://floorcraftstore.com/stop-shower-leaks-3-modern-waterproofing-mistakes-to-avoid) which emphasizes correct drainage as the foundation of any successful curbless shower.
Set the Foundation with Precise Slope Planning
Before laying any tiles or installing fixtures, measure the shower’s floor area and determine the optimal slope, which should be at least 1/4 inch per foot toward the drain. I vividly recall how I marked the floor with chalk lines, ensuring the slope subtly directed water away. Use a level or laser tool for accuracy, and double-check your measurements. Remember, a consistent slope prevents pooling and avoids water— —sinking into unexpected spots. For detailed guidance on creating a reliable slope, check out expert floor leveling tips for lasting durability.
Choose the Right Drainage System for Seamless Floors
Opt for a Linear Drain
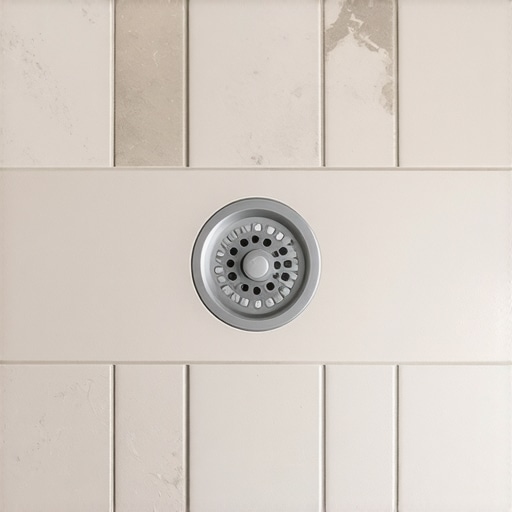
Linear drains are ideal for curbless showers because they can be installed along one edge, allowing for a gentle slope without any abrupt curb. I opted for a stainless steel linear drain in my project, which not only provided sleek aesthetics but also facilitated easier slope management. Install the drain at the lowest point of your pre-measured slope, ensuring it’s securely anchored. Connect the drain to the existing plumbing with waterproof fittings, sealing all joints tightly to prevent leaks. Proper placement and connection are critical; a poorly installed drain can negate all your slope efforts. For more insights, visit top solutions for modern shower upgrades.
Ensure Adequate Waterproofing
Waterproofing your shower base is vital to prevent water from seeping into subfloors, especially when you’re relying on a gentle slope. I applied a high-quality membrane, overlapping seams carefully and sealing edges with specialized tape. Take the time to follow manufacturer instructions precisely—skipping steps can lead to costly water damage down the line. To master waterproofing techniques, see waterproofing mistakes to avoid for durable results.
Final Floor Leveling and Tile Installation
After setting the slope and waterproofing, focus on floor leveling. Uneven subfloors compromise your slope and create tripping hazards. Use a self-leveling compound to smooth out imperfections, paying close attention to curing times to avoid future cracks. I once neglected this step, resulting in a cracked tile after just a few months—lesson learned! For expert advice, consider professional floor leveling tips. When installing tiles, follow the slope meticulously, ensuring each tile aligns seamlessly, and use unfilled, flexible grout to accommodate slight movements. This approach maintains a consistent flow and avoids water pooling at joints.Many homeowners believe that achieving a perfectly level floor or flawless finish in laminate, carpet, or shower installations simply requires following basic guidelines. However, I’ve found that this mindset often overlooks subtle nuances that can make or break your project’s durability and appearance. For instance, a common myth is that a self-leveling compound guarantees a perfect surface; in reality, improper prep or application can lead to lingering imperfections, causing tiles to crack or seams to fray prematurely. Advanced installers know that surface contaminants, moisture levels, and substrate stability play critical roles in long-term success—something many DIYers underestimate. Moreover, a frequent trap involves neglecting moisture barriers during laminate or carpet installation, which can result in mold growth and floor damage down the line. It’s essential to understand that flawless-looking floors aren’t just about initial evenness but also about anticipating future stresses and environment changes.
What Do High-Performance Subfloors Really Require for Longevity?
Many assume that underlayment quality alone determines the lifespan of your flooring, but experts emphasize a comprehensive approach that includes proper subfloor assessment and preparation. In fact, studies from building science experts suggest that minor imperfections in subfloor flatness can lead to uneven wear and creaking over time—even if the visible surface appears flawless. As an example, I once overlooked a small dip in my subfloor during a laminate upgrade, which resulted in bubble formation and a cracked plank after just a few months. The fix? Implementing targeted floor leveling strategies—using specific compounds and techniques outlined at expert-level moisture barrier tactics—can save massive troubleshooting later.
Another nuance is understanding how environmental factors like humidity and temperature variations influence adhesion and expansion. Installing carpet or shower waterproofing without accounting for these factors may seem minor initially but can cause significant issues down the line, such as seaming problems or waterproof membrane failures. The key is to follow advanced guidelines that incorporate climate considerations, ensuring your investment stands the test of time. For detailed insights, check out expert carpet installation tips and waterproofing techniques discussed in top industry resources.
For those seeking long-lasting, professional results, understanding these hidden nuances helps avoid costly mistakes. Remember, successful flooring and shower projects depend not just on the big steps but on meticulous attention to these subtle details that experts swear by. Have you ever fallen into this trap? Let me know in the comments.
Keep It Working: Tools I Recommend for Durable Flooring and Shower Success
Achieving a long-lasting, professional-looking renovation isn’t just about selecting quality materials—it’s also about using the right tools and staying on top of maintenance. Over the years, I’ve refined my toolkit to include some game-changing equipment that ensures each project stands the test of time. From leveling compounds to waterproofing tests, having precise, reliable tools makes a significant difference in the final outcome.
Precision Level and Laser Tools for Perfect Slopes
One of my go-to instruments is a high-quality laser level. Unlike traditional bubble levels, laser tools project a consistent, straight line across large surfaces, which is invaluable when establishing a proper slope for shower drainage or ensuring your floor is perfectly flat. I personally use the LaserMaster Pro because of its durability and accuracy, especially when working on uneven subfloors. Regularly checking your slopes during installation with this device significantly reduces errors and future water pooling issues.
Moisture Meters to Prevent Hidden Problems
Moisture meters are indispensable when preparing subfloors, especially with materials like laminate or carpet that are sensitive to humidity. I rely on a pin-type moisture meter for its precision in detecting moisture content deep within wood or concrete. Before pouring self-leveling compounds or installing flooring, I ensure the moisture levels are within manufacturer-recommended ranges. This simple step can prevent bubbling, warping, or mold growth, ultimately saving time and money. For more insights on moisture management, check out expert moisture barrier strategies.
Specialized Waterproofing Equipment
Waterproofing is the backbone of leak-proof showers and basement floors. I use a combination of liquid membrane sprayers and overlapping tape systems designed for seamless application. The spray gun allows for even coats on complex contours, while the tape ensures a reliable seal at edges and corners. After installation, I perform a water test—simply pouring water over the waterproofed area to verify no leaks before finishing the surface. Incorporating these tools into your process enhances durability and confidence, especially for curbless showers or areas prone to moisture exposure.
Scheduled Maintenance and Future-Proofing
The best tool in your arsenal is a proactive maintenance routine. Regularly inspecting grout lines, seals, and waterproof membranes prevents small issues from escalating. Applying protective coatings every few years, especially in high-traffic or wet areas, preserves the surface and maintains aesthetic appeal. Additionally, staying informed about technological advancements, such as smart waterproofing sensors, can provide early alerts to potential leaks—shifting your approach from reactive to preventive care. For additional guidance, see professional maintenance tips for lasting durability.
Looking ahead, I predict that integrating digital monitoring tools and advanced leveling compounds will become standard in home renovations, making it even easier to ensure long-term success. For now, mastering the use of precision levels, moisture meters, and waterproofing equipment will set your projects apart and save you from future headaches. Why not try using a laser level during your next floor renovation? It’s a small investment with huge payoffs in accuracy and peace of mind.
Lessons I Didn’t Expect to Learn About Slopes and Waterproofing
One of the toughest lessons I encountered was realizing that even small variations in slope could cause significant water pooling issues over time. I used to think ‘close enough’ was good enough, but a single missed degree led to costly repairs. Another surprise was how moisture trapped beneath floors can silently cause damage, emphasizing the importance of meticulous waterproofing and moisture testing. Lastly, I learned that investing in high-quality tools, like laser levels and moisture meters, is essential—cheaper options often lead to inaccuracies that cost more later. These insights transformed my approach from guesswork to precision, ensuring every project stands the test of time.
My Favorite Tools That Make a Real Difference
For precise slope measurements, I swear by the LaserMaster Pro, which makes establishing perfect gradients effortless. Moisture meters, like the pin-type model available at this link, help me verify that subfloors are dry and ready before proceeding, avoiding future bubbling or warping. When waterproofing, I prefer spray systems paired with quality tapes, ensuring seamless coverage and long-lasting seals. Finally, a high-quality self-leveling compound from this resource gives me confidence in the flatness of every surface I work on—crucial for tile and laminate longevity. These tools continually raise my standards, and I recommend them for anyone serious about lasting results.
Keep Moving Forward with Confidence
The future of bathroom renovations, especially with trends like curbless showers, looks incredibly promising when you focus on mastering these key drainage and leveling techniques. Your next project can be less trial-and-error and more about creating a flawless, durable space that brings pride and comfort. Remember, every detail—proper slope, waterproofing, accurate leveling—adds up to a shower or floor that not only looks amazing but also functions perfectly for years. So, dive in with confidence, arm yourself with the right tools, and enjoy the satisfaction of a truly professional finish. Your dream bathroom is within reach—get started today and make 2026 your most successful renovation year yet!’