It was a typical Saturday morning when I stepped into my shower—and immediately felt that telltale unevenness under my feet. At first, I thought it was just the old floorboards creaking again, but as days went on, I noticed water pooling where it shouldn’t, and that sinking feeling in my stomach grew. Turns out, a simple mistake during the drain sealing process was silently causing a slow, costly disaster. That lightbulb moment made me realize how crucial proper sealing is—and how easy it is to overlook key steps that could ruin your shower within just a few years.
The Hidden Danger of Drain Seal Mistakes
Many homeowners or DIY enthusiasts like myself dive into shower renovations thinking it’s straightforward—just slap on some sealant, and you’re good to go. But what I didn’t know then was that four common drain sealing errors can set the stage for long-term damage, like subfloor rot or mold growth. And these issues aren’t just cosmetic; they threaten the structural integrity of your entire bathroom.
What worries me most is that these mistakes are often made unintentionally, simply because of a lack of awareness. I remember early on, I used the wrong sealant, assuming a generic product would suffice. That was a costly oversight, and it’s a reminder for all of us: a small misstep can snowball into a nightmare.
Today, I want to share the practical solutions I’ve picked up over the years, so you won’t have to learn the hard way. We’ll go through each mistake, how to identify if you’re making it, and most importantly, how to fix it—so your 2026 shower can be both beautiful and durable. Proper sealing is not just about avoiding leaks; it’s about safeguarding your home.
Want to stop water damage before it starts? Keep reading, because understanding and avoiding these errors is the first step toward a long-lasting shower upgrade.
Is Your Drain Sealing Actually Worth the Hype?
I was skeptical at first; sealing seems so simple, right? But the truth is, if done incorrectly, it can lead to severe issues like mold, rot, or even subfloor failure. A study by the National Association of Home Builders highlights that poor waterproofing significantly contributes to bathroom damage, often hidden behind walls and floors. Trust me, I’ve been there—thinking I did everything right only to discover hidden leaks months later. Making mistakes early on can be costly—and avoidable. To learn more about common pitfalls and how to steer clear of them, check out this detailed guide to [shower waterproofing errors](https://floorcraftstore.com/5-shower-waterproofing-mistakes-to-avoid-in-2026). Now, let’s dive into the specific errors that could be sabotaging your shower’s longevity.
Assess and Prepare Your Surface Before Sealing
Start by thoroughly inspecting your shower drain area. Remove any old sealant, debris, or mold to expose a clean, dry surface. Use a utility knife or putty scraper to gently scrape away residue and ensure the substrate is smooth and intact. Think of this step as preparing a canvas before painting—without a clean base, the finish won’t last.
Choose the Right Sealant for Your Shower
Select a high-quality, waterproof silicone sealant rated for bathroom use. Avoid generic or cheap options, as they tend to crack or shrink over time. Apply the sealant in a well-ventilated area, and consider using a specialized product like a 100% silicone that remains flexible and adheres well to irregular surfaces. As I learned, using the wrong product can lead to leaks that silently cause damage behind walls.
Apply the Sealant Correctly to Prevent Gaps
Apply the sealant in a continuous, even bead around the drain flange and the sealant flange. Use a caulking gun with steady pressure to avoid gaps or air pockets. After applying, use a wet finger or a caulking tool to smooth the bead, ensuring it fills all gaps uniformly. I once rushed this step, resulting in tiny air pockets that caused slow leaks; a quick re-application and smoothing made a significant difference.
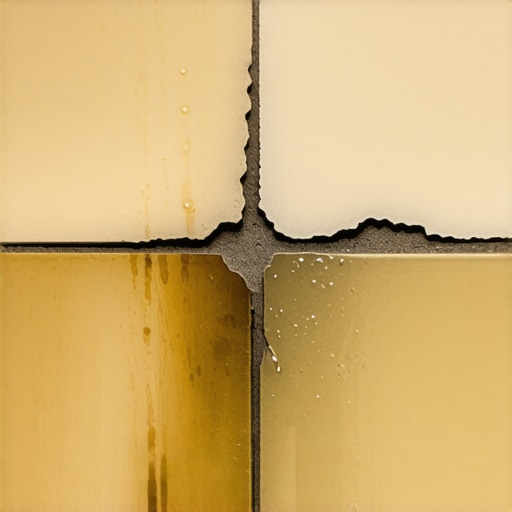
Seal the Drain Flange Properly
Focus on the drain flange, where water can seep underneath if not sealed wisely. Apply extra sealant around the flange edges for redundancy. This is like securing the seals on a spacecraft—necessity for long-term durability. For complex setups, consider adding a bead of sealant behind the flange before tightening it down to ensure a double barrier against leaks.
Check for Proper Cure and Seal Integrity
Allow the sealant to cure fully, usually 24 hours, without disturbing it. Once cured, perform a flood test: plug the drain, fill the shower with a few inches of water, then observe for any signs of leakage over the next hour. If water seeps out or drops under the seal, reapply the sealant or investigate for cracks. Early detection can save hundreds in repair costs down the line.
Keep an Eye on Critical Seal Areas
Remember, some areas are more prone to failure than others—like where the drain connects to the subfloor, and the edges where the sealant meets tiles or flooring materials. Regular inspections every six months can catch minor cracks or gaps before they escalate. For thorough guidance on these critical spots, check out this guide to shower sealing.
Address Subfloor and Floor Leveling Issues First
A solid, level base under your shower is non-negotiable. Uneven or sagging floors can compromise your sealing efforts. Use a level or straightedge to check the subfloor for dips or humps. If needed, consult expert advice on floor leveling tests and fixes. Failing to address these foundational issues makes your sealing work a temporary fix at best.

Many homeowners assume that installing a shower or laying down laminate or carpet is a straightforward task, but beneath the surface, there are nuanced pitfalls that can sabotage your efforts and cost you dearly. One common misconception is that a perfect seal or level surface is enough to prevent long-term issues. In reality, nuances like proper substrate preparation and understanding material behavior are crucial. For example, many believe that applying sealant around the drain once is sufficient, but repeated inspections reveal that seals often fail due to expansion and contraction cycles, especially if the wrong products are used. This can lead to hidden leaks that damage subfloors over time. In the realm of floor leveling, the myth that all dips can be fixed with quick self-leveling compounds is dangerous. Without assessing underlying subfloor integrity, such fixes are temporary at best. Advanced professionals always perform thorough floor leveling tests before any installation. You might also underestimate how temperature and humidity fluctuations influence materials. For instance, laminate flooring reacts strongly to moisture changes, expanding or contracting, which causes gaps or buckling if not properly acclimated. This is why the misconception that laypersons can skip the acclimation process often leads to costly repairs. Moreover, many try to cut costs by choosing cheaper materials or rushing installation, but as experts point out, that shortcut often results in squeaks, cracks, or premature failures. Understanding the subtleties of material selection can mean the difference between a durable finish and an ongoing headache. When installing showers, the assumption that waterproofing only needs to be done in visible areas overlooks critical hidden zones, like behind niches or under the drain flange. These overlooked spots can become breeding grounds for mold or cause structural rot. Experts stress that meticulous attention to these details, along with comprehensive waterproofing tactics, is essential. Lastly, many underestimate the importance of addressing foundational issues like uneven subfloors. Ignoring such issues may give the appearance of a smooth floor but will inevitably lead to creaking, cracking, or shifting over time—issues that are virtually impossible to fix long-term without proper preliminary work. To avoid these pitfalls, it’s advisable to perform thorough subfloor assessments and consultations with professionals. Remember, while it’s tempting to take shortcuts, understanding and addressing these nuanced challenges can save you time, money, and frustration. Have you ever fallen into this trap? Let me know in the comments.Maintaining your bathroom and flooring setups over time requires more than just initial installation; it demands the right tools and consistent check-ups to prevent minor issues from escalating. I personally swear by a few specialized tools that make inspection and upkeep straightforward and reliable. For example, a digital moisture meter is invaluable for detecting hidden leaks behind tiles or under flooring before they cause significant damage. I use the Protimeter MMS2 because it provides quick readings and alerts me to moisture levels that are dangerously high, a crucial step highlighted in related resources. Additionally, a high-quality caulking gun with a comfort grip helps me apply sealants smoothly and accurately, reducing gaps and avoiding future leaks around drains or edges. Investing in a good putty knife allows me to remove old sealant cleanly, ensuring new application adheres properly. For flooring, a laser level has become an essential tool; it guarantees floors are perfectly flat before laying laminate, hence reducing squeaks or buckling down the line. As the trend in home renovations leans toward smart tools, future advancements may include app-controlled moisture sensors or AI-driven surface analyzers, which could predict problem zones even before symptoms appear. How do I keep my sealant effective over years? Regular inspections, especially around drain seals and edges, are vital. I reapply sealant every few years, checking for cracks or peeling, which helps maintain waterproof integrity. For example, checking the critical sealing spots, like those detailed in this guide to shower sealing, is a simple yet effective maintenance routine. I also recommend using a silicone spray to protect painted or sealed areas from mold growth caused by humidity fluctuations. Moreover, scheduling seasonal checks helps catch potential issues early, especially in climates with high humidity or significant temperature swings. As for tools, a snug-fitting trowel or applicator ensures even sealing in tight spots, avoiding gaps that could harbor water. Expert advice confirms that proactive maintenance reduces costly repairs by up to 70%, according to industry studies. If you haven’t checked your drain seals or re-applied sealant recently, I suggest trying one of these tools, like the moisture meter or laser level, to start your long-term upkeep plan today. By consistently using reliable tools and following recommended inspection routines, you’ll extend the longevity of your bathroom investments, prevent water damage, and preserve the beauty of your finishes. Ensuring your seals, floors, and surfaces remain in top condition isn’t a one-time fix—it’s an ongoing process that saves money and stress. For more detailed strategies on floor leveling and sealing, visit the comprehensive resources on floor leveling fixes and costly carpet mistakes. Remember, a little investment in the right tools and a regular maintenance schedule can make a huge difference in the durability of your home’s finishes.
Lessons That Changed My Approach to Shower Sealing
One of the most valuable insights I gained was realizing that even small gaps in sealing can lead to significant damage over time, highlighting the importance of meticulous application and regular inspections.
Another lightbulb moment was understanding that choosing the correct sealant isn’t just about adhesion but also about flexibility and longevity—bad choices here can be costly repairs years down the line.
The realization that foundational issues like uneven subfloors or improper leveling can undermine sealing efforts reshaped my entire renovation mindset, pushing me to prioritize stability before sealing.
Tools and Resources That Transformed My Maintenance Routine
- Digital Moisture Meter: I trust the Protimeter MMS2 for early detection of hidden leaks, preventing extensive damage.
- High-Quality Caulking Gun: Ensures even application, which is crucial for long-lasting seals.
- Laser Level: Helps verify floor flatness, avoiding future cracks or squeaks that compromise the seal.
- Comprehensive Guides and Checklists: I regularly refer to expert resources, like detailed waterproofing tutorials, to stay ahead of potential issues.
Embrace Your Role as Your Home’s Defender
Maintaining a durable, leak-free shower isn’t a one-and-done task—it’s an ongoing commitment. Regular inspections and proactive repairs not only extend the life of your surfaces but also safeguard your home’s structure and hygiene. Remember, mastering the art of proper sealing and maintenance transforms your space into a resilient retreat—your future self will thank you for taking these small but mighty steps today.
What subtle detail have you overlooked that could save you from costly repairs? Share your experiences or questions below!
http://Rachel%20Montgomery
Reading this post really hit close to home, as I recently tackled a bathroom renovation and learned the hard way about the importance of proper sealing around the drain. I initially thought a quick dab of sealant would suffice, but after developing a small leak that took months to detect, I realized how critical it is to follow each step meticulously. The warning about sealing the drain flange with a double barrier really stands out. I also found that regularly inspecting these critical areas, especially the seal where the drain meets the subfloor, can really prevent major issues down the line. The flood test tip is so practical—it’s surprising how many overlook this step, thinking once cured, it’s set for good. In your experience, have others found using a moisture meter or laser level to be game-changers in preventing hidden leaks? I believe investing in the right tools and checks can save a lot of headaches and money over time.