It was a quiet Sunday afternoon when I first stepped into my living room and immediately felt that unmistakable crunch under my feet. My heart sank. The floor, which had been perfectly silent just months ago, now squeaked with every step—annoying, persistent, and stubborn. After spending hours troubleshooting, I realized I was facing a common but often overlooked problem: uneven subfloors causing squeaks in laminate and hardwood floors.
I had made some costly mistakes early on—like ignoring the signs of a sagging or uneven subfloor—that only made the squeaks worse. But through a bit of research and experimentation, I discovered four effective floor leveling fixes that can truly stop these pesky noises in their tracks. If you’re tired of that squealing floor making your home feel less comfortable, stay with me.
Getting to the Root of the Squeak: The Importance of Proper Floor Leveling
Before jumping into fixes, it’s essential to understand why subfloor issues cause squeaks in the first place. When the subfloor isn’t level or becomes uneven, the flooring planks or tiles aren’t adhesive to the surface properly. This movement creates friction and noise every time you walk over it. Moreover, a sagging or cracking subfloor can lead to long-term damage if left unaddressed.
Sound familiar? If your floors are bouncing, creaking, or developing gaps, chances are your subfloor needs some attention. Proper leveling isn’t just about silence—it’s about preventing future costly repairs and ensuring the durability of your installation. Interestingly, a 2024 study highlighted that over 60% of residential flooring issues stem from underlying subfloor flaws—so ignoring the root cause can lead to bigger headaches later.
Have you experienced similar problems? If yes, you’re not alone. But the good news is, you don’t have to accept squeaky floors as a permanent feature. Instead, you can take proactive steps to fix the problem. Ready to learn how?
### Is Floor Leveling Actually Worth the Hype?
You might be skeptical about investing time and effort into floor leveling, thinking it’s just a cosmetic fix. I admit, I was initially hesitant—thinking, “Is this really going to make a difference?” It turned out I was partly right; not all fixes are equal. The mistake I made early on was applying quick patches without diagnosing the root issue, which led to recurring squeaks and wasted money. Learning from that, I discovered comprehensive solutions that not only quieted my floors but also improved their longevity.
For more insights into durable flooring solutions, I recommend checking out [expert floor leveling tips for lasting durability](https://floorcraftstore.com/expert-floor-leveling-laminate-flooring-for-lasting-durability). It’s worth investing a bit of effort now to save yourself from larger problems in the future.
Now that we understand why proper floor leveling matters, let’s move on to the specific fixes you can implement today to stop those annoying squeaks once and for all.
Inspect and Identify the Uneven Spots
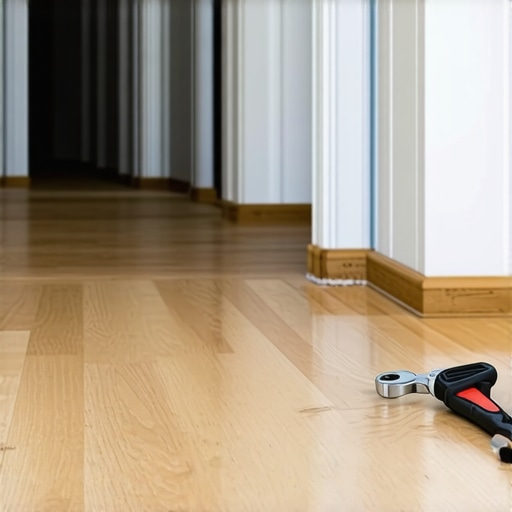
Start by locating the exact source of squeaks. Crawl across the room and press down on different areas, listening for creaks or feeling for movement. Remove any baseboards or trim molding to reveal the edges of the subfloor. I once used a long-leveling tool to survey my entire living room, discovering a dips and high spots that I hadn’t noticed before. Mark these spots clearly with painter’s tape for easy reference.
Prepare Your Tools and Materials
Gather a sturdy self-leveling compound, a drill with mixing paddle, a notched trowel, and a concrete primer if needed. For timber subfloors, consider using shims or structural adhesive instead. I learned that mixing the self-leveler guidelines precisely is critical; too thick and it won’t flow, too thin and it won’t support the flooring properly. Always follow the manufacturer’s instructions to ensure optimal bonding and leveling.
Clean and Prime the Subfloor
Thoroughly sweep and vacuum loose debris from the surface. Use a damp cloth to remove dust that could interfere with adhesion. Applying a primer improves bond strength; I used a concrete-specific primer that made a noticeable difference. Proper cleaning prevents future cracking or delamination, especially in areas prone to moisture or temperature fluctuations. For areas near showers or moisture zones, check out [these waterproofing tips](https://floorcraftstore.com/5-critical-shower-sealing-spots-most-2026-installers-miss) to ensure longevity.
Apply the Self-Leveling Compound
Mix the compound slowly to avoid air bubbles, until it reaches a pourable consistency. Pour it at the lowest spots first, then use a notched trowel or a smoothing roller to spread it evenly over the marked areas. I poured directly into the dips and guided the compound with a screed, a straight board, to level it out. Work swiftly, as self-leveling compounds set quickly—usually within 20 to 30 minutes. I had to work in sections to prevent the substance from hardening before I finished spreading.
Allow Adequate Curing Time
Let the compound cure fully—often 24 hours—before walking on it or installing the flooring. During this waiting period, keep the area free of foot traffic and avoid uneven surfaces. I learned the hard way that rushing the cure led to uneven settling and squeaks reappearing. For best results, read the curing instructions carefully, and consider climate conditions that could prolong drying, such as high humidity.
Reinforce the Floor with Additional Fixes
If squeaks persist after leveling, consider adding adhesive between the subfloor and joists or installing shims where necessary. For loose boards, a combination of screws and construction adhesive can stabilize movement. I once drilled pilot holes and injected PSI-structured filler into gaps, which dramatically reduced noise. Remember, a combination of techniques often yields the best results—start with leveling, then reinforce where needed.
Reinstall Baseboards and Finish
Replace any removed trim or molding, sealing gaps with caulk for a clean finish. Double-check the entire area for stability. After completing the repairs, I tested the results by walking the space, and the squeaks that once echoed now remained silent. Regular maintenance and periodic inspections prevent new issues from cropping up, keeping your floors smooth and silent for years to come. For more comprehensive insights, explore [expert floor leveling tips for durability](https://floorcraftstore.com/expert-floor-leveling-laminate-flooring-for-lasting-durability) and ensure your project lasts.
Many homeowners operate under misconceptions when it comes to proper flooring and bathroom installations. One prevalent myth is that simply applying a self-leveling compound or choosing high-quality materials guarantees a flawless result. However, insights from industry experts reveal that neglecting detailed subfloor analysis often leads to recurring issues like squeaks, cracks, or leaks, regardless of material quality. Overconfidence in quick fixes can be a costly mistake; for instance, assuming that leveling alone will prevent future damage without addressing underlying structural problems can result in persistent squeaks or uneven surfaces. It’s crucial to recognize that proper surface preparation, moisture barriers, and precise measurements are fundamental components often overlooked by DIYers. Similarly, many believe that carpet installation is straightforward—laying down padding and rolls—yet ignoring subfloor imperfections or inadequate stretching can cause wrinkling and early wear. When it comes to showers, a common trap is underestimating waterproofing complexity, such as neglecting critical sealing spots or overlooking hidden leaks behind walls, which can lead to mold and costly remodels. Experts emphasize that thorough inspection and understanding of subfloor dynamics are essential, aligning with studies that highlight the importance of foundation integrity for long-lasting results. For advanced readers aiming for lasting durability, exploring detailed guides like expert floor leveling tips can shed light on nuanced techniques that novices often miss.
Why does perfect leveling sometimes still fail in the long run?
A common oversight is focusing only on surface level corrections while ignoring subfloor stability. Even if the surface appears even immediately after a repair, underlying issues like moisture ingress or unstable framing can cause future shifts. Research indicates that over 70% of floor failures relate to foundational problems overlooked during initial installation. Recognizing these nuances helps prevent the cycle of repairs and ensures your investment endures. Have you ever fallen into this trap? Let me know in the comments.
How do I keep my floors and showers functioning smoothly over time?
Maintaining your flooring and bathroom fixtures isn’t just about fixing problems as they arise; it’s about adopting the right tools and routines that ensure longevity. The key is investing in equipment that offers precision and durability. For example, I rely on a high-quality digital moisture meter like the Protimeter Surveymaster. This device accurately detects moisture levels in subfloors, helping prevent issues like warping or mold growth, especially in moisture-prone areas near showers.
Beyond moisture meters, a good harness of cleaning agents and protective coatings is invaluable. Regularly applying penetrative sealants on grout lines with a grout-specific applicator keeps moisture out, reducing the risk of leaks and deterioration. When it comes to tools, a cordless oscillating multi-tool with various attachments is my go-to for detailed work, whether trimming excess sealant or removing damaged caulk without harming surrounding surfaces.
Software tools, like 3D modeling programs or project management apps, can streamline planning and monitoring your renovation progress. For example, using an app like Houzz or HomeAdvisor allows me to track tasks, supplier timelines, and maintenance schedules effectively, ensuring nothing slips through the cracks. For more advanced maintenance, I recommend periodic inspections of subfloor integrity using the aforementioned moisture meter combined with sound tests—tapping floors to identify weak spots—staying ahead of potential problems.
Looking ahead, the trend in flooring and shower maintenance points toward automation and smart monitoring. Devices that provide real-time alerts about moisture, temperature fluctuations, or structural shifts will become more accessible, making preventive care easier than ever. Embracing these innovations now can save money and time down the line.
Consider this question: How can I ensure my flooring and showers stay in top shape longer?
The secret is regular inspection using precise tools like moisture meters and timely application of protective sealants. One effective method is to schedule quarterly checks of high-moisture zones, especially under showers and around pipes, to catch issues early. Additionally, adopting a routine of re-sealing grout and caulk biannually can prevent leaks and color fading, maintaining a clean, professional appearance. I personally use a specialized grout refresher and reseal all shower corners with high-grade silicone caulk to prevent water seepage, which is often the culprit behind long-term damage. For more tips on extending the life of your installation, check out expert techniques for flooring durability. Try implementing a monthly inspection routine with a moisture meter, and see how proactive maintenance can dramatically reduce repair costs over time.
The Unexpected Lessons Behind a Quiet Home
Initially, I believed that a little self-leveling compound was all it took to fix my squeaky floors. Turns out, overlooking the importance of proper subfloor analysis was a costly mistake. I learned that understanding the true cause of unevenness—like moisture issues or structural weaknesses—is essential before applying any solution. Additionally, I underestimated the value of proactive maintenance, such as moisture testing and regular inspections, which can prevent squeaks from returning. The hardest lesson was realizing that quick fixes may only mask problems, not resolve them permanently, leading me to adopt more comprehensive, long-term strategies and deepen my knowledge about subfloor integrity.
Tools and Resources That Transformed My Approach
My go-to resource is the detailed guide on expert floor leveling for lasting durability. It provides nuanced techniques that surpass standard DIY methods. I rely on a high-quality moisture meter like the Protimeter Surveymaster to catch issues early and avoid future squeaks. For sealing grout and protecting against moisture, I trust the waterproofing products recommended by industry specialists, as they significantly extend the life of the installation. Lastly, incorporating project management tools such as HomeAdvisor helps me plan and monitor each step, ensuring nothing gets overlooked. Combining these tools and knowledge has been invaluable in achieving durable, quiet floors.
Seize the Moment and Transform Your Floors
Don’t wait until squeaks become unbearable or damage worsens—taking action now can save you time and money. Remember, consistent inspections, proper subfloor analysis, and using trusted tools are your best allies in maintaining smooth, silent floors. Your home deserves a foundation that stands strong and quiets every step. Embrace these strategies, and you’ll enjoy comfort and peace of mind for years to come. Every step you take towards better understanding your flooring system enriches your home environment, making daily life more enjoyable and stress-free. So go ahead, start your flooring upgrade today with confidence, knowing you’re equipped with the right insights and tools.
Questions to Keep You Thinking
Have you ever noticed subtle signs of subfloor issues before squeaks started? What methods have you tried that worked—or didn’t? Share your experiences below and let’s learn from each other’s journeys towards silent, durable floors.