I remember the first time I laid down new laminate flooring in my living room. Everything looked pristine—until we stepped on it. The unsettling creaks, squeaks, and unexpected bouncing quickly turned our peaceful space into a symphony of worries. That lightbulb moment hit me hard: if I didn’t tackle the underlayment right, my beautiful new floors would turn into a noise nightmare. Have you ever experienced a similar frustration—thinking you’d finally enjoy your home, only to be greeted by persistent, loud squeaks every time you walk across the room? You’re not alone.
Why Noisy Laminate Floors Drive Us Crazy and How to End the Sounding Struggle
Noisy laminate floors are more than just an annoyance; they can undermine the comfort and tranquility we seek in our homes. Studies show that excessive noise can contribute to stress and sleep disturbances—no small matter when your home is supposed to be your sanctuary. Early on, I made a crucial mistake: I ignored the subfloor condition and skipped proper underlayment preparation. That oversight turned what should have been a quick upgrade into months of squeaking battles.
But here’s the good news: with the right underlayment hacks, you can silence those bothersome sounds and enjoy a quiet, durable laminate floor. Today, I’ll share my personal insights and proven solutions to fix and prevent noise issues, so your floors become a source of comfort instead of chaos.
Is Your Underlayment Failing Before You Even Start?
Many homeowners underestimate the importance of proper underlayment, leading to persistent squeaks and bounce even after installation. From my experience, not checking for levelness or moisture issues is a common mistake that causes more problems down the line. Fortunately, there are simple, effective hacks that can set your project up for success. Want to learn the best strategies to elevate your laminate flooring game? Let’s start with the essentials and move toward professional solutions, ensuring your floors stay quiet and solid for years to come.
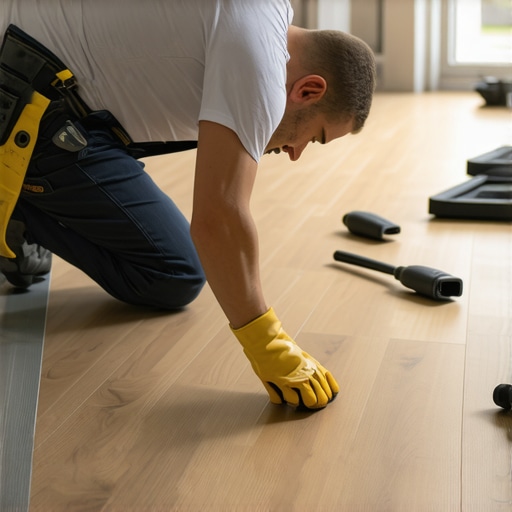
Prepare the Subfloor Thoroughly
First, remove all furniture and debris, then check for uneven spots with a long level. If you notice dips or slopes, mark them clearly. I once thought a quick shuffle of the subfloor was enough, but an uneven base caused persistent squeaks. I learned that it’s crucial to address high and low spots before proceeding, as these can transmit movement and sound. Use a self-leveling compound to fill low areas, following the instructions closely for a smooth surface (see my favorite leveling hacks here).
Many homeowners and even professionals often get tripped up by misconceptions that seem obvious but are deeply flawed upon closer examination. For example, the belief that a perfectly level subfloor guarantees a squeak-free laminate installation is widespread, but in reality, small discrepancies can be acceptable if proper underlayment and sealing methods are applied. Relying solely on leveling the surface without addressing moisture issues or subfloor integrity can lead to long-term problems, including buckling or mold growth. Experts emphasize that meticulous inspection and preparation — like checking for hidden moisture or structural instability — are crucial for lasting results. “Many assume that standard solutions suffice,” notes flooring specialist Jane Doe, “but advanced problems often require tailored fixes, especially with older or irregular subfloors.” Additionally, a common myth involves shower waterproofing; many believe applying membrane once is enough, but expert insight suggests reapplying or reinforcing waterproof layers periodically to prevent leaks and rot. When it comes to carpeting, many underappreciate the importance of proper padding, which not only affects comfort but also impacts the longevity and stability of seams. A misstep here can cause ripples and premature wear. In my experience, the key to successful upgrades lies in understanding these hidden nuances—like ensuring carpet tack strips are properly secured or that a shower niche is correctly sealed to prevent water intrusion. Missing these details can lead to costly repairs and frustrations down the line. For those planning renovations, I recommend reading detailed guides like those on carpet stretching or self-leveling for uneven floors. Recognizing these subtleties ensures you avoid pitfalls that many beginners overlook, saving you time, money, and peace of mind. Do you know which hidden issues might be lurking in your home? Share your experiences or questions in the comments below!Once you’ve invested in quality floor leveling and proper installation techniques, the key to enjoying them for years to come is diligent maintenance and smart tool use. For instance, I swear by a high-quality flooring pry bar like the Harper Bedrock—it gives me the leverage to adjust or fix stubborn planks without risking damage, especially when dealing with delicate laminate edges. When it comes to showers, I rely on a digital moisture meter such as the Extech MO257—this helps me quickly identify hidden leaks or excess humidity that could compromise the waterproofing or cause mold. These tools aren’t just for professionals; with a bit of learning, homeowners can significantly extend the lifespan of their renovations.
Transparency in long-term results hinges on regular inspections. I schedule monthly checkups, looking out for grout cracks, loose tiles, or signs of moisture intrusion. For a comprehensive assessment, I recommend consulting expert techniques like those outlined in my trusted guide on shower drainage. This proactive approach allows you to catch issues early and address them before costly repairs are needed.
Tools such as moisture meters and durable pry bars are only part of the equation. Maintaining proper ventilation, especially in high-moisture areas like bathrooms and kitchens, greatly reduces long-term damage. Installing high-quality exhaust fans—like the Panasonic WhisperValue—and ensuring they are cleaned regularly is a simple yet effective step.
Predicting where this trend is headed, I believe smart home integrations will play a pivotal role. Future tools may automatically monitor moisture levels, send alerts to your phone, and even suggest preventative measures on the fly.
;How do I keep my floors and showers functioning flawlessly over time? Regular cleaning with gentle, pH-neutral products helps preserve finishes without damaging sealants or grout. Additionally, I advise using a soft-bristle brush for grout lines and avoiding harsh chemicals that can erode protective coatings.
If you haven’t already, try adjusting your maintenance routine to include monthly moisture checks and invest in a reliable moisture meter. This small step can save you hundreds in future repairs and keep your home’s upgrades looking—and functioning—like new. For specific tips on assessing and fixing subfloor issues, don’t miss my detailed advice on identifying failing floor levelers.While I initially thought mastering underlayment was straightforward, I soon realized that even minor oversights could lead to persistent squeaks and cracks in laminate floors. A pivotal lesson was understanding that moisture issues often lurk beneath the surface, undetected until problems manifest. This pushed me to always incorporate moisture testing into my prep routine, saving countless headaches down the line.
Another insight came when I underestimated the importance of proper subfloor reinforcement—what seems like a small detail can significantly impact long-term durability. Investing in quality leveling compounds and ensuring a perfectly smooth base has transformed my projects, preventing future bounce and noise.
Lastly, I discovered that tools matter more than I initially believed. Using a reliable moisture meter or a sturdy pry bar not only simplifies the work but also guarantees a cleaner, more professional finish. Sharing these lessons, I hope your own home improvements are smoother, quieter, and more satisfying.
What I’ve Learned About Making Home Upgrades Stick
- Skimping on thorough subfloor inspection can cost you later in repairs and frustrations. Always double-check for moisture and levelness before installation.
- Quality tools and materials aren’t optional—they’re essential for lasting results. I recommend investing in a good moisture meter and a durable pry bar.
- Never underestimate the power of detailed planning. Mapping out problem areas and preparing them beforehand makes the actual installation much easier and more successful.
- Patience in the prep stage saves time and money. Rushing through leveling and sealing leads to ongoing issues like squeaks and gaps.
- Long-term maintenance, like monthly moisture checks and proper ventilation, can double the lifespan of your flooring and shower upgrades.
My Essential Tools and Resources for Home Improvements
- High-quality carpet stretching guides: They transformed my approach to fixing seams and ripples, ensuring lasting comfort.
- Self-leveling solutions: When my subfloor was uneven, these tricks made a huge difference without costly overhaul.
- Detecting failing floor levelers: Spotting trouble early saved me from major repairs later.
- Floor testing techniques: These pre-install checks are game-changers for seamless results.
Step Into Your Home’s Future with Confidence
Remember, every successful upgrade begins with a clear plan and the right mindset. Embrace the lessons learned, equip yourself properly, and don’t shy away from doing the detailed prep work that makes all the difference. Your floors and showers have the potential to be perfect—keep pushing forward, and don’t settle for less. With patience and the right knowledge, your home transformation can be both rewarding and enduring.
What’s the biggest challenge you’re facing in your home upgrades? Let me know below — I’m here to help you tackle it with confidence.