I’ll never forget the moment I stepped into what was supposed to be a sleek, modern walk-in shower—only to feel a sudden, sticky puddle under my feet. Turns out, a tiny misstep in drainage planning turned a stylish upgrade into a damp nightmare. If you’re considering a bathroom remodel, especially with the upcoming 2026 renovation wave, this personal stumble might sound all too familiar.
Why Proper Shower Drainage Can Make or Break Your Remodel
Proper drainage is the unsung hero of a lasting shower makeover. Skimp on it, and you’ll deal with leaks, water damage, and mold—problems that can turn a beautiful renovation into a costly disaster. I learned this the hard way when I overlooked a critical detail early on, which resulted in water seeping through the subfloor, causing long-term damage I had to fix later. That mistake cost me time, money, and a whole lot of frustration.
Fortunately, I discovered that many of these issues are entirely preventable if you know what to watch out for. Today, I want to share the insights I’ve gained from personal experience and expert advice, so your 2026 remodel won’t suffer the same fate. We’ll dive into the seven common drainage errors that derail many bathroom upgrades, along with practical tips to avoid them. Think of this as a neighborly heads-up—because no one wants to start a renovation only to be taken down by avoidable pitfalls.
Is This Drainage Disaster Really Worth Worrying About?
Honestly, I used to think a good waterproof seal was enough. Turns out, I was blind to the nuanced complexities of proper shower drainage. Early on, I made the mistake of assuming that slapping on some sealant would prevent future leaks. Spoiler: it doesn’t. Experts warn that improper slope, inadequate waterproofing, or ignoring subfloor prep can cause serious issues down the line—issues that might not manifest until it’s too late. According to industry professionals, fixing water damage related to drain failures can cost thousands—money better spent on thorough planning from the start. For more insights on waterproofing pitfalls, check out the comprehensive guide on combating shower leaks. Learn about common waterproofing mistakes here.
So, if you’re dreaming of a beautiful walk-in shower that lasts—and doesn’t turn into a flood zone—stay tuned. We’re about to explore the seven drainage blunders that can sabotage your 2026 remodel, with simple fixes that save you time, money, and headache. Are you ready to make sure your next project is a triumph, not a disaster?
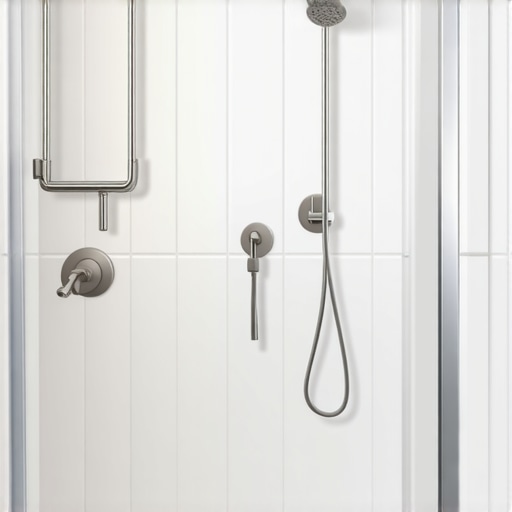
Ensuring the Floor Slope is Correct
One of the most critical steps in effective shower drainage is achieving the proper slope of the shower floor. I recall a time when I used a simple level on the subfloor, just as I would when installing laminate flooring. It revealed a slight dip towards one side, which could have caused water pooling. To fix this, I added a leveling compound beneath the subfloor to ensure a consistent 1/4-inch per foot slope, the industry standard for drainage. This approach prevents water from stagnating and seeping into the walls or subfloor, ultimately avoiding costly water damage.
For detailed guidance, review expert advice on floor leveling techniques that prepare your surface for proper drainage and long-term durability.
Selecting and Installing the Correct Drain
Choosing the right drain is the foundation of a leak-proof shower. I once installed a drain that seemed compatible but lacked a weep hole, which later caused water to pool around the base. To avoid this, opt for a drain with a built-in trap and water feature that encourages proper flow. When installing, ensure that the flange sits flush with the subfloor and that the sealant forms an airtight, waterproof barrier.
Use adjustable drain collars to fine-tune the height, making sure it aligns perfectly with your waterproof membrane for a seamless seal. Proper installation here is crucial; otherwise, water can leak into the subfloor, leading to mold and rot. Check out this guide on shower pan mistakes to prevent errors during this step.
Mastering Waterproofing Techniques
Waterproofing is where many fail, leading to hidden leaks that manifest years later. I learned this firsthand when I cut corners by only applying a thin membrane. Later, water seeped through a small crack in the grout, causing damage behind the walls. To rectify this, I used a high-quality waterproofing membrane like Kerdi, applying it meticulously over the entire shower area, including corners and seams, and extending it up the walls to at least 6 inches above the shower floor.
To get it right, prioritize multiple coats of waterproof membrane, paying special attention to vulnerable areas. For comprehensive waterproofing tactics, explore modern waterproofing mistakes and how to sidestep them in your project.
Proper Drain Connection and Sealing
Connecting the drain to the plumbing must be done with precision. I once used the wrong type of connector, which led to slow drainage and minor leaks. The key is to use a compatible slip or compression coupling, depending on your piping materials, and to secure it tightly without over-tightening, which can crack the fitting.
Apply a high-quality, drain-safe silicone sealant around the flange to create a waterproof barrier. Test the connection by pouring water into the drain before installing the tile to ensure no leaks occur. This step is simple but vital; a single overlooked seal can lead to water damage over time. For detailed tips, see advice in this sealing guide.
Effective Floor and Wall Preparation
Finally, prepare your walls and floor to handle water and movement. I learned this the hard way when I skipped proper curing of the cement board behind tiles, leading to cracking. To prevent this, soak the cement board in water beforehand, then lay it with appropriate thin-set mortar, ensuring it’s firmly anchored and level.
Seal all joints with waterproof tape and sealant. When installing tiles or laminate around the shower, make sure the surface is no longer uneven or bouncy. If your subfloor dips or bounces like an old trampoline, it can cause tiles to crack and laminate to buckle. For fixing uneven subfloors, follow the steps in floor leveling fixes to create a stable base.
Most homeowners believe that following basic installation procedures is enough to ensure a durable, flawless finish in laminate flooring, showers, floor leveling, or carpet installation. However, overlooking certain nuanced details can lead to costly mistakes down the line. Let’s examine some common misconceptions and advanced pitfalls that even seasoned DIYers often miss, so you can avoid becoming a cautionary tale.
Why Common Beliefs About Laminate and Flooring Fall Short
Many assume that a perfectly leveled subfloor guarantees squeak-free, stable laminate floors. While levelness is vital, it’s only part of the story. A frequently overlooked nuance is the impact of moisture barriers and expansion gaps. Without adequate moisture protection, even a level subfloor can lead to warping and buckling. Furthermore, the misconception that expansion gaps are optional can cause laminate to buckle as it expands with temperature changes. Industry expert highlight the importance of proper expansion gaps for lasting results.
The Shower Myth: Sealants Are a Complete Solution
A widespread myth is that applying sealant around shower edges and joints suffices for waterproofing. In reality, relying solely on sealant without comprehensive waterproof membrane application is risky. Sealants can crack over time, and water can seep through unnoticed, leading to mold and structural damage. Proper waterproofing demands multiple layers of membrane combined with curing time and careful sealing at critical points. Skipping these steps is a sneaky trap that causes many to face costly repairs later, as pointed out in expert waterproofing advice.
Advanced Floor Leveling: Beyond the Bubble Level
Many installers rely on a simple bubble level to check subfloor flatness, but this approach can lull you into a false sense of security. Subtle dips and high spots often go unnoticed without precise measurements and tools like a laser level. Moreover, compacting or leveling compounds must be applied with proper feathering techniques to prevent uneven surfaces that cause tiles or laminate to crack or lift over time. An advanced approach involves mapping the entire area with a laser and using meticulous grout or compound application, as recommended in floor leveling experts.
The Carpert Pitfall: Ignoring Floor Prep
Many assume that simply stretching carpet over a clean, dry floor is sufficient. However, this overlooks the critical importance of subfloor integrity. Uneven or bouncy subfloors cause carpet seams to fray, develop wrinkles, or lift prematurely, which can be mistaken for poor quality carpet. Proper floor prep with thorough leveling, moisture testing, and surface cleaning is pivotal. For a durable, neat finish, take extra steps in prep as outlined in professional carpet installation techniques.
These advanced nuances might seem minor but can make or break your project’s longevity. Don’t fall into the trap of oversimplification—investigate every layer, joint, and material interaction. Have you ever fallen into this trap? Let me know in the comments.
Keep It Working: Tools I Recommend for Long-Term Success
Achieving a durable, stylish finish in laminate flooring, showers, or carpet installations isn’t just about choosing the right materials—it’s equally about using the right tools and establishing effective maintenance routines. Over years of DIY and professional projects, I’ve identified specific equipment that guarantees precision and longevity, setting my work apart. Here are the tools I rely on for every project, along with maintenance strategies to keep your upgrades pristine over time.
First and foremost, a laser level is indispensable. Unlike traditional bubble levels, laser tools such as the Bosch GLL 3-80 project a precise 360-degree line, eliminating guesswork when ensuring subfloor flatness or wall plumbness. This accuracy prevents issues like tile cracking or laminate bouncing down the line, which are common pitfalls for DIYers following basic level checks. While the upfront cost is higher, the reduction in errors and rework pays off. For a detailed approach, see this guide on expert floor leveling techniques.
Second, a multi-tool oscillating saw (like the Fein MultiMaster) is my go-to for trimming waterproof membranes, fitting drains, or removing old grout. Its versatility allows for meticulous adjustments without damaging surrounding structures, which is crucial when sealing drains or extending waterproof layers. Precise cuts here prevent future leaks, which can be disastrous in shower remodels. Additionally, I maintain my tools with compact, high-capacity batteries like the Ryobi One+ line, which provide consistent power during detailed work.
To monitor the moisture levels that could compromise your work, I recommend a digital moisture meter. A popular choice is the
How do I maintain these elements over time?
Routine inspection and gentle cleaning are key. For laminate and tile, a damp mop with pH-neutral cleaner preserves surfaces without degrading sealants or waterproof membranes. For showers, annual resealing of grout joints and inspection of waterproof membranes prevent sneaky leaks. Carpets benefit from professional.cleaning every 12-18 months and prompt repairs of seams or frays before they worsen. Incorporating these maintenance steps, coupled with the right tools, ensures your investment continues to perform well beyond the initial installation.
Looking ahead, the trend in home improvement points toward smarter, more durable solutions. Using integrated moisture sensors and automated cleaning devices will further extend the life of laminate and tile surfaces, reducing manual upkeep. Staying updated with the latest tools like laser guides and moisture monitors can make maintenance easier and more effective.
Start by investing in a quality laser level and moisture meter; they are game-changers in preventing common issues like uneven floors or hidden water damage. For instance, proactively monitoring moisture content can avert the cracking or buckling of laminate over years.
Take the challenge today: incorporate a laser leveling technique for your next floor project and see how it elevates your precision and peace of mind. Remember, good tools and regular upkeep are the secret ingredients to enduring beauty and function in your home upgrades.
Lessons I Wish I Learned Sooner in Bathroom Upgrades
- One of the biggest realizations was that paying attention to tiny details like subfloor moisture content can save thousands in repairs down the line. Rushing through measurements or dismissing waterproofing often leads to hidden leaks that only surface years later. Don’t let overlooked nuances become your project’s undoing.
- Another lesson was that even the best-looking drains require meticulous installation — a small misalignment or seal error can cause ongoing water issues. It’s worth investing time in understanding the correct installation techniques and choosing high-quality components, which can be the difference between a dry, lasting shower and a flood waiting to happen.
- I’ve also discovered that relying solely on basic tools like spirit levels isn’t enough for demanding jobs like floor leveling. Upgrading to a laser level provided me with unmatched precision, significantly reducing errors and rework. That small investment pays dividends when it comes to durable, crack-free finishes.
- Lastly, I learned that stepping back and reviewing your entire waterproofing approach regularly helps catch potential weak points — especially in corners and seams. Staying proactive with routine inspections and maintenance keeps your renovation looking great and functioning flawlessly for years.
My Must-Have Arsenal for Lasting Home Improvements
- Laser Level: Precision is everything. My favorite is the Bosch GLL 3-80 because it provides accurate, 360-degree lines that help ensure walls and floors are perfectly aligned and level. Reliable measurements prevent costly mistakes down the road.
- Moisture Meter: Protect your investment with tools like the Protimeter MMS2. Regular moisture testing in subfloors or backing materials detects issues early, especially important before laying laminate or carpet, helping your floor stay in top shape longer.
- Quality Waterproof Membrane: Don’t skimp on waterproofing products. I trust brands like Kerdi because they offer durable, flexible membranes that can be applied in multiple coats. Proper waterproofing prevents leaks that could ruin your entire bathroom.
- Multi-Tool Oscillating Saw: This versatile tool makes precise cuts when fitting drains or trimming membranes. It saves time and reduces damage, making complex installs feel more manageable and less stressful.
Your Next Move Starts Now
Building a bathroom capable of standing the test of time isn’t just about buying the right materials—it’s about mastering proven techniques and using the best tools. With deliberate planning and attention to detail, you can dodge costly errors and create a space you’ll love for years to come. Remember, every successful project begins with a single step: choosing the right approach today.
What aspect of bathroom renovation do you find most challenging? Share your experiences below, and let’s learn together!
.