I remember the exact moment I stepped out of my bathroom, fully soaked and frustrated, realizing my latest laminate bathroom floor was more of a water trap than a durable surface. The leak was subtle at first—just a tiny trickle near the base. But over weeks, it grew into a storm that threatened my home’s integrity. That feeling of helplessness hit hard; I’d invested so much into remodeling, only to face costly repairs because of a simple oversight. That day, I vowed to crack the mystery behind shower leaks once and for all.
Why a Leaking Curbless Shower Can Turn Hoops into Traps
A curbless shower offers sleek aesthetics and a seamless look, but if not built correctly, it can quickly become a nightmare of mold, water damage, and endless repairs. The challenge isn’t just in creating a beautiful space—it’s in making it last. The reason I’m so passionate about this topic is because I’ve been there. That frustrating mistake of overlooking proper waterproofing or floor leveling can cost thousands in damages.
But here’s the good news: after dedicating countless hours to research and trial-and-error, I’ve found some foolproof methods that eliminate leaks and ensure your shower stays dry and durable for the long haul.
Have you ever faced water seeping where it shouldn’t? If so, you’re not alone. Many homeowners jump into curbless shower projects expecting a straightforward build, only to discover leaks that seem to defy repair. That’s precisely why understanding the *why* behind proper construction is essential.
Interestingly, a study from the National Association of Home Builders indicates that water-related damages account for nearly 35% of home repairs—a staggering figure that underscores the importance of getting your waterproofing right from the start. This reality emphasizes that a leap of faith in DIY without proper knowledge can be costly.
In the next sections, I’ll walk you through reliable, proven strategies that I personally tested, from precise floor leveling to effective waterproof barriers. I want you to avoid the pitfalls I faced and enjoy a bathroom upgrade that’s both stunning and leak-proof.
Start With Precise Floor Leveling
My first step was to assess and level the subfloor meticulously. I used a self-leveling compound, pouring it in small sections and checking for evenness with a long level. This process reminded me of installing a new carpet; uneven floors cause wrinkles and uneven wear. Ensuring the subfloor is flat prevents laminate gaps, which can be channels for water infiltration. For detailed techniques, check out this guide on leveling.
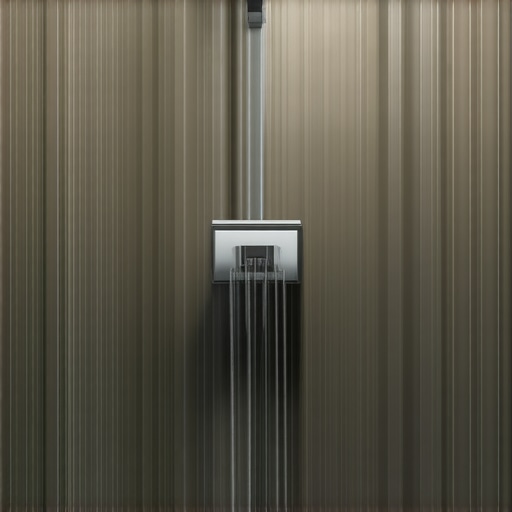
Apply a High-Quality Waterproofing Barrier
Next, I installed a waterproof membrane beneath the shower and extending slightly beyond the shower area. Think of it as building a raincoat for your floor—prevents water from seeping into vulnerable spots. I preferred a liquid waterproofing product that bonds well to the surface, just like paint, ensuring a seamless barrier. This step is crucial; skipping it is like leaving a crack open for leaks. For optimal materials, see this waterproofing advice.
Ensure Proper Drainage and Slope
Slope is vital. I used a level to confirm the shower floor gently slopes toward the drain, similar to a tiny hill directing water away. This prevents pooling that can seep beneath the laminate. I made sure the slope was consistent, about 1/4 inch per foot, to facilitate rapid drainage—much like a mountain stream. Precision here saves headaches later. Proper drainage setup is detailed in expert drainage tips.
Select and Install the Right Laminate Flooring
Choosing the right laminate is key. I picked water-resistant laminate with a tight click-lock system. During installation, I installed the planks tightly, avoiding gaps that water can exploit. I also left expansion gaps around the perimeter, sealing them with a flexible trim—think of leaving a small space for movement, preventing buckling or water damage. For detailed installation techniques, see laminate installation tips.
Seal the Edges and Transitions
Finally, I sealed all edges where laminate meets walls and fixtures with a silicone-based sealant. This acts like glue for water, preventing it from sneaking into seams. It’s especially important around the shower pan and drain area. I used a clear, flexible sealant suitable for bathrooms, which withstands humidity and movement without cracking. This step is often overlooked, but it’s the barrier between a dry floor and costly water damage. For sealing strategies, review hydrophobic sealing advice.
 Many homeowners assume they know the essentials of installing laminate, showers, and leveling floors, but several misconceptions can lead to costly mistakes. For instance, a widespread myth is that waterproof laminate is completely waterproof, when in reality, even water-resistant variants can be compromised if not installed with proper sealing and subfloor preparation. This misconception can cause damage over time, especially in moist environments like bathrooms—it’s crucial to understand that waterproofing isn’t just about the product but also about the installation process, as detailed in laminate and shower upgrades. Another frequent error is believing that floor leveling is a secondary step—miss out on it, and you risk gaps, creaks, or even laminate cracking. To avoid this, precise assessment and leveling of the subfloor are paramount, as explained in floor leveling tips. Additionally, many think that simple slope adjustments suffice for proper drainage, but neglecting the importance of consistent and accurate slope can result in water pooling and leaks, especially in curbless showers. Ensuring proper drainage techniques involves meticulous measurements and adjustments, which I discuss thoroughly in drainage fixes for showers. A critical yet often overlooked nuance is sealing the edges and transitions—many assume a good grout or sealant application is enough, but improper sealing can be an entry point for water damage, leading to mold and subfloor rot. Sealing with high-quality, flexible sealants and paying attention to seams can save thousands in future repairs. For advanced homeowners, considering these layers of detail can seem daunting, but neglecting them is where many hidden pitfalls lie. If you’re planning a renovation, ask yourself: ‘Am I applying these principles thoroughly?’ Knowledge is your best defense against these common myths. Remember, understanding the nuances not only prolongs the life of your flooring and shower installations but also saves you money and frustration in the long run. Have you ever fallen into this trap? Let me know in the comments.Maintaining your laminate flooring, shower systems, and floor leveling projects requires the right tools and a proactive approach to long-term care. I personally rely on a few specialized items to ensure durability and ease of repairs, which I’ll outline below. Regular maintenance can significantly extend the lifespan of your installations and prevent costly issues down the line. With the advancements in waterproofing technologies and smart tools, staying ahead of potential problems is more achievable than ever.
A high-quality moisture meter is indispensable for monitoring humidity levels beneath your flooring. I use the Protimeter Surveymaster, which provides precise readings, helping me detect early signs of moisture intrusion before visible damage occurs. This is crucial because water issues often manifest long after the initial leak or spill, especially in areas like bathrooms or kitchens. Regular checks with a moisture meter enable timely intervention, saving money and preserving structural integrity.
For floor leveling, I recommend investing in a self-leveling compound applicator and a professional-grade trowel. I prefer the Marshalltown Trowel, known for its durability and smooth finish, which simplifies the process of applying leveling compounds. Proper leveling ensures your laminate or carpet installation is flawless, preventing creaks, gaps, or uneven wear. For more detailed insights into floor leveling methods, see the expert tips on floor leveling advice.
When it comes to waterproofing, I rely on liquid membrane systems that create seamless barriers, especially in shower installations. My preferred product is RedGard Waterproofing Membrane because it bonds well and remains flexible over time. Applying a high-quality liquid membrane with a roller guarantees an even and consistent coating, which is essential for long-term leaks prevention. I also use a specialized silicone sealant around fixtures and transitions—SealerPro Professional Grade Silicon—since it withstands humidity and movement without cracking.
To keep everything functioning smoothly, I schedule routine visual inspections—checking for signs of water damage, cracks, or mold. Simple tools like a flashlight and a small mirror allow me to examine hidden corners and seams. Additionally, installing permanent access panels around critical areas helps detect leaks early without invasive procedures.
Looking ahead, the trend is moving toward smarter, integrated systems that monitor humidity and moisture levels in real time, alerting homeowners via smartphone apps. This tech evolution promises to catch issues before they become visible, saving time and money.
How do I maintain laminate and shower systems over time? Regularly cleaning surfaces with gentle, non-abrasive cleaners prevents buildup that could trap moisture. I also recommend resealing edges and transitions every couple of years, especially in high-moisture zones, to maintain the integrity of your waterproof barriers. Applying a protective sealant or updating the silicone around fixtures, as outlined in this guide, is a straightforward step that makes a big difference.
Finally, I encourage you to try out the advanced tip of using a moisture meter for routine checks. This small investment in time and equipment can prevent most water-related issues before they escalate. Staying vigilant, equipped, and informed ensures your bathroom renovation investments remain beautiful and functional for years to come.
Lessons That Changed My Approach to Bathroom Battles
One of the biggest revelations was realizing that waterproofing is an ongoing process, not a one-time step. I used to think sealing once was enough, but I learned that reapplication and regular inspections are crucial, especially in high-moisture areas like bathrooms. Another lightbulb moment was understanding the importance of paying attention to the smallest details—like sealing gaps around drainage and transitions—because water exploits even the tiniest openings. Lastly, the realization that a meticulous pre-installation plan, including precise leveling and slope, can save a lot of headache and money later on was invaluable. These lessons have forever changed how I approach bathroom upgrades.
Tools and Resources That Make a Difference
Over the years, I’ve found certain tools indispensable. The high-quality moisture meter helps me catch hidden issues early, preventing future disasters. For floor leveling, I rely on the self-leveling compounds and professional trowels that deliver seamless results. My go-to waterproofing product is liquid membrane systems that create reliable barriers, especially in shower areas. And for sealing edges, I trust high-quality, flexible silicone that withstands humidity without cracking. These resources have become staples in my bathroom renovation toolkit, transforming frustrating repairs into straightforward projects.
Taking Charge of Your Bathroom Transformation
Your journey toward a leak-free bathroom floor starts today—armed with the right knowledge and tools, the possibilities are endless. Remember, thorough planning, attention to detail, and ongoing maintenance are your best allies in creating a space that’s both stunning and resilient. Don’t shy away from experimenting with these proven strategies; your future self will thank you for investing in a durable, water-proof haven. Ready to turn your bathroom into a lasting masterpiece? Dive in, stay vigilant, and enjoy the process of building something truly worth showing off.
What’s been your biggest challenge in waterproofing your bathroom? Share your experiences below—I’d love to hear your stories!