I’ll never forget the moment I stepped into my bathroom after a long shower, only to notice that telltale damp smell creeping up the walls and a faint, stubborn mold spot nibbling at the grout. It was a lightbulb moment for me—this persistent bathroom issue wasn’t just about cleanliness; it was a sign that my waterproofing game needed serious upgrade. Like many homeowners, I thought regular cleaning would suffice. Spoiler: it doesn’t. In fact, poor shower waterproofing can turn your bathroom into a mold playground, especially as we head into 2026 when stricter regulations and climate factors make moisture control more critical than ever.
Why Waterproofing Matters More Than Ever
Bathrooms are one of the most humid spots in any home. Without proper waterproofing, moisture seeps into walls and floors, creating an environment where mold thrives. According to the CDC, mold exposure can trigger allergic reactions and respiratory issues, making waterproofing not just a matter of aesthetics but health. Yet, many of us overlook small leaks or assume that mere sealant maintenance will do the trick. I made that mistake early on, neglecting the importance of comprehensive waterproofing tactics, which led to costly mold remediation later.
Have You Faced a Bathroom Mold Emergency?
If your bathroom has ever experienced persistent dampness, peeling paint, or visible mold, you’re not alone. I’ve been there. That’s why I want to share my insights into three effective shower waterproofing methods to prevent mold before 2026 creates stricter standards. Addressing these issues now can save your health, money, and time down the line. Whether you’re tackling a new bathroom build or renovating an existing space, understanding these tactics will give you a solid foundation. Ready to dive into how you can waterproof smarter and avoid mold pitfalls? Keep reading—your bathroom and your lungs will thank you.
Prep the Subfloor for Lasting Waterproofing
Start by inspecting your subfloor; it should be level, dry, and free of debris. Use a professional floor leveling kit if you notice any dips or bumps, ensuring a flat surface that prevents water pooling. I once skipped this step, and my laminate flooring developed creaks due to an uneven subfloor, highlighting its importance.
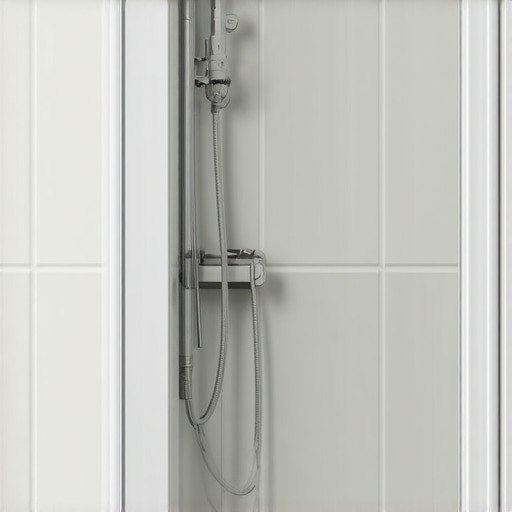
Apply a Quality Waterproof Membrane
Choose a liquid or sheet membrane specifically designed for shower areas. Before application, clean the surface thoroughly. Spread the membrane evenly with a brush or roller—think of it as painting a protective suit over your subfloor. I used a liquid membrane that self-levelled easily, but I had to be meticulous to avoid thin spots, which could lead to leaks.
Seal Corners and Edges with Extra Care
Corners and joints are vulnerable spots. Use mesh tape to reinforce seams and apply additional membrane over them. This step acts like sewing a zipper—preventing water from seeping through tiny gaps. In my renovation, neglecting this created a leak, so I now double-check these areas.
Install the Shower Pan Correctly
The shower pan sits atop your waterproof membrane. Use a high-quality, pre-sloped pan for optimal drainage. Ensure it’s level by testing with a bubble level—any slope, and water will stagnate or leak. I once installed a pan slightly off-level, which caused water to pool, emphasizing the need for precision here.
Set the Tiles with Waterproof Adhesive
Select an epoxy or waterproof tile adhesive. Apply it with a notched trowel, ensuring full contact with the back of the tile and underlying membrane. Avoid gaps that water could exploit. I remember rushing this step, resulting in tiles loosening after a few months; patience here saves headaches later.
Seal the Grout to Keep Water Out
Use a high-quality, waterproof grout and seal it thoroughly after curing. Pay special attention to corners and edges. Use a silicone caulk around corners instead of grout to accommodate movement. A proper seal acts like a barrier armor—a must-have to prevent mold growth. I once used cheap grout, and it cracked, allowing moisture ingress that led to mold issues.
Test Your Waterproofing System
Before finishing, conduct a water test. Spritz water on the tiled surface and monitor for leaks or dampness. Place a plastic sheet beneath the shower base if accessible, to catch any leaks. During my last project, this test revealed a slow leak, saving me from future mold problems. Regular testing continues as part of maintenance.
 When tackling home renovations, many assume they know the basics, but overlooking nuanced details can lead to costly mistakes. One widespread myth is that simply sealing a shower enclosure guarantees waterproofing—this oversimplifies a complex process. In reality, proper waterproofing requires meticulous attention to seams, materials, and installation techniques, as emphasized by experts in bathroom renovations. Similarly, many believe that carpet installation is a straightforward task, but neglecting subfloor preparation—like ensuring level and stable surfaces—can cause wrinkling or gaps over time, defeating comfort and durability. Advanced homeowners know that subfloor unevenness can cause visible issues; thus, employing techniques like self-leveling compounds and checking with laser levels prevents future problems. When it comes to floor leveling, a common mistake is assuming a quick fix with underlayment suffices, but this can mask underlying issues like sagging or uneven joists. A study by flooring specialists highlights that proper subfloor assessment before installation dramatically extends flooring lifespan. For laminate flooring, many underestimate the importance of acclimation and correct subfloor prep. Installing laminate on an uneven surface not only causes bounce but increases wear and noise, which can be avoided by following comprehensive leveling strategies outlined in professional guides. Curious about how these nuances can protect your investment? Dive into detailed guides like expert floor leveling tips and learn which pitfalls to avoid. Have you ever fallen into this trap? Let me know in the comments.
Maintaining your flooring, carpets, and showers over time requires a combination of the right tools and a proactive approach. To ensure longevity, I rely on specialized equipment that allows me to perform precise inspections and repairs. For flooring, a high-quality moisture meter is indispensable; it helps monitor moisture levels in subfloors and walls, preventing issues before they escalate. I personally prefer the Tramex Moisture Encounter Plus because of its accuracy and ease of use, which is essential when assessing moisture trapped behind surfaces after installation or repairs. For leveling subfloors, I use a laser level combined with a self-leveling compound to address uneven surfaces efficiently, ensuring a flat base for flooring that prevents future creaking or buckling. You can find comprehensive guidance on effective leveling techniques in this expert article.
When it comes to cleaning and maintaining showers, a dedicated scrub brush with stiff bristles and a shower-specific cleaner can make a significant difference in preventing mold and soap scum buildup. Regularly inspecting grout lines with a flashlight helps me catch early signs of cracking or weakening, which I then reseal promptly using a high-quality silicone caulk—like GE Silicone II—to keep water from seeping behind tiles. For carpets, I swear by the Vax PowerMax Pro vacuum with HEPA filters; it effectively removes dust and allergens, which is vital for maintaining indoor air quality and extending carpet lifespan. Proper routine maintenance, such as cleaning filters and inspecting seams, supports long-term durability.
Looking ahead, the trend is moving toward smart tools and automated monitoring systems. Imagine moisture sensors connected to your smartphone, alerting you instantly to any potential leaks or high humidity levels—saving you from costly repairs and health hazards. As a homeowner or renovator, I recommend integrating these tools into your maintenance routine to stay ahead of problems.
How do I keep my renovation projects running smoothly over time? Staying organized with the right maintenance schedule, using precision tools for inspections, and handling repairs promptly are keys. For instance, regular testing with a moisture meter can catch issues early, preventing mold and structural damage. If you haven’t tried incorporating a digital moisture monitor yet, give it a shot—it’s a game-changer for long-term results. Keep an eye on this resource for more tips on safeguarding your renovations against common pitfalls.
The Hardest Lesson I Learned About Bathroom Waterproofing
Early in my renovation journey, I thought a simple sealant application was enough to keep moisture at bay. Mistake. After a small leak led to mold and costly repairs, I realized that meticulous attention to seam reinforcement and material selection was crucial. Experience taught me that waterproofing is less about quick fixes and more about understanding the science behind moisture barriers.
What Experts Won’t Tell You About Floor-Leveling for Perfect Results
Despite the common belief that surface-level fixes suffice, professionals emphasize the importance of assessing underlying structures. I learned this the hard way when uneven subfloors caused laminate planks to wobble long after installation. Using a laser level and self-leveling compounds can prevent these issues and extend the lifespan of your floors. For detailed strategies, I recommend exploring this expert guide.
How I Discovered the Power of Proper Shower Pan Installation
Initially, I underestimated the critical role of a pre-sloped, high-quality shower pan. My first attempt led to pooling water and slow leaks. The breakthrough came when I followed precise leveling techniques, ensuring proper drainage and sealing. This experience underscored that investing in the right materials and proper setup can save you from future headaches. Check out this resource for comprehensive tips.
Why Sealing Grout with Care Ensures Your Bathroom Stays Mold-Free
After resealing grout lines with a quality silicone caulk, I noticed a significant reduction in mold buildup. Learning to thoroughly cure the grout and periodically reseal has been a game-changer. It’s a simple step that can greatly enhance mold resistance and extend tile aesthetics. For the most reliable products and techniques, I rely on guidance from seasoned professionals.
Understanding the Big Picture: Less Hidden Water Damage Means Fewer Repairs
One of my biggest revelations was monitoring moisture levels behind tiles and under floors. Regular inspections with a moisture meter like the Tramex Moisture Encounter Plus dramatically reduce unexpected failures. Over time, integrating smart moisture sensors and ongoing testing can alert you before damage becomes visible, saving time and money. To master proactive maintenance, explore this valuable resource.