The ‘Flashlight Test’ for Finding Invisible Pinholes in Shower Membranes
A shower floor is not a decorative canvas. It is a critical drainage plane that must manage thousands of gallons of water every single year. The structural integrity of your joists, subfloor, and ceiling below depends entirely on a microscopic layer of rubberized liquid or sheet membrane. If that membrane has even a single pinhole, gravity will find it, and wood rot will follow.
Why your shower pan is probably leaking right now
A shower pan leak starts with microscopic structural voids that escape the naked eye during standard inspections. While installers focus on the beauty of the tile, the waterproof barrier underneath often harbors tiny punctures from dropped utility knives, grit, or improper brush strokes. These pinholes act as capillary pathways that draw water through the concrete subfloor and rot the underlying framing joints over time.
I once walked into a house where a $15,000 wide-plank walnut floor was cupping so bad it looked like a potato chip because the installer didn’t check the crawlspace humidity and neglected a pinhole leak in the adjacent master shower. The water had migrated laterally along the subfloor plywood, traveling over fifteen feet through capillary action. By the time the homeowner noticed the buckled wood, the subfloor was mush. This is why I treat waterproofing as a structural engineering challenge. A beautiful tile job over a leaking membrane is just an expensive mistake waiting to be demolished.
“A floor is only as good as the subfloor beneath it; deflection is the enemy of every joint.” – Master Flooring Axiom
The physics of the invisible pinhole
To understand why a pinhole is so destructive, you must look at the molecular behavior of water. Liquid water has high surface tension, which allows it to bridge tiny gaps temporarily. However, under the constant hydrostatic pressure of a shower in use, that surface tension breaks down. The water is drawn into the pore by capillary suction. Once inside the subfloor, the liquid cannot easily evaporate. It gets trapped beneath the tile layer, creating a humid microclimate where mold spores thrive.
This moisture migration is accelerated by floor leveling compounds that have not been fully sealed. Many self-leveling underlayments are highly porous. If you pour a leveling bed and apply a liquid membrane over it before the compound is completely cured, the outgassing from the cement will blow tiny bubbles through your liquid waterproofing. When those bubbles pop, they leave behind micro-craters. These are the infamous pinholes that ruin subfloors.
How to perform the flashlight test with precision
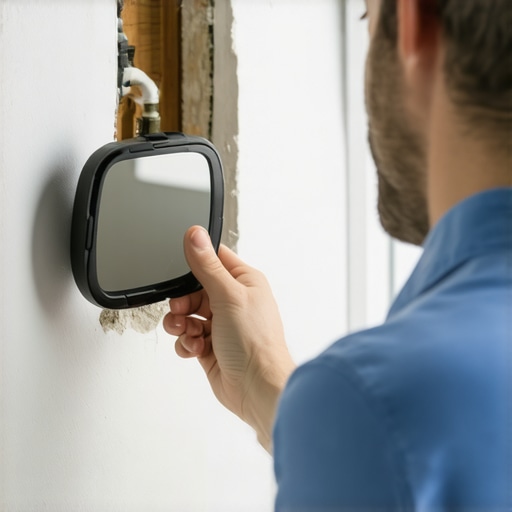
The flashlight test works by using high-intensity directional light cast at a low angle to reveal micro-shadows and light penetration through thin spots in the waterproofing membrane. By darkening the room and shining a high-lumen light source directly against the cured membrane, you can spot voids where the liquid coating was applied too thin or where bubbles popped during the curing process. This simple method identifies defects before you tile over them.
- Ensure the liquid membrane is fully cured according to the manufacturer specification sheet.
- Turn off all overhead lighting and block out any natural light from windows to make the room pitch black.
- Hold a 500-lumen or stronger LED flashlight flat against the membrane surface.
- Sweep the beam of light slowly across the floor and up the shower walls.
- Look for tiny points of light shining through the membrane or dark shadows indicating thin spots in the application.
- Mark every detected pinhole with a wax pencil so you can apply a patch layer.
The chemical reality of liquid membranes
Liquid-applied waterproofing membranes are typically elastomeric polymers. As they cure, the water or solvent evaporates, leaving behind a solid rubber sheet. If you apply the coat too thick in a single pass, the surface skin dries first. This traps wet moisture underneath. As that trapped moisture tries to escape, it forces its way through the drying skin, creating a pinhole. This is why manufacturers demand two thin coats rather than one thick slop-job.
For those dealing with concrete subfloors, moisture vapor transmission is another force to reckon with. Concrete looks solid, but it is actually a dense sponge. If you have high moisture emission from the slab, that vapor pressure will push upward. It will blister your waterproofing membrane. You must use a calcium chloride test or an in-situ relative humidity probe to measure the slab before you ever open a bucket of sealer.
| Membrane Type | Required Dry Film Thickness | Typical Cure Time | Common Failure Points |
|---|---|---|---|
| Liquid Elastomeric | 30 to 40 Mils | 12 to 24 Hours | Outgassing bubbles, thin corners, over-dilution |
| CPE Sheet Membrane | 40 Mils | Immediate | Seam failure, improper thin-set coverage, puncture |
| ANSI A118.10 Sheet | 20 to 30 Mils | Immediate | Air pockets under sheet, bad wall transitions |
Why too much cushion ruins your floor locking joints
There is a common belief in the flooring world that a thicker underlayment is always better because it feels softer underfoot. This is a lie. While most people want the thickest underlayment, too much cushion actually causes the locking mechanisms on LVP and laminate to snap under pressure. The subfloor must be flat and rigid. If the underlayment compresses too much when you walk on it, the tongue-and-groove joints are forced to flex. Over thousands of footsteps, that plastic or fiber joint will fatigue, crack, and eventually separate.
The same logic applies to shower benches and niches. If there is any deflection in the framing, the waterproofing membrane will stretch. Sheet membranes have high tensile strength, but liquid membranes can only stretch so far before they tear. If your wood studs flex when someone sits on the shower bench, the liquid membrane at the joint will rupture, rendering the entire system useless.
“Deflection of the substrate must not exceed L/360 under total design load for ceramic tile installations.” – TCNA Handbook Standards
The ghost in the expansion gap
Wood moves. Concrete moves. Everything moves. If you do not leave a proper expansion gap around the perimeter of your floors, the materials will buck each other. In a shower, this movement occurs at the change of plane. The joint where the floor meets the wall is a zone of intense stress. If you do not reinforce this joint with fiberglass mesh or a dedicated band membrane, the movement will split your liquid waterproofing right down the middle.
This is why you must never rely on standard grout at the floor-to-wall transition. Grout is rigid and will crack under the slightest deflection. You must use a high-quality 100 percent silicone sealant that can handle 25 percent movement. Silicone remains flexible, absorbing the structural shifts of the house without breaking the waterproof seal.
How to patch a compromised membrane
If your flashlight test reveals pinholes, do not panic. You do not need to scrape up the entire floor. You do need to clean the area thoroughly. Any dust or drywall overspray will prevent the new membrane from bonding to the old layer. Clean the spot with a damp sponge and let it dry completely.
Apply a localized patch using a brush. Feather the edges of the new application at least two inches beyond the pinhole in all directions. If the pinhole is larger than a pencil lead, reinforce it with a small square of alkali-resistant mesh embedded between two thin layers of the liquid membrane. Once cured, run the flashlight test one more time to guarantee the surface is completely sealed. Only then are you ready to mix your thin-set and lay your first tile.