The Correct Way to Seal the Joint Between a Bathtub and Tile
I spent three days grinding concrete on a job last month just so the floor wouldn’t click like a castanet. Most guys skip the leveling compound. They think the underlayment will hide the dip. It won’t. I have seen it a thousand times where a guy ignores a 3/16 inch birdbath in the slab and thinks a bit of padding will save his reputation. It never does. That same lack of respect for the physics of a building is exactly why most shower installations fail at the most basic point which is the transition between the bathtub and the tile wall. People look at a tub and see a static object. I look at a tub and see a massive vessel that holds forty gallons of water and a two hundred pound human. That is nearly six hundred pounds of vertical pressure. If you do not account for that movement, your seal will fail before the homeowner even finishes their first shower.
The structural movement that cracks your grout
The joint between a bathtub and tile must remain flexible because it represents a change of plane where two different materials meet. This specific junction is subject to differential movement caused by thermal expansion, structural settling, and the massive weight fluctuations of a filled tub. Using rigid grout in this gap is a guaranteed failure. When the tub sinks under the weight of water, the grout will crack and allow moisture to migrate into the wall cavity where it destroys the floor leveling integrity and causes rot in the wooden framing members.
You have to understand the molecular reality of these materials. Tile is rigid and fired in a kiln. The bathtub, whether it is cast iron, enameled steel, or acrylic, has a different rate of expansion. When you pump hot water into a cold tub, the material grows. If you have blocked that growth with a hard portland cement product, something has to give. Usually, it is the bond between the grout and the tub rim. Once that bond breaks, capillary action takes over. Water does not just sit there. It gets sucked into the gap. It travels behind the tile. It finds the carpet install in the hallway and starts to wick into the pad. By the time you see the spot on the ceiling below, the damage is already five figures deep. I have seen entire showers torn out because an installer wanted to save five minutes by using grout instead of a high grade sealant.
“A floor is only as good as the subfloor beneath it; deflection is the enemy of every joint.” – Master Flooring Axiom
Why your subfloor is lying to you
Subfloor deflection and improper floor leveling are the primary causes of seal failure at the bathtub perimeter. Even if the wall looks perfect, a bouncy floor will cause the tub to pivot against the tile. This movement creates a mechanical stress that exceeds the elongation capabilities of cheap painters caulk. You need a rock solid foundation to ensure the bathtub stays put while the sealant does its job of handling the minor atmospheric shifts. If the floor is out of level, the tub will sit unevenly and create a wider gap on one side that is nearly impossible to seal correctly.
I have walked onto jobs where the laminate was installed right up to a leaking tub. The installer did not realize the subfloor was dipping. He just slapped the floor down. Within six months, the edges of the laminate were peaking because the moisture from the tub joint was feeding the HDF core of the planks. You have to fix the floor first. You use a high flow self leveling underlayment. You check it with a ten foot straight edge. You ensure that the tub is shimmed properly and sitting on a bed of mortar if the manufacturer requires it. A tub that creaks when you stand in it is a tub that will leak. The movement is the enemy. You are not just sealing a gap. You are engineering a movement joint that must withstand thousands of cycles of loading and unloading.
The chemistry of the bond breaker
Professional grade sealants like 100 percent silicone or high performance polyurethanes provide the necessary adhesion and elasticity to maintain a water tight seal. These materials are designed to stretch up to 50 percent of their original width without losing their bond to the substrate. Unlike water based acrylics, these chemicals do not shrink as they cure, which means the volume you apply is the volume that stays in the joint. This is critical for preventing the concave profile that traps soap scum and mold.
There is a specific science to how these molecules grab onto a surface. If you have soap residue or old grout dust in that joint, the silicone will not bond. It will just sit there like a wet noodle. You have to clean the area with denatured alcohol. You need a pristine surface. Then there is the issue of the three point bond. If the sealant sticks to the back of the gap and both sides, it will tear when the tub moves. You need it to stick only to the tub and the tile. This is why we use backer rod in deep gaps. It acts as a bond breaker and allows the sealant to stretch like a rubber band. If you skip this, you are just waiting for a cohesive failure. I prefer an acetoxy cure silicone for tile work because of its rapid skin time and superior resistance to fungal growth in wet environments.
| Material Type | Elongation Capacity | Shrinkage Rate | Best Use Case |
|---|---|---|---|
| Standard Grout | 0% | High | Internal tile joints only |
| Siliconized Acrylic | 10% to 15% | Medium | Dry areas, baseboards |
| 100% Silicone | 25% to 50% | None | Wet areas, tub to tile joints |
| Polyurethane | 35% to 50% | Low | Structural joints, exterior |
The 1/8 inch that ruins everything
A joint that is too narrow will fail just as fast as one that is too wide because it lacks the volume of material needed to handle expansion. You need a minimum of 1/8 inch for the sealant to function as a dynamic gasket. If the tile is sitting directly on the tub rim, there is no room for the sealant to penetrate. This creates a surface smear that will peel off the moment you scrub it with a sponge. You must maintain a consistent gap during the tile installation using spacers.
Precision is not a suggestion. It is the law of the job site. I see guys jamming tile tight against the tub because they think it looks cleaner. It does not. It looks like a mistake. When that tub expands from the heat of the water, it will actually push up against the tile and can cause the bottom row to pop off the wall. That 1/8 inch gap is your insurance policy. It allows the house to breathe. It allows the tub to settle. It gives the sealant enough body to hold its shape. If you are working with a heavy cast iron tub, you might even bump that to 3/16 inch. The larger the tub, the larger the potential movement. You have to calculate the load and adjust your gap accordingly. Do not let a thin line be the reason you have to come back and do a warranty repair for free.
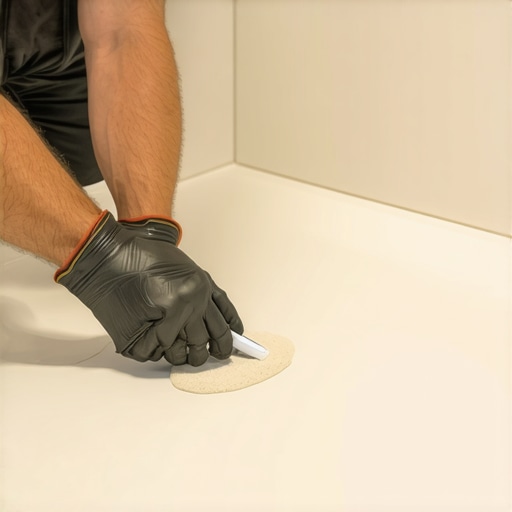
- Clean the joint thoroughly with a vacuum and denatured alcohol.
- Fill the bathtub with water before applying the sealant to pre-stress the joint.
- Use a high quality 100 percent silicone that matches your grout color.
- Apply a consistent bead and tool it with a specialized profile tool.
- Allow the sealant to cure for at least 24 hours before draining the tub.
The ghost in the expansion gap
Movement joints are often ignored in residential construction but they are mandated by the TCNA for any change of plane in wet areas. This is what I call the ghost in the gap. It is the invisible force that wrecks beautiful bathrooms. If you do not respect the movement joint, the tile will eventually tent or crack. This is especially true in large format tile installations where there are fewer grout lines to absorb the stress of the building. The bathtub joint is the most important movement joint in the entire room.
I remember a project where the homeowner insisted on a zero joint look. No caulk, just tight tile. I told them it would fail. They didn’t listen. Two months later, the bottom row of expensive marble had hairline fractures running through every single piece. The tub had settled just a hair, and since there was no expansion gap, the weight of the tub was transferred directly into the tile edges. The stone couldn’t take the pressure. It snapped. We had to rip it out and do it my way. You have to leave room for the ghost. You have to give the building a way to move without breaking things. This applies to your carpet install transitions and your laminate perimeters too. Everything in a house is moving. If you try to stop it with rigid materials, you will lose every single time.
“All joints in tile work should be filled with a flexible sealant when they meet a dissimilar material or a change of plane.” – TCNA Handbook for Ceramic, Glass, and Stone Tile Installation
The danger of the wet subfloor
A compromised subfloor under a bathtub will lead to catastrophic failure of the tile assembly and the sealant joint. If water has already been leaking into the plywood or the OSB, the wood will swell. This swelling pushes the tub upward or tilts it. This creates a cycle of destruction where the leak causes more movement, and the movement causes a bigger leak. You cannot simply put new caulk over a rotten subfloor and expect it to hold. You have to verify the structural integrity of the floor before you ever touch a tube of silicone.
When I evaluate a bathroom, I am looking for signs of deflection. I stand in the tub and bounce. If I feel the floor give, I know the subfloor is shot. I have seen showers where the floor was so soft I could see the drain moving independently of the floor. That is a death sentence for your tile. You have to pull the tub. You have to replace the subfloor with marine grade plywood or a high quality cement board. You ensure the floor leveling is perfect. Then you reinstall. It is a lot of work, but it is the only way to do it right. If you are an installer and you see a soft spot, do not ignore it. You are the last line of defense for that homeowner. If you cover up a rot problem, you own that rot problem. The joint seal is only the final step of a much larger engineering process that starts at the joists. Do not be the guy who puts a band-aid on a broken leg.
When laminate and showers collide
Transitions between bathroom tile and laminate flooring in adjacent rooms require specific moisture barriers to prevent cross contamination of water. While this might seem separate from the bathtub joint, the two are linked by the subfloor. If the tub seal fails, the water will travel along the subfloor and ruin the laminate in the hallway. Laminate is basically compressed sawdust and glue. It hates water. One bad leak at the tub can ruin five hundred square feet of flooring in a single afternoon.
You have to think about the house as a system of interconnected vessels. The bathroom is a wet zone. Everything else is a dry zone. Your job is to keep the wet zone contained. This means your carpet install in the bedroom needs to be protected by a proper transition strip and a moisture block. It means your floor leveling needs to be sloped slightly away from the door if possible. And most importantly, it means that the bathtub joint must be impenetrable. I use a double bead method sometimes on high end jobs. I seal the flange of the tub to the wall board first, then I tile, and then I seal the tile to the tub. It is a belt and suspenders approach. In twenty five years, I have never had a leak call back on a tub I installed. That is because I respect the water. I know what it can do to a house. I know how it can find the smallest pinhole and turn it into a disaster. If you follow these steps, you will be the expert that people trust with their homes. You will be the one who knows the difference between a floor that looks good and a floor that actually works.