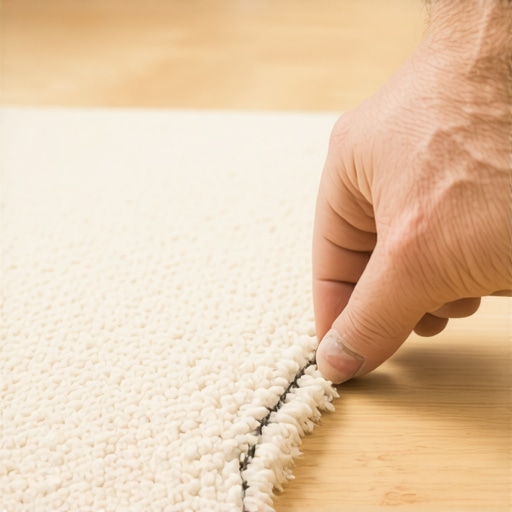
Why Your Carpet Seam is Peeling Up and How to Fix It Fast
I once spent three days on a commercial project in a high-traffic office building where the previous installer had ignored the basic physics of thermoplastic bonding. The seams were curling like dried orange peels within six months. It was a mess of frayed edges and exposed primary backing. I had to rip out three hundred linear feet of carpet because the original guy thought he could save ten minutes by rushing his seaming iron. That is the reality of flooring. If you skip the technical details, the floor will eventually punish you. A peeling carpet seam is a symptom of a systemic failure in the installation process. It is rarely a defect in the material itself. Most of the time, it comes down to a lack of seaming sealer or an improper heat setting on the iron. You are looking at a mechanical bond that has been compromised by tension, moisture, or chemical degradation.
The science of the thermoplastic bond
Carpet seam failure happens when the hot-melt adhesive in the seaming tape fails to penetrate the secondary backing of the carpet. This creates a weak mechanical link that cannot withstand the lateral tension of a power-stretched installation. To fix it fast, you must understand the melting point of the resin and the structural integrity of the latex. When a seam peels, it is usually because the adhesive was too cold or the iron was moved too quickly. This prevents the glue from wicking into the fibers. The result is a surface-level stick that pops loose the moment someone walks over it with a heavy footfall. You are dealing with a molecular failure where the adhesive stayed on top of the tape instead of becoming one with the carpet backing.
“The integrity of a carpet installation relies entirely on the quality of the seam seal and the tension of the stretch.” – CRI Installation Standards
The 1/8 inch that ruins everything
Precision carpet trimming is the difference between a hidden seam and a trip hazard that peels within weeks. If the edges are not buttered with seam sealer, the yarns will eventually blossom and pull away from the backing. This 1/8 inch gap is where the disaster starts. Professional installers know that the row-cutting process must be perfect. If you leave even a tiny bit of overlap, the seam will peak. If you leave a gap, the adhesive has nothing to grab onto but the subfloor. A peeling seam is often the result of the installer trying to hide a bad cut by over-stretching the material. The tension eventually wins, and the glue gives way. You must ensure the two pieces meet with zero compression and zero gap before the heat is applied.
Why your subfloor is lying to you
Subfloor levelness and moisture are the silent killers of carpet seams. If your plywood or concrete is uneven, the carpet has to bend over a hump or bridge a dip. This creates vertical pressure on the seam every time someone walks on it. Most guys think carpet is forgiving because it is soft. It is not. It is a structural layer. I spent years fixing jobs where the subfloor had a 1/4 inch dip that the installer thought the pad would hide. It didn’t. The seam was constantly being flexed until the adhesive cracked. You need to use a floor leveling compound to ensure a flat plane. If the subfloor is damp, that moisture will rise and emulsify the latex in the carpet backing, leading to a complete delamination of the seam.
| Adhesive Type | Melt Temperature | Set Time | Ideal Use Case |
|---|---|---|---|
| Standard Hot Melt | 300F | 2-3 Minutes | Residential Cut Pile |
| Low Melt Tape | 250F | 5 Minutes | Delicate Synthetics |
| Pressure Sensitive | Room Temp | Immediate | Carpet Tiles |
| Epoxy Seamer | N/A | 24 Hours | Commercial Wet Areas |
The ghost in the expansion gap
Perimeter tension and tack strips dictate how much stress a seam has to endure over its lifetime. If the carpet was not stretched correctly with a power stretcher, the seam will eventually buckle. Conversely, if it was over-stretched without proper wall support, the seam is under a constant state of war. It is trying to pull itself apart. This is why you see seams peeling near doorways or transitions. The expansion gap at the wall must be exactly right to allow the tack strip to hold the tension. If the carpet slips off the pins, that energy travels straight to the weakest point. Usually, that is the seam. You are not just laying a rug. You are engineering a tensioned surface that must remain stable under thousands of pounds of foot traffic.
How to fix a peeling seam without a total replacement
Repairing a failed carpet seam requires a systematic approach that starts with cleaning the old adhesive. You cannot just put new glue on top of old, brittle resin. It won’t bond. You need to carefully trim back any frayed fibers and apply a high-quality seam sealer to the edges. This is a non-negotiable step. Use a professional seaming iron set to the correct temperature for your specific carpet type. Slide the iron slowly under the seam, allowing the heat to liquify the tape. Follow the iron with a seam roller or a heavy weight to drive the glue into the backing. This ensures that the mechanical bond is restored at a molecular level.
Essential tools for the professional repair
- Professional Seaming Iron with heat shield
- Premium 4-inch Seaming Tape with reinforced mesh
- Carpet Seam Sealer with applicator tip
- Star Seam Roller for pile integration
- Power Stretcher to reset the tension
- Row Cutter for clean edge preparation
The chemistry of the latex breakdown
Chemical degradation of carpet backing is a common reason for peeling seams in older homes. Over time, the SBR (Styrene-Butadiene Rubber) latex used to hold the carpet together can become brittle. This is accelerated by high-alkaline cleaning solutions or pet accidents. When the latex fails, the primary and secondary backings separate. This is called delamination. Once this happens, the seam tape has nothing solid to hold onto. If you are trying to fix a seam on an old carpet and you see white dust falling out of the backing, you are looking at failed latex. In this case, a simple patch won’t work. You may need to use a latex-based structural adhesive to re-bond the backings before you can even think about seaming them together.
“A floor is only as good as the subfloor beneath it; deflection is the enemy of every joint.” – Master Flooring Axiom
Avoiding the big box store trap
Quality materials for flooring are not found in the bargain bin of a discount warehouse. Cheap seam tape has less adhesive per square inch and a weaker fiberglass mesh. It might save you five dollars on the roll, but it will cost you thousands when the floor fails. High-end tapes use a heavy-duty thermoplastic that has a higher shear strength. This is what you need to resist the pulling forces of a properly stretched room. When you buy cheap, you are buying a product that is designed for the easiest possible installation, not the longest-lasting one. Professional grade materials are engineered to handle the physics of a living environment where furniture is moved and children run. Do not compromise on the glue. It is the only thing holding your floor together.
The final word on floor integrity
Fixing a carpet seam is about more than just aesthetics. It is about restoring the structural continuity of the surface. If you ignore a peeling seam, you are inviting moisture to penetrate the subfloor and allowing the carpet to unravel until it is unrepairable. Take the time to do it right. Use a power stretcher to ensure the tension is even. Use a seaming sealer to protect the edges. Most importantly, give the adhesive time to cool and set before you put any weight on it. A floor is a performance surface. Treat it with the respect that engineering demands. Follow the standards set by the CRI and don’t take shortcuts. Your knees and your wallet will thank you in the long run.