How to Hide a Carpet Patch So Nobody Ever Notices
Most guys skip the leveling compound. They think the underlayment will hide the dip. It won’t. I spent three days grinding concrete on a job last month just so the floor wouldn’t click like a castanet. That is the reality of the trade. You can have the most expensive fiber in the world, but if the substrate is trash, the floor is trash. I once walked into a house where a $15,000 wide-plank walnut floor was cupping so bad it looked like a potato chip because the installer didn’t check the crawlspace humidity, but carpet is no different. It is a structural engineering challenge that starts at the base. When you are looking at a hole in your carpet, you are not just looking at a cosmetic blemish. You are looking at a failure of the surface integrity. To fix it so nobody ever notices, you have to think like an architect, not a decorator. You need to understand the physics of the pile, the chemistry of the adhesive, and the absolute necessity of a flat subfloor.
The 1/8 inch that ruins everything
To hide a carpet patch successfully you must first ensure the subfloor is perfectly level and the donor piece matches the pile direction of the existing installation. If the subfloor has a dip or a peak, the patch will catch light differently, creating a shadow that reveals the repair regardless of how well the edges are blended. This is where floor leveling becomes a part of the conversation. If you are dealing with a subfloor that is out of spec, you are fighting a losing battle. The National Wood Flooring Association and the Tile Council of North America both preach the gospel of flat substrates, and carpet installers should listen. A patch over a hollow spot will flex every time someone walks on it, eventually breaking the bond of the seam tape and making the edges fray. You need to address the structural reality before you worry about the aesthetics.
“A floor is only as good as the subfloor beneath it; deflection is the enemy of every joint.” – Master Flooring Axiom
The physics of pile direction and light refraction
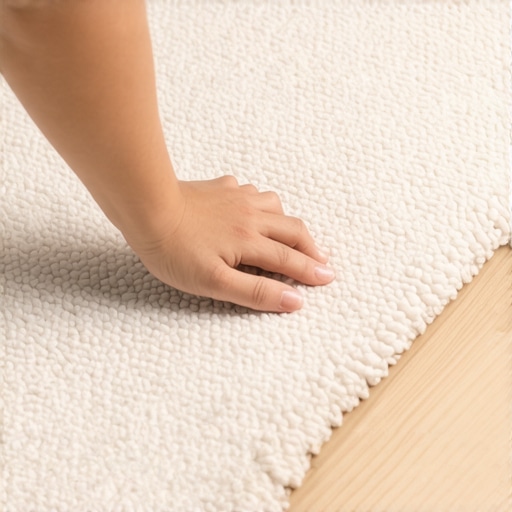
Carpet pile has a specific grain called a nap which reflects light in a single direction based on the way the fibers were twisted and heat-set. If you rotate a patch piece 90 degrees, it will look like a completely different color even if it came from the same roll. This is because the trilobal or square-shaped fibers are designed to bounce light at specific angles. When you cut your donor piece, you must identify the “sweep” of the carpet. You do this by running a hand across the surface; one way will feel smooth and the other will resist. Your patch must align perfectly with the sweep of the surrounding area. Failure to do this creates a visual anomaly that the human eye is biologically programmed to detect. It is about light management more than it is about the carpet itself.
The molecular bond of thermoplastic adhesives
Mastering the carpet patch requires using high-grade thermoplastic seaming tapes that create a permanent chemical bond between the primary backing and the donor piece. Cheap tapes or simple glues will fail because they lack the shear strength to hold up under foot traffic. When you use a seaming iron, you are melting a specific blend of resins that penetrate the secondary backing of the carpet. This creates a bridge. If the iron is too hot, you risk delamination or melting synthetic fibers like polyester. If it is too cool, the bond is purely superficial. You need that sweet spot, usually around 350 degrees Fahrenheit, to ensure the adhesive flows into the grids of the backing. This is not just sticky tape; it is a structural weld of synthetic materials.
Tools for a surgical repair
Professional carpet repair requires specialized tools including a row spreader, a sharp utility knife, a seaming iron, and a carpet tractor. These tools allow you to manipulate the fibers and the backing without causing the fraying that usually gives away a DIY attempt. You cannot just cut a square with a pair of scissors and hope for the best. You need to separate the rows of yarn to ensure you are only cutting the backing, not the face fibers. This protects the “bloom” of the carpet and allows the patch to disappear into the surrounding pile. Using a tractor after the seam is hot ensures the adhesive is pressed firmly into the fibers, creating a unified surface that resists pulling.
- A sharp utility knife with fresh blades for every cut to avoid tearing the latex backing.
- A row spreader or a flathead screwdriver to find the “valleys” between the yarn loops.
- High-quality hot melt seam tape with a wide adhesive track.
- A carpet tractor or weighted roller to press the seam into the adhesive while it is still molten.
- A donor piece of carpet from a closet or a leftover remnant that has similar wear patterns.
Why your subfloor is lying to you
Subfloors often contain hidden moisture or uneven transitions that cause the carpet to shift and the patch to eventually become visible. Even in a dry climate, concrete slabs can emit moisture vapor that affects the tackifier or the glue holding the carpet in place. If you are working in a basement or near showers, this risk is amplified. Moisture can cause the carpet backing to expand and contract, which puts immense stress on any patched area. Before you even think about the carpet, you need to check that the substrate is dry and flat. If the floor leveling was done poorly, you will see it in the carpet. A dip in the plywood or a hump in the concrete acts like a magnifying glass for any imperfections in the floor covering above it.
A comparison of common carpet fibers and their repair difficulty
The chemical composition of the fiber determines how well it will hide a seam and how the adhesive will react during the repair process. Nylon is the gold standard for repair because it has excellent memory and can be groomed to hide a cut line. Polyester and Olefin are more difficult because they tend to be less resilient and can melt more easily if the seaming iron is not managed perfectly. Wool is a different beast entirely, requiring specialized latex glues because the natural oils can interfere with standard thermoplastic tapes. Understanding these materials is a part of the trade that most people ignore in favor of whatever is on sale at the big-box store.
| Fiber Type | Resiliency Rating | Melting Point | Repair Difficulty |
|---|---|---|---|
| Nylon 6,6 | High | 490°F | Low |
| Polyester (PET) | Medium | 482°F | Medium |
| Olefin (Polypropylene) | Low | 320°F | High |
| Wool | Very High | N/A (Chars) | Expert |
The ghost in the expansion gap
Every floor needs room to breathe, and failing to account for the expansion and contraction of the perimeter will lead to buckling at the patch site. While we often think of wood as the primary culprit for expansion, the latex backing on carpet and the synthetic pads underneath are also subject to thermal and hygroscopic movement. If the carpet is stretched too tightly or not tightly enough, the patch will be the first place to show a ripple. This is why you must use a power stretcher, not just a knee kicker, to ensure the tension is uniform across the entire room. If the tension is uneven, the patch will eventually be pulled out of alignment, revealing the cut lines that you worked so hard to hide. It is about the tension of the entire system, not just the square inch you are fixing.
“Proper carpet repair requires an understanding of row alignment and pile sweep to achieve visual continuity.” – Flooring Industry Standards
Regional humidity and adhesive set times
The climate of your region significantly impacts how long it takes for floor leveling compounds and carpet adhesives to reach their full structural strength. If you are in a high-humidity area, the moisture in the air can slow the cooling of hot-melt tape, meaning you need to leave the weights on the seam for much longer. In a dry climate, the adhesive can set too quickly, potentially skinning over before you have had a chance to properly tractor the seam. This is where the experienced installer knows to adjust their pace. You cannot treat a job in the swampy heat of the south the same way you treat a dry high-desert installation. You are a slave to the ambient conditions, and ignoring them is a recipe for a failed repair that will haunt you when the homeowner calls three months later.
Managing transitions near showers and wet areas
Carpet patches near bathrooms or showers are prone to failure due to the frequent changes in humidity and the risk of topical moisture. If water gets under the patch, it will degrade the adhesive and can even cause the subfloor to swell if it is made of OSB or particleboard. This is why a proper moisture barrier is essential in these zones. I always recommend a transition strip or a specialized waterproof adhesive for any carpet that sits adjacent to a wet area. You are fighting the laws of physics when you put a porous material like carpet next to a shower, and the patch is the weakest link in that chain. You have to over-engineer the bond in these high-risk areas to ensure it stays invisible and intact for the life of the floor.