How to Fix a Squeaky Plywood Joint Before Installing Laminate
Most guys skip the leveling compound. They think the underlayment will hide the dip. It won’t. I spent three days grinding concrete on a job last month just so the floor wouldn’t click like a castanet. My knees still feel the vibration of that grinder, and the smell of pulverized silicate and oak dust is practically baked into my skin. If you are about to lay a beautiful new laminate floor over a subfloor that groans every time you step on a seam, you are making a massive mistake. A floor is only as good as the structural integrity of the wood beneath it. If it squeaks now, it will squeak forever, and the clicking sound of a floating floor rubbing against a moving plywood joint will drive you insane within a month. I have seen fifteen thousand dollar installations torn up because the installer was too lazy to spend twenty dollars on the right screws. This is not about aesthetics. This is about structural engineering at the microscopic level.
The structural ghost in your floor joists
To fix a squeaky plywood joint you must identify the mechanical failure between the subfloor panels and the floor joists using structural fasteners and gap-filling adhesives. Most squeaks are the result of wood shrinkage. When the joists were installed, they were likely wet. As the house seasoned, that wood dried out and pulled away from the nails. Now, there is a tiny gap between the plywood and the joist. When you walk across it, the plywood slides down the shank of the nail. That metal-on-wood friction is the high-pitched chirp you hear. It is a physical manifestation of a loose connection. You cannot fix this with a hammer. You need to pull the plywood down tight and keep it there. I have walked into homes where the owners tried to use finish nails to stop a squeak. It is like trying to stop a train with a piece of dental floss. You need the shear strength of a proper screw and the chemical bond of a professional adhesive.
“A floor is only as good as the subfloor beneath it; deflection is the enemy of every joint.” – Master Flooring Axiom
Why your subfloor is lying to you
The flatness of a subfloor is measured by deflection limits like L/360 which dictates that the plywood surface must not dip more than 1/8 inch over a 10 foot span. Most people look at their floor and think it looks fine. They do not realize that laminate is a rigid product. It does not contour to the floor like a carpet install does. If there is a 1/4 inch dip in your plywood, that laminate will bridge over the gap. Every time you step on it, the locking mechanisms will flex. Eventually, the plastic or HDF tongue will snap. Then you have a failed floor. I always take a 6-foot level and a flashlight. I lay the level across the joints and shine the light from behind. If I see light peeking through under the level, I know I have work to do. Floor leveling is not a suggestion. It is a requirement for any warranty. If you are also planning showers or tile work nearby, the subfloor requirements are even stricter. Tile needs zero movement, whereas laminate can handle a tiny bit of play, but the squeak is a sign that the play has become a problem.
The hardware debate for silent floors
Choosing the correct fastener involves evaluating the thread pitch and shank diameter of subfloor screws to ensure the plywood layers are compressed against the solid wood joists. Do not use drywall screws. I see this all the time and it makes my blood boil. Drywall screws are brittle. They are designed to hold paper and gypsum, not to withstand the lateral shear forces of a walking human. They will snap. You need 2 inch or 2.5 inch wood screws with a smooth upper shank. The smooth part allows the screw to spin in the plywood while the threads bite into the joist, pulling the two together like a vice. If the screw has threads all the way to the head, it can actually push the plywood away from the joist, which is called jacking. That will make your squeak even worse. I prefer a square drive or a Torx head. Phillips heads strip too easily when you are trying to drive them through old, hardened Douglas fir joists.
| Fastener Type | Application | Holding Power |
|---|---|---|
| Common Nail | Framing only | Low (prone to withdrawal) |
| Drywall Screw | Wallboard only | Zero (brittle) |
| Subfloor Screw | Plywood to Joist | High (mechanical grip) |
| Ring Shank Nail | Plywood to Joist | Medium (resists pulling) |
The physics of friction and plywood edges
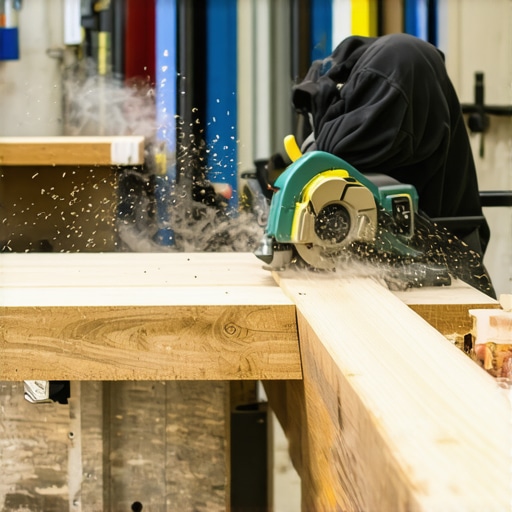
The friction at the joint is often caused by expanding wood fibers rubbing against adjacent panels which lacks the necessary expansion gap required by NWFA standards. Wood is a living material. It breathes. When the humidity in your house rises, the plywood expands. If the boards were installed butt-tight against each other, they have nowhere to go. They will push against each other and lift up, creating a peaked joint. This is why the pros always leave a 1/8 inch gap between sheets. If your boards are rubbing, I take a circular saw and set the depth to exactly the thickness of the plywood. I run the saw right down the seam. This creates the necessary space for the wood to move without grinding against its neighbor. It sounds destructive, but it is the only way to kill the noise forever. After that, I vacuum out the sawdust because even a small pebble of wood can cause a click under your laminate. It is about the details that no one sees.
“Subfloor panels must be installed with a 1/8 inch gap at all edges and ends to allow for expansion.” – NWFA Technical Manual
Leveling compounds and the death of the dip
Applying self-leveling underlayment involves a chemical cure that creates a flat substrate by filling low spots and voids in the subfloor assembly. Sometimes the squeak isn’t just a loose nail. Sometimes the joist itself is crowned or sagging. In those cases, screws alone won’t fix the dip. I use a high-quality primer first. Never skip the primer. If you pour leveling compound onto raw plywood, the wood will suck the moisture out of the mix, and it will crack and crumble. The primer creates a moisture barrier and a surface the compound can bond to. I mix the compound with a heavy-duty drill until it has the consistency of a milkshake. I pour it into the low spots and let gravity do the work. It is a beautiful thing to watch a floor become perfectly flat. This is the difference between a floor that lasts five years and one that lasts fifty.
Moisture barriers and the vapor war
Installing a 6-mil polyethylene film or a high-density underlayment provides vapor protection for laminate flooring to prevent cupping and peaking. Even after you fix the squeak, the job is not done. You have to protect the wood from the humidity coming up from the crawlspace or basement. Laminate is basically high-density fiberboard with a picture of wood on top. It hates water. If moisture gets into the core, it will swell and the edges will rise. I always overlap my moisture barrier seams by at least six inches and tape them with waterproof tape. This creates a sealed environment. The floor becomes a separate entity from the house structure, which is why we call it a floating floor. It needs to be able to move as a single unit without being pinned down by transitions or heavy cabinetry.
- Check the subfloor moisture content with a pin meter.
- Drive screws every 6 inches along the edges of the plywood.
- Sweep and vacuum the entire surface to remove all debris.
- Undercut door jambs to allow for expansion.
- Install a moisture barrier even on second-floor installations.
The professional checklist for a silent surface
A successful flooring prep requires meticulous inspection of the subfloor fasteners and the structural stability of the joist system. I start at one corner of the room and walk every square inch. I mark every squeak with a piece of blue painter’s tape. Then I go back with my impact driver. If the screw doesn’t bite, it means the joist is missing or the wood is rotten. I have seen houses where the plumbing was moved and the joists were notched so badly they were basically toothpicks. In those cases, you have to sister a new joist to the old one. It is a pain in the neck, but you cannot build a house on sand. Once the floor is silent and flat, I do a final check for any protruding screw heads. They must be flush or slightly recessed. A single screw head sticking up will telegraph through the laminate and create a bump you will see every time the sun hits the floor. It is about perfection.
Regional humidity and the swelling of OSB
In regions with high relative humidity such as the Gulf Coast, oriented strand board (OSB) is prone to edge swelling which requires sanding the joints to maintain a level plane. If you live in a place like Houston or New Orleans, your subfloor is going through a war every summer. OSB is notorious for this. The edges soak up moisture like a sponge and expand. If you ignore this, those swollen edges will create ridges under your laminate. I use a heavy-duty floor sander with 36-grit paper to knock those ridges down. It creates a massive mess of sawdust and glue particles, but it is necessary. In the dry heat of Arizona, the problem is the opposite. The wood shrinks and the gaps get too wide, which can cause the laminate joints to lose support. You have to understand your environment before you ever open a box of flooring. The climate dictates the installation method. There is no such thing as a universal approach in this business. You respect the wood or the wood will humiliate you. The final word on subfloor integrity is simple. If you do not have the patience to fix the foundation, do not bother with the finish. A silent, flat, and dry subfloor is the only foundation for a professional laminate job. Take the time, buy the right screws, and kill the squeaks before they become a permanent part of your home.
{ “@context”: “https://schema.org”, “@type”: “HowTo”, “name”: “How to Fix a Squeaky Plywood Joint Before Installing Laminate”, “step”: [ { “@type”: “HowToStep”, “text”: “Locate all squeaks by walking the floor and marking problematic areas with tape.” }, { “@type”: “HowToStep”, “text”: “Verify the location of floor joists using a stud finder or by looking at the existing nail patterns.” }, { “@type”: “HowToStep”, “text”: “Drive 2.5 inch wood screws through the plywood and into the joists, ensuring the screw head is flush with the surface.” }, { “@type”: “HowToStep”, “text”: “Use a circular saw to create a 1/8 inch expansion gap between plywood panels that are rubbing together.” }, { “@type”: “HowToStep”, “text”: “Apply a self-leveling compound to any low spots to ensure the floor is flat within 1/8 inch over 10 feet.” } ] }