The ‘Silicone’ Secret for Sealing Shower Corners That Always Crack
The hidden mechanics of failing shower joints
I spent three days grinding concrete on a job last month just so the floor would not click like a castanet. That job taught me a lesson about precision that most installers forget. Most guys skip the leveling compound. They think the underlayment will hide the dip. It will not. That same lack of discipline is what ruins shower corners. I have seen thousand dollar tile jobs destroyed by a single tube of cheap acrylic caulk. When you are twenty five years into this trade, you stop looking at the tile and start looking at the physics of the house. A house is a breathing organism. It expands and it contracts. If you treat a corner like a static object, you have already lost the war against water damage. I smell like oak dust and floor wax most days, and I can tell you that the secret to a shower that does not leak is not the tile itself. It is the chemistry of the expansion joint.
The structural movement of a change of plane
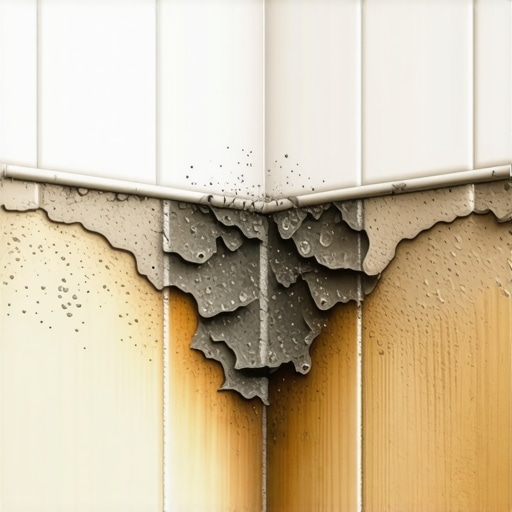
A change of plane occurs wherever two surfaces meet at a ninety degree angle such as a wall meeting a floor. These joints require 100% silicone sealant because grout is rigid and will crack under the inevitable structural movement of the home framing and subfloor deflection. You cannot fight physics. Wood framing shrinks as it loses moisture. Concrete slabs settle. If you fill that corner with cementitious grout, the bond will break within months. This creates a hairline fracture. Water travels through these fractures via capillary action. Before you know it, your wall studs are rotting. I have pulled apart showers where the homeowner thought they just had a dirty corner, but the reality was a colony of black mold living behind the substrate because they used grout where they should have used a flexible polymer.
“A floor is only as good as the subfloor beneath it; deflection is the enemy of every joint.” – Master Flooring Axiom
The chemistry of the 100% silicone bond
Pure silicone offers a high modulus of elasticity and superior adhesion to non-porous surfaces like glazed ceramic and porcelain. Unlike siliconized acrylics, 100% silicone does not shrink during the curing process which ensures the seal remains airtight and watertight even as the shower surfaces shift and vibrate. You need to understand the molecular level of what you are squeezing out of that gun. Acrylic caulk is water based. As the water evaporates, the bead shrinks. This creates tension at the edges of the bond. 100% silicone is a moisture cure product. It links up with the humidity in the air to create a rubberized gasket. It is also naturally resistant to the microbes that thrive in a wet environment. Most people buy the cheap stuff because it is easier to tool with a wet finger, but ease of installation is the hallmark of a mediocre installer. You want a product that meets ASTM C920 standards for high performance sealants.
Floor leveling and its impact on shower integrity
Proper floor leveling ensures that the shower pan or substrate is perfectly flat which prevents the localized stress points that lead to corner cracking. A level subfloor distributes the weight of the water and the user evenly across the entire surface rather than concentrating it at the wall joints. If your floor is out of level by even an eighth of an inch, the shower pan will flex every time you step into it. That flex translates directly to the corner joint. No sealant can survive a constant mechanical prying action. I always tell my apprentices that if they do not spend the time with the straight edge and the self-leveling underlayment, they are just building a failure on a timeline. You need to use a high flow, cement based leveler that can handle the moisture requirements of a wet area. This creates a monolithic base that supports the entire tile assembly without the bounce that kills joints.
| Material Property | 100% Silicone | Siliconized Acrylic | Cementitious Grout |
|---|---|---|---|
| Flexibility | High | Moderate | None |
| Shrinkage | Negligible | Significant | Minimal |
| Waterproof Rating | Excellent | Good | Porous |
| Life Expectancy | 20+ Years | 3 to 5 Years | Indefinite (but rigid) |
Laminate and carpet install logic in wet zones
While laminate and carpet install techniques are common in residential spaces, they have no place in a shower environment where moisture management is the priority. Applying carpet style transitions or non-waterproof laminate near a shower entry invites subfloor rot that eventually destabilizes the wall corners. I have seen guys try to run a laminate floor right up to a shower curb without a proper expansion gap. The laminate expands, hits the curb, and pushes the entire shower assembly. It is a domino effect of bad engineering. You need a hard break. If you are doing a floor leveling job, ensure the transition to the bedroom carpet is handled with a proper metal Z-bar or a reducer that does not trap moisture. The goal is to isolate the wet zone. If water can wick from the shower corner into the padding of a carpet, you are looking at a total floor failure within two years. Use the right tool for the right room. Keep the textiles in the bedroom and the polymers in the bath.
- Verify the subfloor meets L/360 deflection standards before tiling.
- Use a backer rod for joints deeper than half an inch to prevent three sided adhesion.
- Clean tile edges with denatured alcohol to remove all dust before applying silicone.
- Apply the silicone in a continuous bead without stopping to ensure a uniform seal.
- Tool the joint within ten minutes using a dry smoothing tool or a gloved finger.
The ghost in the expansion gap
The secret to a long lasting seal is the three sided adhesion failure which occurs when silicone sticks to the back of the joint as well as the two sides. Using a bond breaker or backer rod ensures the silicone only sticks to the tile edges allowing it to stretch like a rubber band. This is the technical detail that separates the pros from the handymen. If the silicone sticks to the wall stud or the backer board behind the tile, it cannot stretch. It will tear down the middle. By creating a two point bond, you allow the material to perform its intended engineering function. I always carry a roll of foam backer rod in my kit. It is a small expense that prevents a massive headache. You shove that rod into the gap, then apply your silicone over it. This creates a C-shaped bead that is much stronger than a solid triangular wedge. It is about geometry and the distribution of stress across the polymer chain. If you skip this, you are just waiting for the next crack to appear.
“Movement joints are not optional; they are a structural necessity in any tile installation that expects to survive five winters.” – TCNA Handbook for Ceramic Tile Installation
Why your subfloor is lying to you
Subfloors often appear flat to the naked eye but contain micro-oscillations and dips that become apparent only after the rigid tile is installed. Using a moisture meter and a ten foot straight edge is the only way to confirm if a floor is truly ready for a shower assembly. I have walked onto jobs where the previous guy said the floor was fine. I put my level on it and found a quarter inch dip right at the drain. That dip means the tile will be under constant tension. In a shower, that tension pulls at the corners. You have to be the one to tell the homeowner the hard truth. Sometimes you have to rip it back to the joists and sister in some new wood to get it stiff enough. If the floor moves, the shower dies. It is that simple. Do not trust your eyes. Trust the tools. Use a high quality leveling compound and give it the full twenty four hours to cure before you even think about thinset. The chemistry of the leveler needs to be fully hydrated to provide the compressive strength required for a heavy tile load.
The 1/8 inch that ruins everything
A gap smaller than one eighth of an inch does not allow for enough silicone volume to handle the thermal expansion of the tile. Maintaining a consistent and wide enough gap at the corners is the primary defense against sealant failure. Many installers try to make the corner joints as thin as the grout lines. This is a mistake. A thin line of silicone has very little material to stretch. It is like trying to use a tiny rubber band to hold a heavy gate. You need enough bulk in that bead to absorb the movement. I always spacer my corners at a full eighth. It might not look as sleek as a hairline joint, but it will still be there and waterproof in ten years. When you are looking at the longevity of a home, function must always dictate form. Use a color matched silicone that blends with your grout to keep the aesthetic clean without sacrificing the structural integrity of the seal. That is the real secret. It is not about the brand of the tile. It is about the math of the gap and the quality of the bond.