The ‘Marker’ Hack for Hiding Scratches in Dark Wood
I once walked into a house where a $15,000 wide-plank walnut floor was cupping so bad it looked like a potato chip because the installer didn’t check the crawlspace humidity levels before the first nail went in. It was a tragedy written in timber. The homeowner was trying to hide the stress fractures with furniture markers, thinking a bit of ink would solve a structural humidity failure. That is the thing about dark wood floors. They are the most unforgiving surfaces in the world of architecture. Every speck of dust, every pet claw mark, and every microscopic subfloor shift shows up like a neon sign. My hands are permanently stained with walnut dye and my knees have the permanent calluses of a man who has spent three decades chasing the perfect level. When people talk about the marker hack for hiding scratches, they are usually looking for a quick fix for a deep-seated problem. But as any mechanic with sawdust under his nails will tell you, a repair is only as good as your understanding of the material physics involved. We are not just coloring in a line. We are performing a surgical resin injection into a compromised cellular structure.
The physics of light refraction on dark timber surfaces
Dark wood species like American Walnut, Brazilian Cherry, or stained White Oak rely on light absorption to maintain their deep, rich aesthetic. When a scratch occurs, it ruptures the polyurethane topcoat and crushes the lignin fibers, creating a jagged valley that reflects light rather than absorbing it. This reflection is what makes the scratch visible. To fix it, you must use a pigmented resin marker or a stain-filled wax stick to restore the refractive index of the damaged area. You are essentially trying to trick the eye by removing the white, reflective edges of the torn wood grain. Most homeowners grab the first brown marker they see, but they fail to account for the undertones of the wood. A dark oak has green and gray undertones, while a cherry or mahogany has deep reds. If you use a red-based marker on a gray-toned floor, the scratch will stand out even more. You need to match the chromatic profile of the wood at a molecular level.
“A floor is only as good as the subfloor beneath it; deflection is the enemy of every joint.” – Master Flooring Axiom
Why your subfloor is lying to you
Floor leveling is the silent partner in surface durability because a floor that flexes or bounces will develop micro-scratches in the finish much faster than a stable one. When a subfloor has dips or humps exceeding 3/16 of an inch over a 10-foot span, the locking mechanisms on laminate or the tongues on hardwood will rub together. This internal friction creates heat and pressure that can cause the surface finish to flake off. I spent three days grinding concrete on a job last month just so the floor wouldn’t click like a castanet. People think the underlayment will hide the dip. It won’t. If you do not address the subfloor flatness, no amount of markers or touch-up kits will keep your dark wood looking pristine. The movement will eventually cause the finish to delaminate at the edges of the planks, a process known as white lining, which is far harder to fix than a simple chair scrape.
The chemical reality of wood grain markers
Wood grain markers are not typical office supplies; they are low-viscosity stains suspended in an alcohol-based or oil-based carrier. The capillary action of the wood fibers pulls the pigment into the scratch, saturating the exposed raw wood. For a carpet install transition where the wood meets the soft goods, these markers are vital to hide the raw edges of the cut planks. However, you must be careful with sheen matching. Most markers leave a matte finish. If your floor has a high-gloss sheen, the matte spot will look like a smudge. You have to wait for the ink to dry and then dab a tiny amount of wipe-on poly over the repair to match the surrounding specular reflection. This is where the amateurs fail. They focus on color and forget about the way light bounces off the surface. A truly invisible repair requires matching both the hue and the gloss level of the original factory finish.
| Wood Type | Janka Hardness | Pore Structure | Marker Absorption Rate |
|---|---|---|---|
| American Walnut | 1010 | Semi-diffuse porous | High |
| Brazilian Cherry | 2350 | Diffuse porous | Medium-Low |
| Ebony Stained Oak | 1360 | Ring porous | Very High |
| Dark Laminate | N/A | Non-porous (Resin) | Surface only |
The ghost in the expansion gap
Expansion gaps are the lungs of a flooring system, and without them, the internal pressure will force planks to peak, leading to surface damage that no marker can hide. A floor needs at least 1/4 inch of space at the perimeter to breathe. If you lock the floor under heavy cabinetry or skip the gaps, the planks will crush into each other. This creates edge-loading, where the finish chips off at the seams. I see this constantly in kitchens where people try to run the floor under a massive granite island. You are essentially pinning the floor to the subfloor, which prevents thermal expansion. When the wood tries to move and can’t, it finds the weakest point, which is usually the surface finish. If you see scratches or chips appearing at the long edges of your planks, stop looking for a marker and start looking for where the floor is pinched against a wall or a door frame.
Why showers and dark hardwood are a recipe for disaster
Showers and high-moisture zones are the natural enemies of solid hardwood and most laminate products because of hydrostatic pressure and vapor emissions. When you have a dark floor near a bathroom, the vapor drive from the subfloor or the humidity from the shower will cause the wood to expand. This expansion causes the finish to stretch and eventually crack, leaving those white, unsightly lines. In these areas, the marker hack is a temporary bandage on a hemorrhage. You should be looking at WPC or SPC cores with a high mil-thickness wear layer if you want the dark wood look near water. Even then, the slip resistance and the way the surface handles standing water are more important than how easily it scratches. A wet floor is a moving floor, and a moving floor is a scratched floor.
“Wood is a hygroscopic material; it never stops moving, even after it is chopped, dried, and finished.” – Master Flooring Axiom
The 1/8 inch that ruins everything
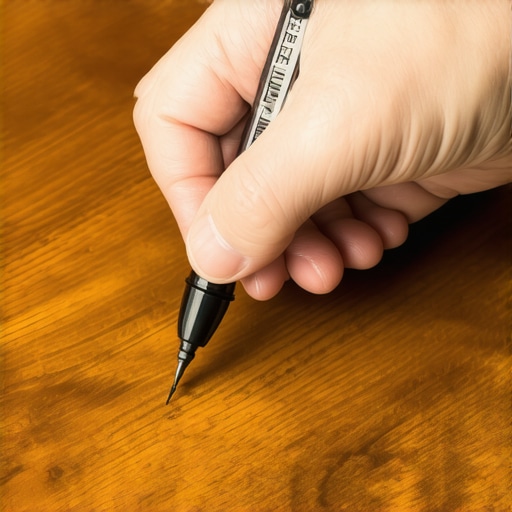
Precision depth is the difference between a successful marker repair and a mess that requires a full sand and finish. When you apply the marker, you must work in staccato strokes, following the direction of the grain. If you cross the grain, the pigment will settle into the vessel elements of the wood and create a dark smear that looks like a bruise. You need a solvent-dampened rag ready to immediately wipe away any excess that lands on the healthy finish. The goal is to keep the pigment inside the valley of the scratch. If the scratch is deep enough to feel with your fingernail, the marker alone is not enough. You will need to use a burn-in stick or a shellac-based filler to bridge the gap before applying color. This level of detail is why most DIY jobs look like a toddler with a crayon went to town on the hallway. You are trying to rebuild a microscopic topographic map of the wood grain.
Professional Scratch Mitigation Checklist
- Check moisture levels in the slab with a calcium chloride test before any repair.
- Clean the scratch with denatured alcohol to remove wax or floor cleaners.
- Select a marker one shade lighter than the wood, as pigments often darken upon capillary saturation.
- Apply the color in thin layers, allowing 30 seconds of dry time between passes.
- Buff the area with a microfiber cloth to blend the sheen.
- Apply a satin or gloss topcoat pen to seal the repair if the scratch is through the wear layer.
The nuclear option for dark wood restoration
Sometimes the scratches are so pervasive that the marker hack is like trying to paint a house with a toothbrush. If the wear layer is completely compromised, you have to consider a buff and coat or a full sand and finish. For engineered floors, you have to know exactly how many millimeters of lamella you have left. If you have a thin 1.2mm veneer, you can’t sand it. You will burn through to the plywood core faster than you can say ‘replacement.’ In these cases, chemical etching and a new coat of finish are your only hope. This is why I always tell clients to buy the thickest wear layer they can afford. A 4mm or 6mm wear layer on an engineered plank is the difference between a floor that lasts ten years and a floor that lasts a lifetime. The marker is for the occasional accident; the structural integrity of the wear layer is for the daily grind.