How to fix a floor leveler that was mixed too thin
Most guys skip the leveling compound. They think the underlayment will hide the dip. It won’t. I spent three days grinding concrete on a job last month just so the floor wouldn’t click like a castanet. I walked onto a site where the homeowner tried to save a buck by stretching a bag of self leveling underlayment with an extra gallon of water. The result was a dusty, grey soup that looked like a dried out lake bed in the Mojave. It was soft enough to scratch with a fingernail. If you lay a floor over that, the first time someone walks on it in high heels, the leveler will pulverize into dust, the locking mechanisms on your laminate will snap, and you will be pulling the whole mess up by Friday. Fixing this requires more than just a second coat. You have to address the structural compromise at the molecular level before you even think about your finish material.
The chemistry of a failed self leveling pour
Self leveling underlayment relies on a precise chemical hydration process where water-to-powder ratios determine the formation of calcium silicate hydrate crystals. When you add too much water, you dilute the polymer binders and cause laitance, a weak layer of fine particles that rises to the surface and prevents adhesion of subsequent flooring materials. The excess water creates voids in the cement matrix as it evaporates. These microscopic gaps reduce the compressive strength of the floor from a standard four thousand pounds per square inch down to something resembling chalk. You cannot simply pour more leveler on top of a watery mess. The top layer will only be as strong as the weak, dusty foundation beneath it. If that base layer shears off the concrete slab, the whole system fails. You are looking at a total bond failure. This is why following the manufacturer specifications for water measurement is the most critical step in subfloor preparation. One extra quart of water can ruin a ten bag pour.
“A floor is only as good as the subfloor beneath it; deflection is the enemy of every joint.” – Master Flooring Axiom
Signs your leveler was mixed with too much water
Dusting, chalking, and spider-webbing are the primary indicators that your cementitious underlayment was mixed too thin. If the surface feels powdery to the touch or shows map cracking across the surface, the structural integrity is compromised and will not support laminate or carpet install requirements. You might also notice a white film on the surface. This is the laitance. It is a collection of the lightest minerals and polymers that floated to the top because the mix was too fluid. If you take a screwdriver and can easily gouge a deep line into the leveler, it is trash. A proper mix should be as hard as a sidewalk. Another sign is pinholing. When there is too much water, air bubbles have an easier time migrating to the surface but they leave behind tiny craters that weaken the surface tension. In showers or wet areas, this porousness is a recipe for mold growth and substrate rot. You need a dense, closed cell structure for a floor to last twenty years.
[image placeholder]
The scraping solution for weak surfaces
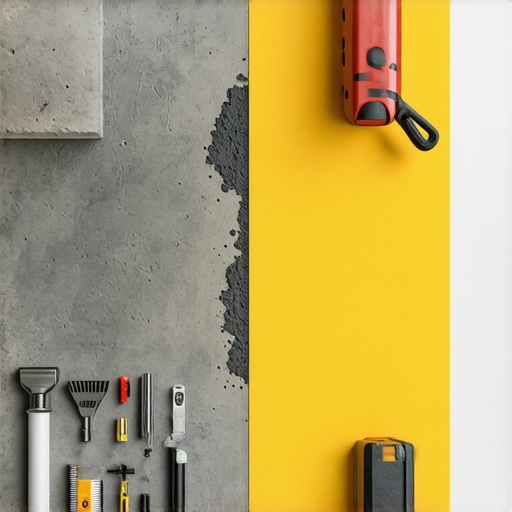
Removing laitance requires mechanical abrasion through grinding or scraping to reach the sound substrate underneath the watery residue. You must use a floor scraper or a diamond cup wheel to peel back the top millimeter of chalky cement until you see the darker, more solid material below. This is back-breaking work. I usually start with a heavy duty floor scraper to see how much of the soft stuff comes up. If it is really bad, the leveler will just flake off in big chunks. That is actually good news because it means you can get back to the clean concrete faster. If it is only slightly thin, you might just have a dusty surface. In that case, you need to use a walk-behind floor sander with a thirty grit sandpaper. You are looking for a surface that no longer transfers dust to your hand when you rub it. Once you hit solid material, you have to vacuum every single microscopic speck of dust. If you leave dust behind, your next pour or your adhesive will just bond to the dust, not the floor. I use a HEPA vacuum and then a damp microfiber mop. No exceptions.
Why your subfloor is lying to you about its strength
Subfloor deflection and compressive strength are often hidden by the topographical flatness of a self leveled surface that was mixed too thin. Even if the floor looks perfectly level, the density of the underlayment might be insufficient to handle static loads from heavy furniture or rolling loads from office chairs. Think about the physics of a point load. A heavy refrigerator sits on four small feet. Each foot exerts massive pressure on a tiny area. If the leveler is thin and chalky, those feet will eventually punch right through the leveler. You will see the floor start to dip around the appliance. If you are installing laminate, the boards will bridge over these weak spots. Every time you walk over them, the board flexes. That flex puts stress on the tongue and groove. Eventually, the click lock mechanism just snaps. Now you have a floor that bounces and squeaks. It is a nightmare to fix once the baseboards and transitions are in. You have to be honest with yourself during the prep phase. If the leveler is soft, rip it out now or pay for it later.
| Metric | Standard Mix | Over-Watered Mix |
|---|---|---|
| Compressive Strength | 4,000+ PSI | Less than 1,500 PSI |
| Surface Texture | Smooth and Hard | Dusty and Chalky |
| Bond Strength | High Adhesion | Prone to Shearing |
| Drying Time | 4 to 24 Hours | Delayed/Inconsistent |
| Coloration | Consistent Grey | White Streaks/Laitance |
The ghost in the expansion gap
Perimeter expansion is a fundamental requirement for floating floors and hardwood to prevent buckling when relative humidity fluctuations cause the flooring material to expand. When you fix a thin leveler by pouring a new layer, you must ensure you have foam expansion strips around the walls to prevent the leveler from pinning the subfloor. If the leveler bonds to the drywall or the bottom plate of your studs, it creates a rigid cage. The floor has nowhere to go. I have seen solid oak floors lift four inches off the ground because there was no gap. When you are re-pouring over a thin mix, the new leveler needs to be at least one eighth of an inch thick to have its own internal strength. Anything thinner than that is called a feather edge, and while some products allow it, most will just crack. You need to treat the second pour with more respect than the first. Use a spiked roller to get the air out. The spiked roller helps the two layers knit together at a molecular level, especially if you used a high quality primer between them.
“The compressive strength of a cementitious underlayment is inversely proportional to the water-to-powder ratio during the initial hydration phase.” – Subfloor Engineering Standards
Preparation for laminate and carpet install after a fix
Laminate flooring requires a flatness tolerance of one eighth inch over ten feet, while carpet install can tolerate more subfloor irregularities but still requires a dust-free and structurally sound base. If you are going back over a corrected leveler with laminate, check the flatness again with a ten foot straight edge. Do not trust your eyes. The shadows in a room can hide a quarter inch dip. For carpet, the main concern is the tack strip. If the leveler is thin, the nails in the tack strip will not hold. They will just pop out like they are in sand. You will be trying to stretch the carpet and the whole strip will just fly off the floor. I always recommend using a high solids acrylic primer before the second pour. This primer acts as a bridge. It soaks into the old, weak leveler and hardens it while providing a sticky surface for the new leveler to grab onto. It is like glue for your cement.
Final checklist for a subfloor rescue
- Check the hardness of the existing leveler with a scratch test.
- Mechanically remove all laitance and dust until you hit solid material.
- Vacuum the entire surface with a HEPA rated industrial vacuum.
- Apply a high quality acrylic primer diluted according to the substrate porosity.
- Measure water for the new batch using a graduated cylinder, not a bucket guess.
- Mix with a low speed drill to avoid entraining excess air into the slurry.
- Maintain a wet edge during the pour to ensure a monolithic surface.
- Allow the fix to cure for at least twenty four hours before foot traffic.