How to Find the Leak in a Tiled Shower Using a Single Cup of Water
The 8 ounce diagnostic that saves thousands
Finding a tiled shower leak with one cup of water involves a precise, sequential isolation of the drain, the curb, and the grout joints to identify moisture migration through capillary action. This method focuses on the drain flange, waterproof membrane, and subfloor deflection to pinpoint failures without destructive testing.
I smell like WD-40 and oak dust most days. I spent three days grinding concrete on a job last month just so the floor wouldn’t click like a castanet. That job taught me that people look at a floor and see a color, but I see a structural engineering challenge. When a homeowner calls me because their ceiling is dripping below a bathroom, they usually expect me to rip out the whole pan. I don’t start with a sledgehammer. I start with a single cup of water. Most guys skip the leveling compound. They think the underlayment will hide the dip. It won’t. The same logic applies to showers. If the pre-slope wasn’t leveled perfectly, water sits. It stagnates. Eventually, it finds a way through the smallest pinhole in your membrane.
The physics of capillary draw in grout joints
Capillary draw in grout joints occurs when water molecules are pulled into microscopic voids within cementitious grout or thin-set mortar. This hydrostatic movement is accelerated by porous substrates and can be identified by observing darkened grout lines that do not dry at the same rate as the surrounding ceramic or porcelain tile.
Water is a persistent enemy. It has a polar molecular structure that allows it to climb up walls. In a shower, the grout is often the first line of defense, but it is never truly waterproof. Even if you use a high-end sealer, the sealer eventually breaks down. When you pour a small amount of water directly onto a suspect grout line, you are looking for immediate absorption. If that water disappears within seconds, your grout is no longer a barrier. It is a sponge. This is why floor leveling is so vital in the subfloor stage. If the floor beneath the shower pan has a dip, the tile will flex. That flex creates micro-cracks in the grout that are invisible to the naked eye. You think the floor is solid. It is not. It is moving every time you step on it.
“A floor is only as good as the subfloor beneath it; deflection is the enemy of every joint.” – Master Flooring Axiom
Isolation of the drain flange
Isolating the drain flange requires blocking the internal weep holes and the primary waste pipe to test the clamping ring integrity. This process identifies if the waterproof liner was properly integrated with the drain assembly, preventing subfloor rot and mold growth in the joist cavities.
The drain is the most common failure point. I see it every week. Installers get lazy with the clamping ring. They don’t apply the bead of 100 percent silicone between the liner and the drain base. To test this with a cup of water, you have to be surgical. You take your cup and pour it slowly, and I mean slowly, only into the drain itself. Do not get the surrounding tile wet. If the leak shows up downstairs after only pouring water into the pipe, the problem is the plumbing. But if it only leaks when you pour water around the edge of the metal grate, the clamping ring has failed. It is a simple binary test. The chemistry of the bond between the PVC liner and the cast iron or ABS drain is a fragile thing. Any movement in the floor leveling around the drain area will snap that bond.
The ghost in the expansion gap
Shower expansion gaps must be filled with 100 percent silicone sealant rather than hard grout to accommodate thermal expansion and structural shifting. Failure to provide a flexible joint at the plane change leads to shearing forces that rupture the waterproof membrane behind the tile.
Every floor needs room to breathe. Whether I am doing a carpet install or laying down high-end laminate, I leave gaps at the perimeter. In a shower, the perimeter is where the floor meets the wall. If you grout that corner, it will crack. It is a mathematical certainty. When you use your cup of water, pour it specifically into those corner joints. If the water vanishes, it is likely running down the back of the wallboard. This is the difference between a floor that lasts thirty years and one that fails in three. I have seen laminate floors buckled three inches off the ground because some DIY enthusiast didn’t leave a gap under the baseboard. A shower pan is no different. It is a vessel that is constantly expanding and contracting with the heat of the water.
| Membrane Type | Permeability Rating | Flexibility Index | Ideal Application |
|---|---|---|---|
| Liquid Applied | 0.5 perms | Medium | Custom Benches |
| Sheet Membrane | 0.01 perms | High | Steam Showers |
| CPVC Liner | 0.1 perms | Low | Standard Pans |
The myth of the waterproof wear layer
Waterproof wear layers in LVP and laminate flooring prevent surface penetration but do not protect the locking mechanisms or subfloor from hydrostatic pressure from below. Understanding mil thickness and core composition is essential for determining the moisture resistance of any floating floor system.
While we are talking about leaks, let’s clear up a lie told by big-box retailers. They sell waterproof laminate. There is no such thing as a truly waterproof floating floor. The planks themselves might be plastic, but the system is not a bathtub. If you have a leak in your shower that migrates under the bathroom door and hits your laminate, that floor is dead. The water gets into the click-lock joints and sits there. It swells the edges. I have seen $5,000 worth of flooring ruined by a single leaky shower curb. While most people want the thickest underlayment, too much cushion actually causes the locking mechanisms on LVP to snap under pressure. It creates a trampoline effect. You want a high-density, thin underlayment that resists compression.
“The National Wood Flooring Association (NWFA) states that moisture testing is not a suggestion but a requirement for the structural integrity of the installation.” – NWFA Technical Manual
Systematic leak detection checklist
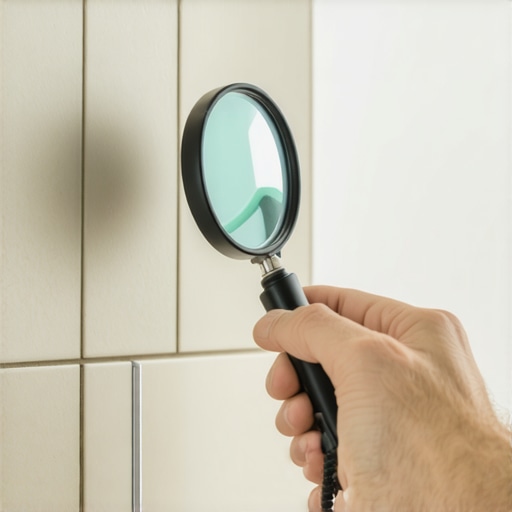
- Inspect the grout for pinholes using a magnifying glass and a bright LED light.
- Perform the drain isolation test by pouring 8 ounces of water into the throat of the drain.
- Apply water to the shower curb independently of the floor to check the wrap of the membrane.
- Check the height of the transition strip to ensure water is not escaping via the door frame.
- Verify the integrity of the silicone caulk at all changes of plane and around the escutcheon plates.
Molecular realities of thin-set bonding
Modified thin-set mortar utilizes polymer additives to create a mechanical and chemical bond between the substrate and the tile. The curing process requires a specific evaporation rate, which can be disrupted by excessive moisture in the concrete slab or plywood subfloor.
When I am mixing thin-set, I am looking for the perfect peanut butter consistency. If the subfloor is too dry, it sucks the water out of the mortar before it can cure. If it is too wet, the mortar never reaches its full strength. When a shower leaks, the thin-set often turns back into a mushy paste. This is why I am so obsessed with moisture meters. I don’t care if the concrete looks dry. I want to know the internal relative humidity. If you are doing a carpet install nearby, you might not care about a little dampness. But for tile, it is the kiss of death. The water you pour from your cup will tell you a story about what is happening beneath the surface. If the tile sounds hollow when you tap it after the water test, you have delamination. The bond is gone. The physics have failed.
The final diagnosis of the shower pan
The cup of water test is a lesson in patience. You cannot rush a leak. You pour, you wait, you check the crawlspace. You pour again. It is a slow process of elimination. If you find that the leak only occurs after the water hits the walls, you know your problem is the plumbing behind the valves or the tile backing. If the leak starts the moment water touches the floor, your pan is compromised. Do not let a contractor tell you that a little bit of grout will fix it. Grout is a cosmetic finish. It is not a structural water barrier. If the pan is leaking, it has to come out. There are no shortcuts in flooring. You either do it right, or you do it twice. I prefer to do it once and then go home smelling like sawdust and success. Use the cup. Listen to the subfloor. It never lies to you if you know how to listen. The 1/8 inch that ruins everything is usually the 1/8 inch you ignored during the leveling phase.