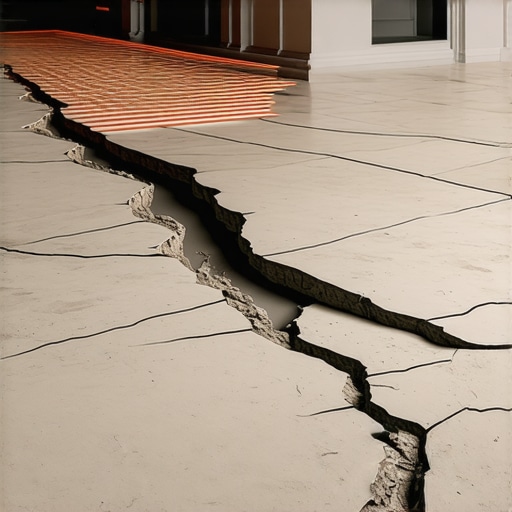
Why Your Floor Leveler is Cracking Over Radiant Heating Wires
I spent three days grinding concrete on a job last month just so the floor wouldn’t click like a castanet. The homeowner had tried to save a few bucks by pouring a cheap bag of big box store leveler over their new radiant heating wires. Within forty eight hours, the whole room sounded like a bowl of Rice Krispies. Cracks were webbing across the surface like a shattered windshield. This is the reality of subfloor physics. If you ignore the science of thermal expansion, your floor will fail. I smell like oak dust and WD-40 most days because I do this the hard way. I do it the right way. A floor is not just something you walk on. It is a structural engineering project that happens to be under your feet. When you add heat to the mix, you are adding energy. That energy has to go somewhere. If your leveler is too rigid or your primer is low quality, that energy will tear your subfloor apart. Most guys skip the leveling compound or they mix it with too much water. They think the underlayment will hide the dip. It won’t. I have seen fifteen thousand dollar wide plank walnut floors cup until they looked like potato chips because the installer did not respect the moisture and heat balance. We are going to look at the chemistry and the mechanical failures that cause these cracks.
The physics of thermal expansion and substrate movement
Floor leveler cracks over radiant heating wires because the heating cables expand at a different rate than the surrounding cementitious material. This creates shear stress at the bond line between the wire and the leveler. Without proper polymer modification and reinforcement, the leveler cannot absorb this movement and fractures. Radiant heating systems are dynamic. They are not static elements. When you flip that switch, those wires or tubes heat up and grow in size. This is basic thermodynamics. The self leveling underlayment, or SLU, is a rigid body. If that body does not have the tensile strength to resist the expansion of the wires, it will snap. Many installers use a standard leveler designed for flat, cold subfloors. That is a recipe for disaster. You need a fiber reinforced or highly polymer modified product that can flex. If the leveler is too brittle, the heat creates microscopic fissures that eventually become structural cracks. These cracks then telegraph through your laminate or cause the grout in your tile to pop. It is a chain reaction of failure that starts the moment the heat is turned on for the first time.
“A floor is only as good as the subfloor beneath it; deflection is the enemy of every joint.” – Master Flooring Axiom
The failure of the chemical bond and priming errors
Priming is the most frequent point of failure in any floor leveling project involving radiant heat. If the primer is not applied correctly, the leveler will not bond to the substrate. The heat from the wires then causes the leveler to delaminate and crack as it floats freely. I see this in every failed shower and every botched laminate install. Guys think they can just sweep the dust away and start pouring. It does not work that way. You need a high quality acrylic or epoxy primer that creates a bridge between the old concrete and the new leveler. When you have radiant wires, the heat intensifies any weakness in that bond. The heat can cause the leveler to expand and contract. If it is not glued tight to the floor below, it will lift. Once it lifts, it has no structural support. Then you walk on it and it cracks. It is simple mechanical failure. You also have to consider the porosity of the subfloor. A dry, thirsty concrete slab will suck the moisture out of the leveler before the cement has time to hydrate. This leaves you with a weak, powdery mess that cannot handle the stress of a heating cycle. You have to prime until the floor stops soaking it up. Sometimes that takes two or three coats. If you skip this, you might as well throw your money in the trash.
The chemical reality of self leveling compounds
The chemical composition of your leveling compound determines its ability to survive a radiant heat environment. High performance levelers use calcium aluminate cement instead of standard Portland cement to reduce shrinkage and increase early strength. Standard cement shrinks as it cures. When you wrap that shrinking material around a heating wire, you are creating internal tension. Add the heat from the wire later on and the tension exceeds the material’s limit. You need to look at the tech data sheet for your bag of leveler. Look for the term polymer modified. These polymers act like a glue inside the cement matrix. They allow the leveler to bend just a tiny bit without snapping. It is the difference between a glass rod and a plastic ruler. One breaks under pressure while the other gives. In the world of flooring, a little bit of give is what keeps the floor in one piece. [image_placeholder] This is especially true if you are prepping for a carpet install or laminate where the subfloor needs to be perfectly flat but also thermally stable. If the leveler shrinks too much during the initial cure, it can actually pull itself off the floor or crush the heating wires. It is a violent chemical process that happens on a microscopic scale.
| Leveler Type | Compressive Strength | Thermal Flexibility | Best Use Case |
|---|---|---|---|
| Standard Portland | 3000 PSI | Low | Basement floors without heat |
| Polymer Modified | 5000 PSI | High | Radiant heat over plywood |
| Fiber Reinforced | 6000 PSI | Very High | Large format tile and showers |
| Gypsum Based | 2500 PSI | Moderate | Acoustic mats and wood frames |
Why thickness and depth are non negotiable
Minimum thickness requirements for floor levelers over radiant heat are typically one quarter inch above the highest point of the wire. If the pour is too thin, the leveler will lack the mass to resist the thermal stress and will crack immediately. I see guys try to skim coat over wires. This is a massive mistake. You are creating a thin, brittle shell over a moving heat source. The leveler needs mass. It needs to act as a thermal mass that absorbs and distributes the heat evenly. When the leveler is too thin, you get hot spots. These hot spots cause localized expansion that the thin material cannot handle. Think of it like an ice cube versus a sheet of ice. The sheet is much harder to break. You also have to consider the height of your transitions. I know homeowners hate a big threshold, but I would rather have a half inch step than a cracked floor. If you are doing a laminate or carpet install, you need that flat, thick base. If the leveler is thin, it will break apart under the weight of furniture or even heavy foot traffic. You are building a foundation, not putting on a coat of paint. Treat it with the respect a foundation deserves.
The danger of air bubbles and pinholing
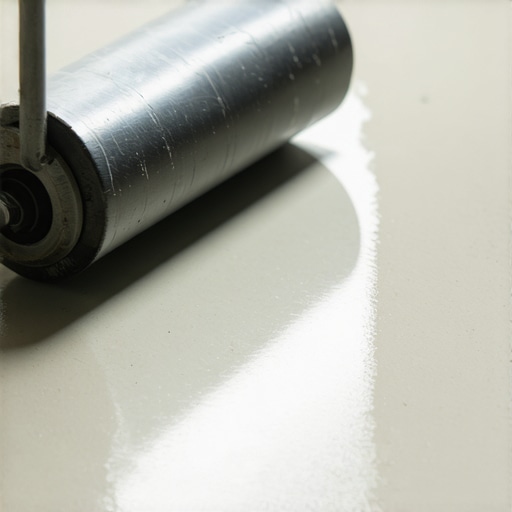
Air bubbles trapped in the leveler during the mixing process create voids that weaken the overall structure. Under radiant heat, these voids act as stress concentrators where cracks are likely to begin. You have to use a spiked roller. If you don’t roll the leveler while it is wet, you are leaving thousands of tiny air pockets in the mix. When the heating wires turn on, the air inside those pockets expands. This creates internal pressure. If the leveler is already under stress from thermal expansion, these bubbles are the breaking point. Mixing is also a science. If you use a high speed drill, you are whipping air into the mud. You need a low speed, high torque mixer. You also have to follow the water ratios to the milliliter. Too much water and the solids settle at the bottom while the top is weak and chalky. Too little water and it won’t flow, leaving you with humps and dips. A mechanic knows his tools and a floor guy knows his water bucket. Don’t eyeball it. Use a measuring pitcher. Your floor’s life depends on it.
- Check subfloor moisture levels before starting any work.
- Vacuum the floor twice to remove every speck of dust.
- Apply primer according to the manufacturer’s specific dilution ratio.
- Secure radiant wires every six inches to prevent them from floating.
- Mix leveler with a low speed drill to avoid entraining air.
- Use a spiked roller to release surface tension and air bubbles.
- Wait at least twenty four hours before walking on the surface.
- Wait seven to fourteen days before turning on the radiant heat.
Thermal shock and the curing process
Turning on a radiant heating system too soon after pouring leveler will cause thermal shock and catastrophic cracking. The cement must fully hydrate and gain its structural integrity before it is subjected to heat cycles. This is where people get impatient. They want their warm floors now. But cement hydration is a chemical reaction that takes time. If you heat up the leveler while it is still curing, you are driving the moisture out too fast. This stops the chemical reaction and leaves the leveler weak. It also causes the material to expand before it has the strength to hold itself together. Most manufacturers recommend waiting at least a week, sometimes two, before turning the heat on. And when you do turn it on, you don’t just crank it to eighty degrees. You increase the temperature by two or three degrees a day. This allows the floor to acclimate to the stress. It is a slow break in period. If you shock the system, you will hear the cracks forming. It sounds like a gunshot in a quiet house. Once that happens, there is no fixing it. You are looking at a complete tear out. Do not let your curiosity ruin your investment.
“Thermal management is the difference between a permanent floor and a temporary one.” – Tile Council Standards
The role of expansion gaps at the perimeter
An expansion gap at the perimeter of the room is mandatory to allow the entire floor assembly to move as it heats up. If the leveler is poured tight against the walls, it has nowhere to go and will buckle or crack in the center. Every material in your house moves. The drywall, the studs, the subfloor, and the leveler. When the heat goes on, the leveler slab gets slightly larger. If it hits a solid wall, the pressure builds up until something gives. Usually, the leveler will arch up off the floor or crack into pieces. I use foam expansion strips around the entire perimeter. This creates a cushion. It is a simple step that most guys skip because they think the baseboard will cover the gap. The gap isn’t for looks; it is for survival. This is especially true for large open areas. The bigger the pour, the more expansion you have. If you have a thirty foot run of leveler, that slab can move a significant amount. Without a gap, you are building a ticking time bomb. This applies to every finish, whether you are doing a laminate install or putting down tile. The floor must be allowed to breathe. If you choke it, it will die.