How to Fix a Loose Shower Handle Without Calling a Pro
The smell of WD-40 and oak dust follows me everywhere. It is the scent of a man who has spent twenty five years fixing what others broke. When you walk into a bathroom and feel that slight wiggle in the shower handle, you might think it is a minor annoyance. You are wrong. That wiggle is the first sign of a structural failure that can lead to a rotted subfloor and a collapsed joist system. I spent three days grinding concrete on a job last month just so the floor would not click like a castanet because the previous installer ignored a subfloor dip. The same level of neglect happens inside shower walls. A loose handle is not just a cosmetic issue. It is a mechanical failure that allows water to bypass the escutcheon plate and feed the mold growing on your 2×4 studs. I have seen fifteen thousand dollar hardwood floors cupping like potato chips because a slow leak from a shower handle traveled along the plumbing line and settled under the planks in the hallway. Fixing it requires more than a screwdriver. It requires an understanding of metallurgy and hydraulic pressure.
The wobbling disaster waiting to happen
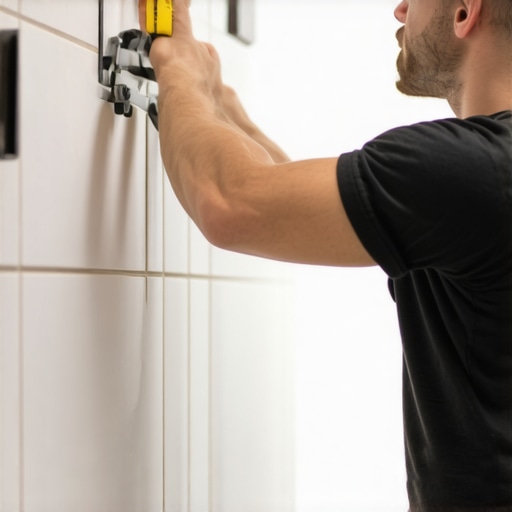
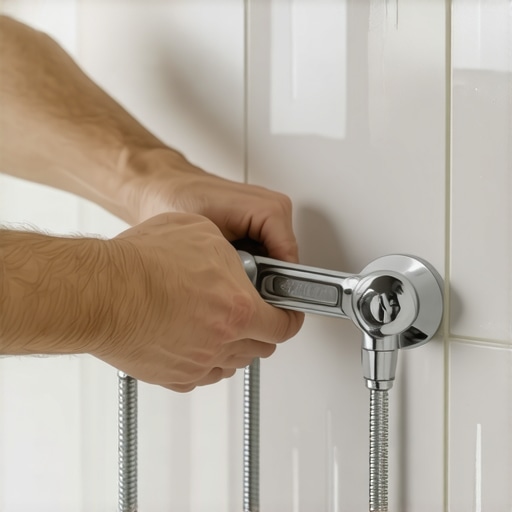
A loose shower handle is typically caused by a loosened set screw, a worn cartridge stem, or a failed valve bracket within the wall cavity. To fix it, you must identify if the play is in the handle attachment or the valve body itself. Tightening the hex screw or replacing the cartridge often resolves the issue. Most homeowners wait until the handle falls off in their hand. By then, the internal splines of the handle are usually stripped. This results in a repair that costs four times as much as a five minute tightening job. The physics of a shower valve are simple but unforgiving. You have a brass or plastic stem protruding from a valve body. The handle sits on this stem. It is held in place by friction and a single screw. If that screw backs out even half a millimeter, the leverage you apply when turning the water on creates a shearing force. Over time, this force rounds off the teeth of the gear. Once those teeth are gone, the handle is junk.
The anatomy of a standard pressure balance valve
Understanding the valve body, cartridge assembly, and escutcheon plate is essential for any structural repair involving bathroom fixtures. These components work in a pressurized environment where thermal expansion and vibration constantly challenge the integrity of the fasteners. You need to know what you are looking at before you start stripping screws. Most modern showers use a pressure balance valve. This device keeps you from getting scalded when someone flushes a toilet. It is a complex piece of engineering. Inside the valve is a cartridge. The cartridge has a stem. This stem is what the handle grabs onto. If the handle is loose, it is usually because the connection between the handle and the stem has failed. However, if the entire assembly moves, including the plate against the tile, you have a structural mounting problem. This is where the real work begins. You are no longer just a homeowner with a wrench. You are a mechanical technician ensuring the longevity of the wet area.
| Tool Name | Specific Use | Pro Tip |
|---|---|---|
| Hex Key Set | Tightening the set screw | Use metric and SAE to ensure a perfect fit without stripping. |
| Plumbers Grease | Lubricating the cartridge | Only use silicone-based grease to avoid degrading rubber O-rings. |
| Thread Locker | Securing the set screw | A single drop of blue Loctite prevents future vibration loosening. |
| Needle Nose Pliers | Removing the retaining clip | Pull straight up to avoid bending the brass housing. |
Why your subfloor is lying to you
The subfloor moisture content can increase silently when a loose shower handle allows water to seep behind the tile substrate and onto the plywood decking. This moisture ruins floor leveling compounds and causes LVP locking mechanisms to fail under the pressure of expanding wood. I have walked into homes where the homeowner thought their floor was uneven because of a bad pour. In reality, the subfloor had swollen by a quarter inch because a loose shower handle was leaking a few drops every time someone bathed. That water follows the pipe. It finds the hole in the floor where the drain goes. It pools there. It rots the subfloor from the bottom up. By the time you see the damage on your laminate or hardwood, the structural integrity of the room is compromised. You are not just fixing a handle. You are protecting the foundation of your home. A floor is only as good as the subfloor beneath it. Deflection is the enemy of every joint. If that subfloor gets wet and soft, your floor will bounce. Then your tiles will crack. Then your grout will crumble. It is a domino effect of failure.
“A floor is only as good as the subfloor beneath it; deflection is the enemy of every joint.” – Master Flooring Axiom
The physics of the set screw failure
The set screw failure occurs when vibration and corrosion break the mechanical bond between the fastener and the valve stem. This is often exacerbated by mineral deposits from hard water that act as an abrasive, grinding down the metal threads over months of use. Most people think they can just tighten the screw and be done. They ignore the chemistry of the metal. If you have hard water, calcium and magnesium are building up inside that handle. When you turn the handle, those minerals act like sandpaper. They wear down the brass stem. Eventually, the hole for the set screw becomes wallowed out. At that point, no amount of tightening will fix it. You need to clean the area with a white vinegar solution to dissolve the minerals. Then you apply a thread locking compound. This is a liquid plastic that hardens in the absence of air. It fills the microscopic gaps between the threads. It stops the vibration from backing the screw out again. This is how a pro does it. We don’t just turn a wrench. We manage the forces of nature.
- Remove the decorative cap covering the set screw hole.
- Inspect the internal splines for metal shavings or rounding.
- Clean the valve stem with a wire brush to remove oxidation.
- Apply a drop of medium-strength thread locker to the screw threads.
- Reassemble and test the torque of the handle.
The chemistry of thread locking compounds
Using anaerobic adhesives like blue thread locker creates a vibration-proof seal that prevents the set screw from backing out during the thermal cycles of hot and cold water usage. These chemicals are designed to polymerize in the tight spaces between metal fasteners, ensuring a permanent but removable bond. While most people want the thickest underlayment, too much cushion actually causes the locking mechanisms on LVP to snap under pressure. The same logic applies here. You do not want a thick, rubbery glob of caulk holding your handle. You want a precise, chemical bond. When hot water flows through the valve, the metal expands. When the water turns cold, it contracts. This constant expansion and contraction is like a slow-motion earthquake for your plumbing. It works the screws loose. The thread locker absorbs that energy. It keeps the handle tight. If you skip this step, you will be back in the shower with a screwdriver in six months. Do it right the first time so you never have to do it again.
Identifying the specific type of looseness
Distinguishing between handle play and valve movement is the first step in diagnosing shower fixture instability. If the escutcheon plate moves when you turn the handle, the backing block behind the wall has likely rotted or the mounting screws have corroded away. This is the nightmare scenario. If the valve itself is moving, the handle isn’t the problem. The structure is. Usually, this means water has been getting behind the wall for a long time. The wood blocking that holds the valve in place is now the consistency of wet cardboard. You can’t fix this through the small hole in the tile. You might have to go through the wall in the closet behind the shower. I hate doing that, but it is better than letting the valve snap off and flood the house. You need to secure the valve to a new piece of pressure-treated lumber. Use stainless steel screws. They won’t rust when the humidity hits them. This is the difference between a handyman and an architect of the home. We look for the root cause.
“Moisture management is the primary directive of every successful floor and wall installation; once the envelope is breached, the structure begins its descent into failure.” – TCNA Handbook Supplement
Dealing with a stripped hex head
A stripped hex head requires precision extraction tools or left-handed drill bits to remove the seized fastener without damaging the chrome finish of the shower handle. This situation often arises from using improperly sized wrenches or salty environmental corrosion that welds the screw into the handle body. I have seen guys try to drill these out and slip, ruining a two hundred dollar handle and a three hundred dollar tile job in one second. Don’t be that guy. If the hex head is round, stop. Get a small screw extractor. Use a slow speed on your drill. The heat from the friction can actually help loosen the bond. Once the screw is out, don’t reuse it. Go to the hardware store and buy a stainless steel replacement. Most of the screws that come in those cheap big-box store kits are made of garbage metal. They are designed to fail so you have to buy a new faucet. I don’t play that game. I use hardware that will outlast the house.
Waterproofing the penetration point
The penetration point where the valve stem exits the shower wall must be sealed with 100 percent silicone caulk or a rubber gasket to prevent capillary action from pulling water into the wall cavity. This is where most flooring failures begin. If you have a curbless shower or large format tile, any water behind the wall will eventually find its way to the thin-set mortar bed and travel under the bathroom floor. This is why I am a stickler for the details. The escutcheon plate usually has a foam gasket. That gasket is worthless after two years. It dries out and cracks. I always throw it away and use a bead of high-quality silicone. But here is the trick. Leave a small gap at the very bottom of the circle. This is a weep hole. If water does get behind the plate, it needs a way to get out. If you seal it perfectly all the way around, the water gets trapped. Trapped water is the enemy. It will find a way through your waterproofing membrane and into your subfloor. It will turn your plywood into mulch.
The 1/8 inch that ruins everything
In the world of structural engineering, a 1/8 inch gap is a canyon. When a shower handle is loose, that small amount of play allows the cartridge to vibrate against the brass housing. This vibration leads to micro-fractures in the solder joints of the plumbing. Eventually, you get a pinhole leak. This leak is silent. It is deadly. It stays inside the wall. It feeds the mold. It rots the floor. I once saw a subfloor so far gone that the toilet was leaning five degrees to the left. The cause? A loose shower handle three feet away. The water had been traveling along the floor joist for five years. The homeowner never knew because they never bothered to tighten a ten cent screw. Precision matters. Alignment matters. If your handle isn’t perfectly perpendicular to the wall, it’s wrong. If it jiggles, it’s broken. Fix it now or pay me to replace your entire floor in three years. The choice is yours. I prefer to fix the screw.