The ‘Ping Pong’ Method for Checking Shower Drainage
I spent three days grinding concrete on a job last month just so the floor wouldn’t click like a castanet. Most guys skip the leveling compound. They think the underlayment will hide the dip. It won’t. I was working on a job where a homeowner wanted a quick laminate install over an old slab that looked like the rolling hills of Kentucky. If I had just rolled out the foam and started clicking planks, the locking tabs would have snapped within a month. I had to get the diamond cup wheel out. The dust was everywhere, even with the vacuum running. It gets under your nails and stays there. But when I was done, that slab was flat to within an eighth of an inch over ten feet. That is the difference between a floor that lasts thirty years and one that fails in thirty days. This same obsession with physics is what makes the ping pong method so vital for your shower.
Gravity is the only inspector that matters
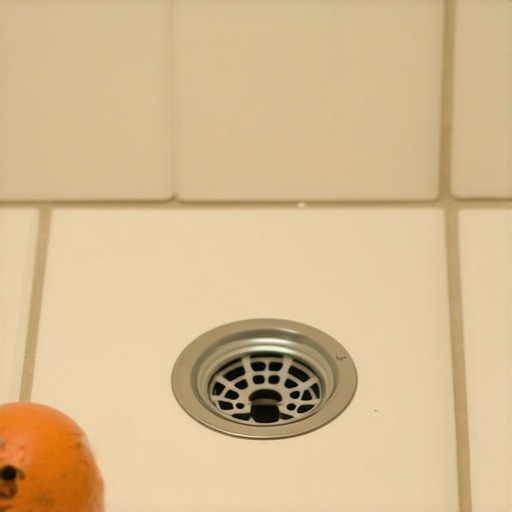
The ping pong method for checking shower drainage involves placing a standard table tennis ball at the furthest points of a dry shower floor to verify a consistent 1/4 inch per foot slope toward the drain. If the ball stops or deviates, it indicates a subfloor irregularity or improper thin set application that will eventually lead to standing water and mold. I have seen guys spend thousands on high end Italian marble only to have the water sit in a puddle because they didn’t check the pitch. You cannot argue with gravity. A level can lie if you do not calibrate it, but a round ball on a slope tells the truth every single time. It is a simple tool for a complex job.
The pre slope is the real foundation
The shower pre slope is a foundational layer of sloped mortar installed beneath the waterproof liner to ensure that any moisture migrating through the tile and mud bed is directed toward the weep holes of the drain assembly. Skipping this step leads to stagnant water, foul odors, and structural rot. Most installers think the liner goes on the flat subfloor. That is a mistake that ruins houses. When you put a liner on a flat surface, the water that soaks through your grout just sits there in the mud bed. It turns into a swamp. You need a slope under the liner and a slope on top of the liner.
“A floor is only as good as the subfloor beneath it; deflection is the enemy of every joint.” – Master Flooring Axiom
The chemistry of the mud bed
Shower mud beds consist of a dry pack mortar mix, typically a 4 to 1 or 5 to 1 ratio of sand to Portland cement. This mixture provides the compressive strength necessary to support heavy tile while remaining porous enough to allow moisture to travel to the drain system via capillary action. You want it to be the consistency of a damp snowball. If it is too wet, it shrinks and cracks. If it is too dry, it won’t bond. I like to use a sharp silica sand. It locks together better than the round stuff you find at the beach. This is not a place for shortcuts. You are building a stone lung that needs to breathe water toward the drain.
Comparing substrate performance and drainage efficiency
When you are planning a bathroom, you have to understand how different materials handle the pitch. A carpet install is easy because the padding is forgiving, but tile is a rigid system that breaks if the ground moves. Here is how different materials stack up in a moisture heavy environment.
| Installation Factor | Standard Requirement | Performance Impact |
|---|---|---|
| Subfloor Deflection | L/360 for ceramic | Prevents grout cracking |
| Mortar Ratio | 4 parts sand 1 part cement | Ensures proper drainage |
| Perimeter Gap | 1/8 inch minimum | Allows for expansion |
| Thin set coverage | 95 percent minimum | Eliminates hollow spots |
Why the ping pong ball never lies
The ping pong method works because the low mass and spherical shape of a table tennis ball respond to the slightest gravitational pull on a smooth surface. By observing the ball’s path, an installer can detect microscopic dips or flat spots in the tile work that would otherwise hold puddles of water. I once checked a job where the tile looked perfect. The lines were straight and the grout was clean. I dropped the ball in the back corner and it just sat there. It didn’t move an inch. The installer had used too much thin set in the center of the pan, creating a slight hump. That hump was enough to trap a half inch of water every time someone took a shower.
The checklist for a perfect pitch
- Verify the subfloor is rigid with no bounce or deflection.
- Install a pre slope of at least 1/4 inch per foot before the liner.
- Ensure the drain assembly weep holes are clear of mortar.
- Use a 2 percent slope for the final tile surface.
- Perform the ping pong test on a dry floor before grouting.
- Check the perimeter expansion joints for a 1/8 inch gap.
The physics of the four way slope
The four way slope, also known as an envelope cut, is the process of mitering tiles along the diagonal lines of a square shower pan to maintain a uniform pitch from every corner to a center drain. This geometry is essential for large format tiles that cannot naturally bend to follow a curve. If you try to run a large tile straight across a slope, you get lippage. That is where one edge sticks up higher than the other. It is a toe stubber and a water stopper. I always tell people that if they want big tiles, they better be prepared for the extra labor of the envelope cut. It is a math problem as much as it is a construction task.
“The slope of the finished floor must be at least 1/4 inch per foot and not more than 1/2 inch per foot to the drain.” – TCNA Handbook Guidelines
Molecular bonds and modern adhesives
Modified thin set mortars contain polymers like ethylene vinyl acetate that increase shear strength and allow for slight movement between the tile and the substrate. These chemical additives are what allow a modern shower to survive the thermal expansion of hot water. When you mix your thin set, you need to let it slake. That is a ten minute rest that lets the chemicals fully hydrate. If you skip the slake, your bond will be weak. I see guys rushing it all the time. They want to get the tile down and go home. But the chemistry doesn’t care about your schedule.
The 1/8 inch that ruins everything
Expansion gaps are the small spaces left around the perimeter of a tile or laminate floor to allow the material to expand and contract with changes in temperature and humidity. Without these gaps, a floor will tent or buckle as it pushes against the walls. I have seen LVP floors that looked like a mountain range because the guy shoved the planks tight against the baseboard. You need that gap. In a shower, that gap gets filled with 100 percent silicone caulk, never grout. Grout is rigid. Silicone is flexible. If you use grout in the corners, it will crack in six months.
Leveling the playing field before the mud goes down
Floor leveling is the process of using a self leveling underlayment or a mechanical grinder to create a flat substrate within industry tolerances, typically 1/8 inch over 10 feet. This is a mandatory step for any laminate or tile installation to prevent structural failure of the locking joints. Many people think they can just buy the thickest underlayment to hide a bad floor. That is a lie. Too much cushion actually causes the locking mechanisms on LVP to snap under pressure because the floor flexes too much when you walk on it. You want a solid base, not a trampoline.
The final word on gravity
If you want a shower that doesn’t smell like an old pond, you have to respect the slope. The ping pong method is the easiest way to make sure you got it right. It takes ten seconds and costs about fifty cents. Don’t let a lazy installer tell you it isn’t necessary. If the ball doesn’t roll, the water won’t either. It is that simple. I have spent my life on my knees making sure things are level and sloped correctly. It is hard work, but it is the only way to do it. Keep your tools clean and your subfloors flat.