How to Level a Sagging Floor with a Bottle Jack
Most guys skip the leveling compound and they think the underlayment will hide the dip. It won’t. I spent three days grinding concrete on a job last month just so the floor wouldn’t click like a castanet because the previous installer ignored a three-quarter inch sag in the center of the room. You can buy the most expensive wide-plank white oak in the world, but if your subfloor has the structural integrity of a wet noodle, that floor will fail. I have seen fifteen thousand dollar installations ruined because someone was too lazy to crawl into the basement with a level and a jack. We are not just talking about aesthetics here. We are talking about the physics of load-bearing members and the biological reality of wood fiber compression. When a floor sags, it is usually because the joists have reached their limit or the soil beneath the piers has shifted. Fixing it requires more than just a quick crank on a bottle jack. It requires an understanding of how force moves through a structure. If you move too fast, you will crack the drywall on the third floor. If you move too slow without proper bracing, you risk a catastrophic collapse of the work area. This is a surgical operation for your home.
The structural reality of a sagging joist
To level a sagging floor with a bottle jack you must identify the low point using a laser level or string line then gradually apply upward pressure through a temporary post to redistribute the load back to the foundation. This process requires slow adjustments over several weeks to prevent structural damage. The wood fibers in your joists have undergone what we call creep. This is a long-term deformation under constant stress. Over decades, the lignin and cellulose in the wood have shifted to accommodate the weight of your furniture, your walls, and the floor itself. You cannot simply undo forty years of gravity in forty minutes. You have to coax the wood back into its original position while ensuring the load path is maintained from the ridge beam all the way down to the footings. If you ignore the load path, you are just moving the problem from the floor to the ceiling. Most homeowners fail to realize that the floor is a system, not a surface. Every joint, every nail, and every adhesive bond is under tension. When that tension is uneven, the system screams in the form of squeaks, pops, and eventually, structural failure.
“A floor is only as good as the subfloor beneath it; deflection is the enemy of every joint.” – Master Flooring Axiom
Tools for the structural correction
Essential tools for leveling a floor include a twenty ton hydraulic bottle jack, heavy duty structural timber posts, a laser level for precision measurement, and solid concrete base blocks. You need equipment that can handle the sheer tonnage of a residential structure without flinching. A standard automotive jack is not sufficient for this task. You need a bottle jack with a wide base and a reliable release valve that allows for micro-adjustments. I prefer twenty-ton jacks even for smaller lifts because they operate further away from their mechanical limit, which provides a significant safety margin. You also need a structural beam, often a 4×4 or a 6×6, to act as the temporary jack post. Never jack directly against a single joist if you can avoid it. You want to spread that lift across multiple joists using a header beam to prevent the jack from simply punching a hole through the wood. The base of your jack must sit on a solid, level surface. If you are in a crawlspace with dirt floors, you must use thick steel plates or heavy concrete pads to distribute the pressure, or the jack will just sink into the mud instead of lifting the house.
Physics of the bottle jack lift
The physics of lifting a house involves Pascal’s Law where pressure applied to a confined fluid is transmitted undiminished in every direction to create massive mechanical advantage. When you pump the handle of that bottle jack, you are forcing hydraulic fluid into a cylinder, which translates your arm strength into thousands of pounds of upward force. But remember that wood is an anisotropic material. It has different properties in different directions. When you apply that hydraulic force against the grain of a horizontal joist, you are fighting the natural resistance of the wood. This is why we use a header. By spreading the force, you respect the internal bond strength of the timber. One contrarian point I always tell my apprentices is that the thickest underlayment is often your enemy. While people think a thick pad hides dips, it actually allows the locking mechanisms on LVP or laminate to flex and snap. The only real fix is structural. You are aiming for L/360 deflection standards, which means the floor should not move more than one-three hundred sixtieth of its span under a standard load. Anything more than that and your tile will crack and your hardwood will gap.
Why sudden lifts shatter plaster and tile
Lifting a sagging floor too quickly causes internal stress fractures in rigid materials like plaster, drywall, and ceramic tile because the house cannot redistribute the load fast enough. I have seen guys try to level a floor in a single afternoon. By evening, every door in the house was stuck shut and the kitchen backsplash was on the floor. You have to remember that the house has settled into its sag. The plumbing lines, the electrical conduit, and the interior finishes have all moved with it. If you jerk the floor back to level, you are tearing those connections apart. The rule of thumb is a quarter-inch per week. This allows the wood fibers to settle and the architectural finishes to adjust without snapping. It is a game of patience. You give the jack a half-turn, check your laser line, and walk away. You come back in seven days and do it again. This slow approach preserves the integrity of the home. If you hear a loud crack, you have gone too far too fast. That sound is a structural member or a finish material reaching its breaking point. Stop, back off the pressure slightly, and wait.
| Joist Size | Max Span (16in OC) | Load Capacity per SQFT | Required Jack Tonnage |
|---|---|---|---|
| 2×8 Southern Pine | 12ft 1in | 40 lbs | 10-12 Tons |
| 2×10 Southern Pine | 14ft 10in | 40 lbs | 12-15 Tons |
| 2×12 Southern Pine | 18ft 0in | 40 lbs | 20 Tons |
| Engineered I-Joist | Varies by Depth | 50+ lbs | 20+ Tons |
Setting the temporary post and the permanent fix
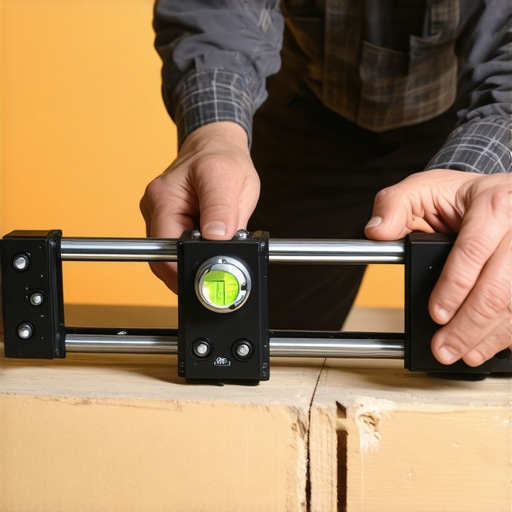
A permanent floor fix requires replacing the temporary jack with a steel lally column or a built up wood post anchored to a concrete footing. Once you have reached your desired level, the jack cannot stay there forever. Hydraulic jacks can leak over time, and they are not rated for permanent load bearing. You must transition the weight to a permanent support. This usually involves digging a hole in the crawlspace floor, pouring a reinforced concrete pad that is at least twenty-four inches square and twelve inches deep, and then installing a steel column. The column must be bolted to both the new footing and the floor joists above. I often see people use 4×4 wood posts for permanent fixes, but wood can shrink and rot in a damp crawlspace. Steel is the professional choice. This is where you have to be a stickler for the details. Ensure the column is perfectly plumb. Even a slight tilt reduces its load capacity significantly. Use a magnetic level to verify the vertical alignment on at least two sides of the post.
“A structural repair is only as permanent as the footing beneath the column; soil bearing capacity dictates the success of the lift.” – Master Flooring Axiom
Deflection limits and the science of wood species
Wood species like Douglas Fir and Southern Yellow Pine have different modulus of elasticity ratings which determine how much they will bend before they break. When you are leveling a floor, you need to know what you are jacking against. Old growth timber found in homes built a hundred years ago is much denser and stronger than the kiln-dried lumber you find at big-box retailers today. This old wood is brittle. It does not like to bend. If you are working in an old Victorian, you have to be even more careful with your jack pressure. Modern engineered joists are different. They are designed for high strength-to-weight ratios but can fail suddenly if the web is damaged. Always inspect the joists for notches or holes drilled by plumbers or electricians. A hole in the wrong place reduces the structural integrity of the joist by half. If you find damage, you must sister the joist with new lumber before you even think about applying the jack. Sistering involves bolting a new, identical piece of lumber to the side of the damaged one, extending at least three feet past the damage on both sides.
- Inspect for termite damage or dry rot before jacking.
- Check the crawlspace for standing water or high humidity levels.
- Clear all furniture from the area directly above the sag.
- Set up a rotating laser level to monitor the lift in real time.
- Apply a header beam across at least three joists to spread the load.
- Verify that the jack is sitting on a level concrete pad or steel plate.
- Turn the jack handle no more than one half turn every seven days.
- Install permanent steel columns once the floor is level.
Beyond the jack for a finished surface
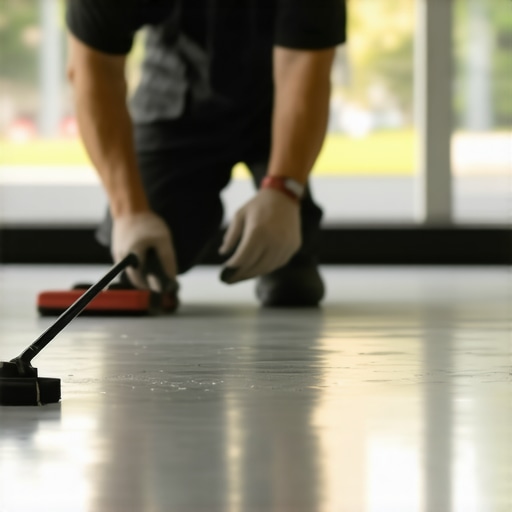
Final floor leveling often requires a high flow self leveling underlayment to remove minor subfloor imperfections that a bottle jack cannot fix. Even after you have corrected the structural sag, the subfloor itself might have high and low spots from years of wear or poor original installation. This is where the chemistry of flooring comes in. You need a primer that is compatible with both the wood and the leveling compound. If you skip the primer, the wood will suck the moisture out of the leveler too fast, causing it to crack and delaminate. I prefer a cement-based leveler with a high polymer content for flexibility. Wood moves. A rigid, cheap leveler will just turn into powder under the stress of daily foot traffic. You want something that can handle the micro-flexing of the subfloor without breaking the bond. This is the difference between a floor that lasts fifty years and one that fails in five. It is about the layers. It is about the prep. It is about doing the work that nobody sees so that the work everyone sees looks perfect.
{“@context”: “https://schema.org”, “@type”: “HowTo”, “name”: “How to Level a Sagging Floor with a Bottle Jack”, “description”: “A professional guide to structural floor leveling using hydraulic jacks, focusing on slow pressure application and permanent support installation.”, “step”: [{“@type”: “HowToStep”, “name”: “Identify the Low Point”, “text”: “Use a laser level or string line to find the exact center of the sag in the floor joists.”}, {“@type”: “HowToStep”, “name”: “Prepare the Base”, “text”: “Place a solid concrete pad or heavy steel plate on the ground beneath the sag to provide a stable jacking surface.”}, {“@type”: “HowToStep”, “name”: “Install Header and Post”, “text”: “Position a header beam across multiple joists and place a structural timber post between the jack and the header.”}, {“@type”: “HowToStep”, “name”: “Apply Gradual Pressure”, “text”: “Pump the bottle jack until the post is snug, then turn the handle one half turn to begin the lift.”}, {“@type”: “HowToStep”, “name”: “Monitor and Repeat”, “text”: “Wait seven days for the house to adjust, then repeat the process until the floor is level.”}, {“@type”: “HowToStep”, “name”: “Install Permanent Support”, “text”: “Replace the jack and temporary post with a steel lally column anchored to a new concrete footing.”}]}