The ‘Drop Test’ for Finding Loose Tiles
Most guys skip the leveling compound. They think the underlayment will hide the dip. It won’t. I spent three days grinding concrete on a job last month just so the floor wouldn’t click like a castanet. That job was in a humid basement in Tampa, and the slab was sweating more than a marathon runner. If I had just slapped that tile down, the moisture would have turned the thin-set into mush within a year. You have to understand that a floor is a structural system, not a sticker you peel and press onto the ground. When you walk across a kitchen and hear that hollow thud, it is the sound of failure. It is the sound of a mechanical bond that has snapped, leaving the ceramic plate floating like an island on a sea of dust. I have seen fifteen thousand dollar installations go to the scrap heap because the installer was too lazy to check the subfloor for flatness. My knees are a map of every shortcut a builder ever took, and they ache whenever I see someone grabbing the cheapest bag of mortar on the shelf.
The acoustic signature of a failing tile installation
Acoustic resonance and subfloor hollows are identified through mechanical vibration testing using impact tools such as steel bearings or golf balls to detect delamination. When a ceramic tile or porcelain slab loses its bond coat, it creates an air gap that changes the frequency response of the surface material. This acoustic shift is the primary indicator of a failed installation. The science here is simple physics. A solid bond allows the energy of an impact to transfer directly through the tile, through the mortar bed, and into the concrete or wood subfloor. This produces a high-pitched, solid sound. When there is a void, the energy is trapped in the tile itself, causing it to vibrate at its own natural frequency. This is the hollow sound that keeps installers awake at night. It means the tile is essentially a drum head, and every footstep is a drumstick hitting it. Over time, this vibration leads to edge chipping and eventually a full-scale crack. You can’t fix a hollow tile with a prayer. You have to find out where the bond died.
The mechanics of the hollow sound
Sonic detection of loose flooring relies on the density of the substrate and the tensile strength of the thin-set mortar. If the curing process was interrupted by high humidity or excessive heat, the hydration of cement will be incomplete, leading to friable layers. This often happens in regions like the Southwest where the air is so dry it sucks the moisture out of the mortar before it can form a crystalline structure. Without those crystals, the mortar is just expensive sand. I once saw a whole floor in Phoenix pop up like a deck of cards because the guy didn’t dampen the subfloor first. The concrete just drank the water out of the thin-set. The result was a floor that sounded like a xylophone. You have to watch the evaporation rates. If you are working in a climate with low humidity, you are fighting the clock from the moment you spread that first trowel of mud.
“A floor is only as good as the subfloor beneath it; deflection is the enemy of every joint.” – Master Flooring Axiom
The golf ball method for large format porcelain
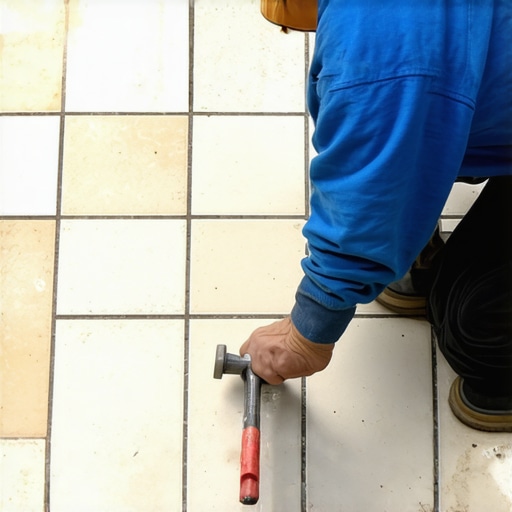
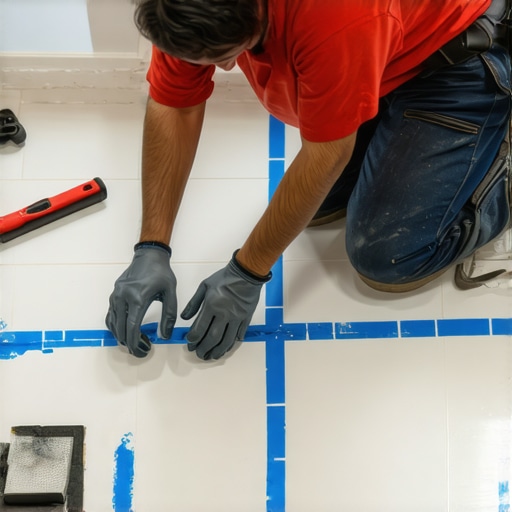
Impact testing with a regulation golf ball provides a consistent force for detecting voids across large format tiles where trowel ridge collapse may be inconsistent. By dropping the ball from a height of twelve inches, the installer can map out hollow spots that indicate insufficient coverage or premature skinning of the adhesive. This is the gold standard for many of us in the field. A golf ball has just enough weight and bounce to trigger the resonance without damaging the tile. You walk the grid, drop, listen, and mark. If I hear a thud, I put a piece of blue tape on that tile. If a tile has more than twenty percent hollow space, it is coming up. The TCNA is very clear about this. For wet areas or natural stone, you need nearly one hundred percent coverage. If you are doing a shower and you have hollow spots, you are basically building a subterranean lake under your tile. That water will sit there, grow mold, and eventually rot the framing. I have smelled those floors when they come up, and it is a scent you never forget. It smells like a swamp mixed with old gym socks.
The chemistry of thin set hydration
Portland cement in thin-set mortar requires molecular hydration to create calcium silicate hydrate chains that provide mechanical interlock with the tile bisque. If the water-to-powder ratio is incorrect, or if polymer modifiers are not properly dispersed, the bond strength will fall below the ANSI A118.4 standard. This is why you don’t just eyeball the water. You use a measuring bucket. I have seen apprentices try to mix mortar like they are making pancakes, just adding a little bit of this and a little bit of that. That is how you end up with a floor that fails in three years. You need the polymer chains to wrap around the microscopic irregularities in the back of the tile. This is especially true for porcelain, which is nearly non-porous. Without the right chemistry, the mortar is just sitting on the surface, waiting for a reason to let go. Even a small change in temperature can cause the tile to expand at a different rate than the subfloor. If the bond is weak, the tile will shear right off.
| Subfloor Type | Minimum Thickness | Deflection Limit | Bond Method |
|---|---|---|---|
| Plywood | 5/8 inch | L/360 | Modified Thin-set |
| Concrete Slab | 4 inches | N/A | Unmodified or Modified |
| Cement Backer | 1/4 inch | L/360 | Alkali-Resistant Tape |
| OSB | 23/32 inch | L/360 | Two-layer system |
Why your subfloor is lying to you
Subfloor flatness must be measured with a ten-foot straightedge to ensure a tolerance of 1/8 inch over ten feet for large format tile. Many contractors assume a plywood deck or concrete slab is level, but deflection and high spots create stress points that cause delamination and hollow sounds. I have seen slabs that looked like the rolling hills of Kentucky. If you put a three-foot tile on a hump like that, you are asking for trouble. The tile will be supported in the middle but have air at the edges. When someone steps on that edge, the tile acts as a lever. It puts massive tension on the bond in the center. Eventually, it snaps. You have to spend the time with the grinder or the self-leveler. It is dusty, it is loud, and it is miserable work, but it is the only way to ensure the floor stays down for fifty years. I always tell homeowners that I am an architect of the subfloor. The tile is just the skin. If the bones are crooked, the skin will look terrible.
“The integrity of the bond is a function of surface preparation; dust is the silent killer of adhesion.” – Tile Council of North America Standard
Leveling compounds and the cost of shortcuts
Self-leveling underlayment uses fluid dynamics to create a perfectly horizontal plane, but it requires a primer to ensure a chemical bond to the substrate. Skipping the primer results in the leveler peeling away from the concrete, creating a secondary failure point that sounds hollow during the drop test. I have seen guys pour leveler over a dusty floor without sweeping. The leveler just sits on top of the dust. It looks great for a week. Then the homeowner moves their refrigerator in, and the whole thing cracks. You can hear the leveler crunching underneath the tile. It sounds like someone is eating potato chips under the floor. At that point, the only fix is to tear it all out. There is no magic glue you can inject into a hollow floor to fix a bad pour. You have to do it right the first time or do it over. I prefer the first option because my back can’t handle doing it twice.
The checklist for structural integrity
- Verify the moisture content of the concrete slab is below 4 percent using a calcium chloride test.
- Ensure the subfloor is flat to within 1/8 inch over a 10-foot radius to prevent lippage.
- Vacuum the entire surface to remove all particulates that might interfere with the chemical bond.
- Apply a high-quality primer to the substrate to prevent the mortar from drying out too quickly.
- Back-butter every tile to ensure a minimum of 95 percent coverage for all wet area installations.
- Use the correct trowel notch size to achieve full ridge collapse when the tile is set.
Shower floors and the risk of pooling
Shower pan integrity depends on the pre-slope and the waterproofing membrane, but loose tiles in a wet environment lead to efflorescence and structural rot. When a shower floor tile sounds hollow, it indicates an air pocket where water will eventually stagnate and degrade the mortar bed. This is where the drop test is most essential. You don’t want a hollow tile in a shower. Water will find its way through the grout lines, which are never truly waterproof, and it will sit in those voids. It will turn into a science project of mold and bacteria. If you see white crusty stuff coming out of your grout lines, that is efflorescence. It is a sign that water is moving through your mortar and pulling out the salts. It is the beginning of the end for that floor. I tell people all the time that a shower is a localized flood. You have to manage that flood with precision. If you have a loose tile on a shower curb, that is a direct path for water to get into the wall framing. I have seen entire floor joists rotted out because of one loose tile on a curb. It is a small detail that has massive consequences.
The 1/8 inch that ruins everything
Expansion gaps at the perimeter of a tiled room allow for thermal expansion and structural shifting without tenting or cracking the field tile. If a tile floor is installed tight against the drywall, the lateral pressure will eventually break the bond of the weakest tiles, resulting in a hollow sound or vertical lift. This is a common mistake. People think they are being neat by running the tile right up to the wall. But houses move. They breathe. When the humidity hits in the summer, the subfloor expands. If the tile has nowhere to go, it will push against itself until something gives. Usually, it is the bond. The floor will literally buckle and pop up in the middle of the room. I have walked into houses where the floor looked like a mountain range because they didn’t leave a gap under the baseboard. You need that 1/4 inch or 1/8 inch of space. It is a hidden detail that most people never see, but it is the reason the floor stays flat. It is these small, invisible rules that separate a professional from a hobbyist. The final summary of any good job is that it doesn’t make a sound when you walk on it. It should be as silent as a stone path in the woods.