The ‘Magnet’ Trick for Finding Hidden Screws Under Old Carpet
Finding fasteners buried deep within a subfloor is the difference between a floor that lasts thirty years and one that fails in three. Most installers walk into a carpet removal job with a pry bar and a prayer, but the real pros know that hidden screws are the silent killers of laminate and floor leveling projects. Using a rare earth magnet to locate these metal intruders is a fundamental skill for any serious flooring architect. I spent three days grinding concrete on a job last month just so the floor wouldn’t click like a castanet, and it all started because the previous guy left a dozen deck screws sticking up 1/16th of an inch. A floor is a performance surface. It requires a perfectly flat, fastener-free foundation before you even think about the aesthetic layer. If you leave a single screw head proud of the plywood, it will eventually telegraph through your new vinyl or cause a stress fracture in your laminate locking system. We are not just decorating rooms. We are engineering structural assemblies that must withstand thousands of pounds of live load pressure over their lifespan. Any variation in the subfloor plane is a point of failure. Using a magnet to identify the location of every screw allows you to ensure the subfloor is properly cinched to the joists without the guesswork that leads to squeaks and movement. This is the baseline of professional floor leveling and preparation.
The physics of the magnetic search
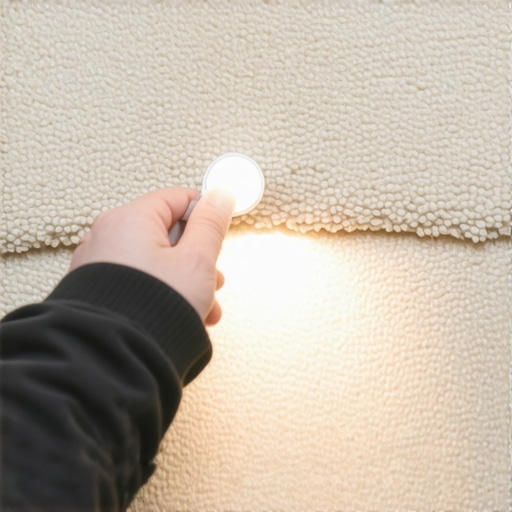
The magnet trick works by utilizing high-intensity neodymium magnets to detect the magnetic flux of steel fasteners hidden under carpet padding or buried in plywood. This method identifies the exact center of the screw head, allowing for precise extraction or tightening without damaging the surrounding subfloor material. When you are dealing with an old carpet install, the staples and tack strips are easy to see, but the screws holding the subfloor to the joists are often countersunk and covered with years of dust and adhesive residue. A standard hardware store magnet is too weak for this. You need a N52 grade neodymium magnet. This tool creates a concentrated magnetic field that can penetrate through thin layers of debris. As you glide the magnet over the surface, you will feel a distinct pull when it passes over a ferrous object. This is the moment you mark the spot. If you are prepping for floor leveling, these screws must be driven flush or replaced. The chemistry of modern self-leveling compounds requires a clean, stable substrate. If a screw is loose, the subfloor will flex. That flex creates a crack in the compound. That crack eventually leads to a hollow sound under your new laminate or tile. You cannot skip this. The magnet is your diagnostic tool for structural integrity. It reveals the map of the skeleton beneath the skin of the house.
Why your subfloor is lying to you
Subfloors often appear flat to the naked eye but contain micro-variations and hidden fasteners that compromise new flooring. These defects are frequently masked by old carpet but become immediate problems once a rigid material like laminate or tile is installed over the top of the existing structure. Most homeowners think that the thick pad under their carpet is a luxury, but in reality, it is a mask. It hides the dips, the humps, and the poor fastening patterns of the original builders. When you rip that carpet out, you are looking at the raw truth of the building. I have seen 15000 dollar wide plank walnut floors cup because the installer did not check the subfloor moisture or the fastener density. Screws that have backed out over time are the primary cause of floor noise. A squeak is simply the sound of two materials rubbing together under load. If the screw is not holding the plywood tight to the joist, the plywood will slide up and down the shaft of the screw. The magnet finds those screws so you can drive them home. We also use this time to check for showers and wet area transitions where moisture might have oxidized the fasteners. Rusting screws lose their grip and their mass, making them harder to find but even more vital to replace. If you are transitioning to laminate, the subfloor must be within 1/8 inch of level over a 10 foot radius. You cannot achieve that if you are fighting hidden screw heads.
“A floor is only as good as the subfloor beneath it; deflection is the enemy of every joint.” – Master Flooring Axiom
The 1/8 inch that ruins everything
Subfloor levelness is measured in tight tolerances where a variance of 1/8 inch can lead to the catastrophic failure of click-lock flooring joints. Identifying hidden screws ensures that the leveling process starts from a truly clean baseline, preventing air pockets and high spots in the underlayment. When you pour a self-leveling underlayment, the liquid follows the laws of gravity. It seeks the lowest point. If you have a screw head sticking up, it creates a pinhole or a swirl in the surface tension of the wet compound. Once it cures, that high spot becomes a fulcrum. Every time someone walks over that spot, the laminate or LVP planks will bend over that screw head. Eventually, the tongue and groove mechanism will snap. It is a mechanical certainty. This is why the magnet trick is not just a tip, it is a requirement. You have to be meticulous. I have seen guys try to use a hammer to find screws by listening for a different thud. That is amateur work. The magnet provides a tactile, repeatable result. We are looking for the exact grid of the joist system. Usually, screws should be spaced every 6 inches on the edges and every 12 inches in the field. If your magnet shows a different pattern, the original installer took shortcuts. You are the one who has to fix it now before the new floor goes down.
Subfloor Fastener Comparison and Specs
| Fastener Type | Holding Power | Detection Ease | Recommended Use |
|---|---|---|---|
| Construction Screw | High | Easy | Subfloor to Joist |
| Ring Shank Nail | Medium | Moderate | Sheathing |
| Finish Nail | Low | Difficult | Trim only |
| Drywall Screw | Very Low | Easy | Never use for floors |
The table above illustrates why we hunt for specific fasteners. If your magnet finds a drywall screw, you need to pull it and replace it. Drywall screws are brittle. They have zero shear strength. In a flooring environment, the lateral movement of the house will snap the heads off those screws, leaving your subfloor to bounce. This leads to the clicking sounds that drive homeowners crazy. A proper floor screw has a specific thread pitch and a nibbed head that sinks itself into the wood. Using the magnet helps you identify what was used in the past. If you find a pattern of nails, you should probably go back through and add screws. Nails pull out over time as the wood dries and shrinks. This is especially true in regions with high seasonal humidity shifts. The wood expansion pulls the nail up, and the magnet is the only way to find it under the residue of the old carpet install.
The chemical bond of leveling compounds
Modern leveling compounds rely on a sophisticated polymer chain to bond with the subfloor and provide a smooth surface. Any metal contamination or loose fasteners can disrupt this chemical matrix, leading to delamination and surface cracking as the compound undergoes its hydration and curing phase. When we talk about floor leveling, we are talking about a chemical reaction. Most high-end levelers are calcium aluminate based. They shrink very little and cure very hard. However, they are brittle. They have high compressive strength but low tensile strength. This means they can handle being stepped on, but they cannot handle being bent. If a subfloor screw is loose, the plywood moves. If the plywood moves, the leveler cracks. It is that simple. Using the magnet to find and secure these points is the only way to guarantee the bond. You also have to consider the moisture vapor transmission rate. If you are in a basement, the screws might be anchors into concrete. The magnet will still find them. This allows you to check for moisture wicking up through the fastener holes. We often see dark spots around screws where moisture has traveled up from the slab, rotting the surrounding wood. This is the level of detail required for a master install. You are looking for microscopic points of failure before they become macroscopic disasters.
Preparation checklist for subfloor excellence
- Clear all debris and vacuum the subfloor with a HEPA filter to remove dust.
- Sweep the entire area with a neodymium magnet to locate all hidden fasteners.
- Drive all proud screws 1/16th of an inch below the wood surface.
- Replace any drywall screws with high-quality gold-coated floor screws.
- Check moisture levels in the plywood using a pin-style meter.
- Sand down high joints and fill low spots with a cementitious patch.
- Verify the floor is level within 1/8 inch over a 10 foot span.
The ghost in the expansion gap
Expansion gaps are the lungs of a floor, allowing the material to expand and contract with changes in atmospheric humidity without buckling or crowning. Hidden fasteners near the perimeter can block this movement, effectively locking the floor in place and causing structural tension. One of the biggest mistakes I see is people running their new laminate or hardwood tight against the wall. They think it looks better. It is a death sentence for the floor. You need a minimum of 1/4 inch to 1/2 inch of space around the entire perimeter. If your magnet finds a screw right at the edge of the wall that is holding a piece of trim or a transition, that screw might be snagging your floating floor. A floor needs to move as a single unit. If one corner is pinned down by a stray screw or a poorly placed nail, the rest of the floor will buckle in the middle. It is like putting a thumb on a piece of paper and pushing from the other side. The paper has nowhere to go but up. This is why we use the magnet even in the corners. We make sure nothing is going to interfere with that expansion gap. We are respecting the physics of the material. Wood is a hygroscopic material. It wants to grow when it is humid and shrink when it is dry. You cannot stop it. You can only plan for it.
“Deflection is the silent killer of tile; if your subfloor moves the thickness of a human hair, your grout will crack.” – TCNA Technical Manual
Mastering the transition to showers and wet zones
Wet zone transitions require specialized moisture barriers and fastener protocols to prevent water from reaching the subfloor and causing rot. Using a magnet in these areas ensures that the waterproof membrane is not being compromised by sharp fastener heads or corroded metal. In a bathroom or near showers, the stakes are even higher. Moisture is the enemy of all flooring except for perhaps the highest grade of tile. If you are installing laminate near a wet zone, you must be certain the subfloor is rock solid. Any movement will break the silicone seal at the transition. I have seen homeowners ask why their waterproof vinyl is buckling. Usually, it is because they locked it under a heavy kitchen island or a bathroom vanity, killing the floor’s ability to breathe. But even more often, it is because moisture got under the floor and caused the subfloor to swell. By using the magnet trick during the carpet removal phase, you can see if the previous installers used the wrong fasteners for a wet area. If you see rusted heads, you know you have a moisture problem that needs to be addressed before the new floor goes down. You might need to install a topical moisture barrier or an uncoupling membrane. The magnet is your first line of defense in identifying these historical moisture patterns.
Finalizing the structural integrity
The goal is a floor that does not move, does not squeak, and does not fail. This requires a level of obsession that most people do not understand. They see a floor as something you walk on. We see it as a complex system of layers, fasteners, adhesives, and physics. The magnet trick is the simplest tool in our kit, but it is one of the most powerful. It allows us to see through the surface and understand the bones of the house. When you are done with your magnetic sweep, your screw tightening, and your floor leveling, you should have a surface that is as flat as a billiard table and as solid as a rock. Only then are you ready to lay the finished material. This is the difference between a contractor and a master flooring architect. We do not just install floors. We build foundations for life. Every screw we find and every dip we fill is a testament to our commitment to the craft. Do not let a single hidden screw ruin a beautiful carpet install or a high-end laminate project. Find them, fix them, and build something that lasts.