The ‘Flashlight’ Trick for Spotting Hidden Ridges in Your Floor Leveler
I spent three days grinding concrete on a job last month just so the floor wouldn’t click like a castanet. My back was screaming. My lungs felt like they were lined with Portland cement. But the homeowner wanted a high-gloss laminate, and you can’t fake that with a dip in the slab. Most guys skip the leveling compound. They think the underlayment will hide the dip. It won’t. If you ignore a 3/16 inch ridge, your floor becomes a drum. You’ll hear every step. You’ll feel the hollow void where the subfloor fails to support the locking mechanism of your laminate planks. This is why I am obsessed with the flashlight trick. It is the only way to see the truth of a floor before you commit to the final install.
The hidden mountain ranges in your living room
Floor leveling requires a tolerance of 1/8 inch over a 10 foot radius to prevent structural failure in floating floors. Using a high-lumen flashlight allows installers to identify high spots and ridges that are invisible to the naked eye. This technique reveals the microscopic topography of the concrete slab.
When you look down at a gray concrete floor, your eyes lie to you. The matte finish of the concrete absorbs light. It hides the subtle heaves and the long, slow swells that occur during the curing process. In the world of high-end flooring, we call these “ghost ridges.” They are the remnants of a finisher’s trowel or the result of uneven aggregate settling. If you lay laminate over these ridges, the floor will teeter-totter. Eventually, the tongue and groove joints will shear off under the weight of a refrigerator or even a heavy bookshelf. I have seen fifteen thousand dollar floors ruined by a ridge the thickness of a nickel.
“A floor is only as good as the subfloor beneath it; deflection is the enemy of every joint.” – Master Flooring Axiom
The physics of the low angle light
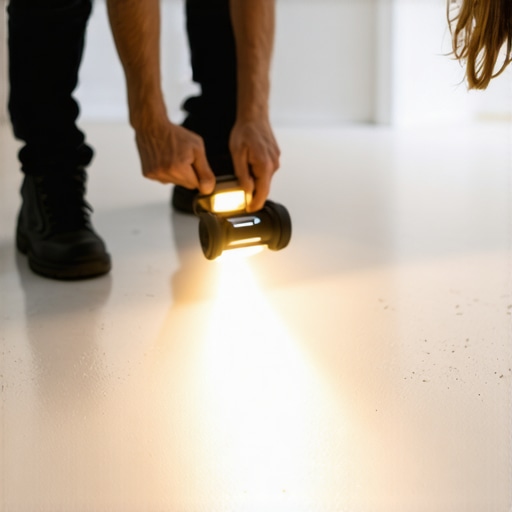
Grazing light reveals surface imperfections by elongating the shadows cast by ridges and bumps. By placing a flashlight directly on the floor surface, you transform a flat slab into a map of peaks and valleys. This method is more accurate than using a standard 6 foot level.
To perform this correctly, you need to wait until the sun goes down or block the windows with cardboard. Darkness is your friend here. I take a heavy-duty Maglite or a high-output LED work light and place it flush against the floor. I am not pointing it down. I am sliding it across the surface so the beam travels parallel to the concrete. Suddenly, every tiny pebble, every drop of dried drywall mud, and every ridge in the self-leveling compound looks like a mountain range in the Mojave Desert. The shadow cast by a 1/8 inch ridge will stretch for six inches. This visual exaggeration is how we achieve a perfect floor leveling result for demanding materials like laminate or thin-profile tile.
Mapping the subfloor topography
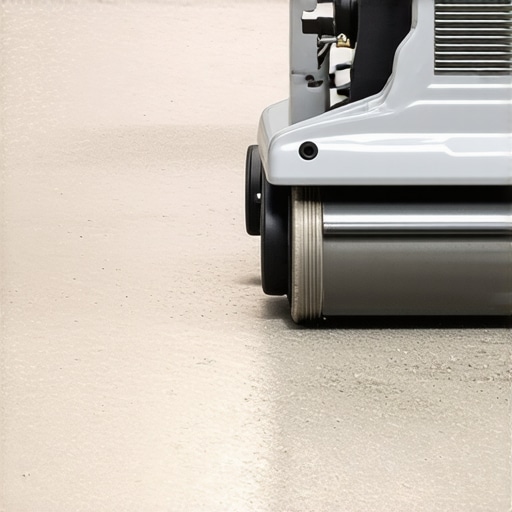
I keep a piece of soapstone or a carpenter’s pencil in my pocket during this process. When the light hits a ridge, I circle it. I mark the peak and the direction of the slope. If I find a dip, I mark the perimeter where the light disappears into the shadow. This creates a topographical map of the room. It tells me exactly where I need to pour more compound or where I need to get back on my knees with the diamond cup wheel and the vacuum shroud. In showers, this is even more critical. If you have a hump in the subfloor before you install your pre-sloped tray, the entire drainage system is compromised. You’ll end up with standing water in the corners of the stall, which leads to mold and thin-set failure.
| Subfloor Type | Recommended Tolerance | Max Ridge Height | Acclimation Time |
|---|---|---|---|
| Concrete Slab | 1/8 inch per 10 ft | 1/16 inch | 72 Hours |
| Plywood Subfloor | 3/16 inch per 10 ft | 1/8 inch | 48 Hours |
| Shower Pan Base | 1/16 inch per 3 ft | 0 inch | 24 Hours |
The chemistry of self leveling compounds
Self leveling underlayment relies on a delicate balance of Portland cement, polymers, and water to achieve a flat surface. The chemical bond is dependent on the porosity of the substrate and the ambient humidity. Incorrect water ratios lead to aggregate suspension failure and surface dusting.
Many people think you just mix the bag and pour it out like water. That is a recipe for disaster. The chemistry inside that bag is complex. There are superplasticizers that reduce the water requirement while maintaining flow. There are defoamers that prevent air bubbles from creating a Swiss cheese texture in your floor. If you add even a cup too much water, you break the polymer chain. The heavy sand settles to the bottom, and the weak, chalky resin rises to the top. When it dries, you can scratch the surface with your fingernail. That is not a floor. That is a failure waiting to happen. For a successful carpet install, you might get away with a little bit of dusting, but for anything glued down, the bond will break within six months.
Why the primer dictates your success
You cannot skip the primer. Concrete is a sponge. If you pour leveler on dry concrete, the slab will suck the moisture out of the compound before the polymers have a chance to cross-link. This results in pinholes. Those pinholes are actually tiny volcanoes of air escaping the concrete. If you don’t seal the slab with a high-solids acrylic primer, the leveler will crack and delaminate. I’ve seen guys try to use watered-down wood glue as a primer. It doesn’t work. You need a product that penetrates the pores and creates a tacky surface for the leveler to grab onto.
“Deflection is the silent killer of tile installations; if the subfloor moves, the grout will crack.” – Master Flooring Axiom
Preparing for a flawless laminate install
Laminate flooring requires a rigid and flat subfloor to maintain the integrity of its click-lock system. Any vertical movement caused by subfloor dips will stress the joints. This leads to audible clicking sounds and eventual separation of the planks.
Laminate is a floating floor, which means it expands and contracts as a single unit. If you have a ridge in the middle of the room, the floor will pivot on that ridge. Every time someone walks across the room, the joints flex. This is called “vertical deflection.” Laminate joints are made of high-density fiberboard, which is basically compressed sawdust and glue. They are not designed to be structural hinges. Once they flex a few thousand times, the locking mechanism snaps. Now you have a gap that collects dirt and moisture. This is why the flashlight trick is your best friend. You find those pivots before you click the first plank together.
- Clean the slab of all drywall mud and paint overspray.
- Vacuum the floor twice to remove every grain of sand.
- Apply primer with a soft-bristle broom to ensure it enters the pores.
- Mix the leveler with a high-torque drill to avoid over-aeration.
- Use a gauge rake to set the depth of the pour.
- Use the flashlight trick to verify the surface after 24 hours of drying.
The structural reality of carpet install prep
Carpet installation is often viewed as more forgiving of subfloor imperfections, but ridges will still cause premature wear in the backing. A level floor ensures that the padding provides uniform cushioning across the entire room. Proper subfloor prep prevents the carpet from developing ripples.
People tell me that the carpet pad will hide everything. They are wrong. A ridge in the concrete will act like a knife edge against the primary backing of the carpet. As people walk over that ridge, the fibers are crushed against the concrete. Within two years, you will see a dark line where the carpet has worn down to the nub. It looks like a dirt stain, but it is actually structural damage. If you want your carpet to last twenty years, you treat the subfloor like you are installing hardwood. You level the dips and you grind the ridges. Your knees and your wallet will thank you later.
Managing the slope in custom tile showers
Shower floors must maintain a consistent slope of 1/4 inch per foot toward the drain to ensure proper water evacuation. Any ridges or dips in the leveling bed will create birdbaths where water stagnates. This leads to the degradation of the waterproofing membrane and grout.
In a shower, we are not looking for level. We are looking for a perfect plane. When I am building a mortar bed or using a liquid leveler in a wet area, I use the flashlight trick to check my screed lines. If I see a shadow, I know I have a high spot that will cause a tile to