How to Fix a Squeaky Plywood Subfloor Before the New Floor Goes Down
The subfloor secret that saves your reputation
I spent three days grinding concrete on a job last month just so the floor wouldn’t click like a castanet. Most guys skip the leveling compound. They think the underlayment will hide the dip. It won’t. If you ignore the subfloor, you are building your house on sand. You can buy the most expensive wide-plank white oak or the trendiest laminate, but if that plywood underneath is rubbing against a joist or a rusty nail, the result is a symphony of groans that will drive a homeowner to madness. Fixing a squeak is not about aesthetics. It is about structural integrity and the physics of friction. I have seen fifteen thousand dollar floors ripped up because someone was too lazy to drive a three-cent screw into a joist. I smell like oak dust and old coffee most days, and I have learned that the subfloor is the only part of the house that really matters when your feet hit the ground in the morning.
The physics of a dying subfloor
Squeaks are rarely the fault of the wood itself. They are the sound of movement. When a plywood sheet is not perfectly mated to the floor joist, a gap exists. This gap allows the wood to deflect under the weight of a footstep. As the wood moves, it rubs against the shank of a nail that has pulled loose over time. The friction between the steel nail and the wood fibers creates that high-pitched chirp. In other cases, the squeak comes from two sheets of plywood rubbing against each other because the original installer forgot the mandatory one eighth inch expansion gap. Wood is a living thing. It breathes. It expands with humidity and shrinks when the heater kicks on. If you do not account for this movement, the floor will protest. You are dealing with a mechanical failure of the fastening system. To stop the noise, you must eliminate the movement. It is that simple and that difficult.
Why your fasteners are failing you
Most builder-grade homes were put together with smooth-shank nails and a prayer. Over twenty years, those nails lose their grip. The wood dries out and the hole becomes slightly larger than the nail. This is why we use structural screws for remediation. A screw with a dual-thread design or a serrated shank will bite into the joist and never let go. If you are preparing for a carpet install or laying down new laminate, this is your only window of opportunity to fix the foundation. Once the finished floor is down, your options are gone. You cannot fix a subfloor through a finished surface without leaving scars. You need to get down to the bare wood, grab your impact driver, and start hunting for the ghosts in the joists.
“A floor is only as good as the subfloor beneath it; deflection is the enemy of every joint.” – Master Flooring Axiom
The chemical bond of structural adhesives
Sometimes mechanical fasteners are not enough. If the joist itself is crowned or warped, you might have a gap that a screw cannot pull tight without stressing the plywood. This is where the chemistry of subfloor adhesives comes into play. I prefer a high-solids polyurethane adhesive. Unlike water-based glues that shrink as they cure, polyurethane expands slightly to fill the voids. It creates a bridge between the joist and the subfloor. This is not just glue. It is a structural component. When the adhesive cures, it has a shear strength that exceeds the strength of the wood itself. If you are dealing with a particularly stubborn squeak in a high-traffic area like a hallway or near a shower, you need to apply this adhesive from the crawlspace if possible, or use an injection kit from above. The goal is to create a monolithic structure where nothing moves.
| Subfloor Material | Common Thickness | Squeak Risk Level | Recommended Fastener |
|---|---|---|---|
| CDX Plywood | 3/4 inch | Moderate | 2-1/2 inch Wood Screw |
| OSB (Oriented Strand Board) | 23/32 inch | High | Ring-shank Nail + Glue |
| Particle Board | 5/8 inch | Extreme | Replacement Required |
| AdvanTech | 3/4 inch | Low | Structural Wood Screw |
The screw pattern science
Do not just drive screws at random. There is a geometry to a silent floor. You must locate the center of the joist. Use a chalk line to mark the entire length of the joist across the room. You want to place a screw every six inches along the edges of the plywood sheets and every twelve inches in the field. This prevents the wood from bowing. If you are prepping for a shower or a heavy tile installation, you might even drop that to four inches on center to minimize deflection. Deflection is the technical term for the floor bending. If the floor bends, the grout in your shower will crack and your laminate locking tabs will snap. You are fighting a war against gravity and weight distribution. Every screw is a soldier in that war.
- Identify the joist locations using a stud finder or by looking for existing nail heads.
- Walk the floor slowly and mark every squeak with a bright piece of tape.
- Drive screws into the joist until the head is slightly countersunk below the plywood surface.
- Check the moisture content of the subfloor to ensure it is within 4 percent of the finished flooring.
- Sand down any high spots or seams that are not flush.
The one eighth inch that ruins everything
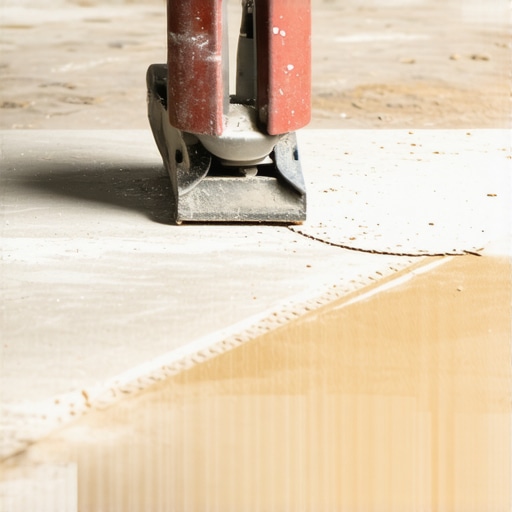
I have walked into rooms where the subfloor was buckled like a mountain range because the installer butted the plywood sheets tight against each other. Wood needs room to grow. If you do not leave a small gap between the panels, they will push against each other as they absorb moisture from the air. This creates a friction squeak that no amount of screws can fix. If you find tight joints, take a circular saw and run the blade right down the seam. This creates the necessary relief gap. It sounds counterintuitive to cut your floor to fix it, but that gap is the difference between a silent floor and a nightmare. This is especially true in humid environments where the wood will swell significantly during the summer months.
The ghost in the expansion gap
Expansion gaps are not just for the plywood. You must also leave a gap at the perimeter of the room. The subfloor should not touch the wall studs or the bottom plate. If the subfloor is wedged against the framing of the house, every time the house settles or the wind blows, the floor will groan. Use a pry bar to check the perimeter. If it is tight, trim it back. While you are at it, check the blocking. Sometimes the squeak is not the plywood but the lack of blocking between joists. Adding a few pieces of scrap lumber as solid bridging can stiffen a bouncy floor and kill the noise forever. It is grunt work, but it is the work that separates a craftsman from a handyman. A floor should be felt, not heard. Once the subfloor is silent, flat, and dry, you are ready for the finish. Until then, put the hammer away and keep working on the foundation.