The Bucket Test for Verifying Your Shower Pan Waterproofing
I spent three days grinding concrete on a job last month just so the floor wouldn’t click like a castanet. That is the reality of the trade. Most guys skip the leveling compound. They think the underlayment will hide the dip. It won’t. I have seen it a thousand times where a guy thinks he can float a floor over a valley in the slab and six months later the locking tongues are snapped and the homeowner is calling me to fix a mess that should have never happened. This same laziness kills showers. When you are building a shower pan, you are not just laying tile. You are building a microscopic containment vessel. If you fail to respect the physics of water migration, you are essentially installing a slow motion bomb in someone’s master suite. The bucket test, often called a flood test in the industry, is the only way to prove you did your job right before the thin-set ever touches a trowel.
The high cost of skipping the flood test
The bucket test identifies leaks in the waterproofing membrane before tile is installed by filling the shower base with water and monitoring levels over twenty four hours. This process is mandatory for anyone following the Tile Council of North America standards. If you skip this, you are betting your reputation and your bank account on a visual inspection. A visual inspection cannot see a pinhole in a liquid membrane or a poorly bonded corner in a fabric system. Water is a persistent enemy. It will find the path of least resistance through capillary action. If there is a breach, gravity will pull that water into the subfloor, the joists, and eventually the ceiling below. Repairing a leaked shower after it is tiled costs ten times more than doing it right the first time because you have to tear everything out to the studs.
“A floor is only as good as the subfloor beneath it; deflection is the enemy of every joint.” – Master Flooring Axiom
Structural integrity starts at the drain flange
A shower drain must be integrated into the waterproofing system using a bonded flange or a traditional clamping ring to prevent water bypass. The mechanics of the drain are where most failures occur. In a traditional mortar bed system, the weep holes in the drain assembly must remain clear. If you clog those holes with mortar, the water that saturates the mud bed has nowhere to go. It sits there. It becomes a stagnant pond under your tile. This leads to the funky smell that homeowners complain about. In modern thin-bed systems, the membrane is bonded directly to the flange. This is a superior method because it keeps the entire assembly dry, but it requires surgical precision. The flange must be perfectly level with the surrounding floor. If the flange is too high, you get a birdbath. If it is too low, you create a stress point in the membrane that will eventually crack under the weight of the water.
The math of water weight on a subfloor
A standard thirty six by thirty six inch shower pan filled with four inches of water exerts approximately two hundred pounds of hydrostatic pressure on the subfloor. This is why floor leveling and structural reinforcement are not optional. If your joists are undersized or if your subfloor has too much deflection, that weight will cause the floor to dip. When the floor dips, the waterproofing membrane stretches. Most modern elastomeric membranes have a high elongation rating, but they have a limit. If the subfloor moves more than the membrane can stretch, you get a tear. This is why I always check the L over three hundred sixty rating for tile installations. For natural stone, I want L over seven hundred twenty. You cannot put a rigid surface on a trampoline and expect it to survive. I have walked onto jobs where the installer put a heavy walk-in shower on a single layer of five eighths inch plywood. That is a recipe for disaster. You need at least an inch and a quarter of total subfloor thickness to minimize the bounce that snaps grout lines and tears liners.
| Method | Material Chemistry | Cure Time | Required Skill |
|---|---|---|---|
| Liquid Applied | Elastomeric Polymer | 24 Hours | Moderate |
| Sheet Membrane | Polyethylene | Immediate | High |
| Traditional Liner | PVC or CPE | N/A | Expert |
| Hot Mop | Asphaltic Bitumen | 4 Hours | Specialized |
Why your liquid membrane might fail you
Liquid waterproofing membranes fail when the installer does not achieve the required dry mil thickness as specified by the manufacturer. You cannot just paint it on like a bedroom wall. You need a wet film gauge to ensure you are hitting twenty to thirty mils. If it is too thin, it is porous. If it is too thick, it can skin over and trap moisture inside, leading to a gummy layer that never fully cures. I always apply two coats in contrasting colors. If I see the first color peeping through the second, I know I have a thin spot. This is the difference between a mechanic and a handyman. The mechanic knows the chemistry. The handyman just likes the color. You also have to watch the temperature. If the house is too cold, the polymer chains won’t crosslink properly. If it is too hot, the water evaporates too fast and the membrane becomes brittle. It is a balancing act that requires a thermometer and a clock.
The ghost in the expansion gap
Flooring materials like laminate and hardwood require a quarter inch expansion gap at the perimeter because they are hygroscopic and react to environmental humidity. Even in a bathroom, where you might be using waterproof laminate, the core can still be affected by the ambient moisture levels. If you run your flooring tight against the shower curb, you are asking for a buckle. When the humidity spikes after a long shower, the floor expands. If it hits the curb with nowhere to go, it will lift off the subfloor in the middle of the room. I have seen floors rise three inches off the ground because there was no gap. People think the baseboard hides everything, but it won’t hide a floor that is shaped like a mountain range. Use a proper transition strip at the shower curb. Do not rely on caulk to bridge a structural gap. It won’t work.
“The flood test is the only definitive method to ensure the integrity of the waterproofing system before tile installation begins.” – TCNA Handbook
The 24 hour rule for peace of mind
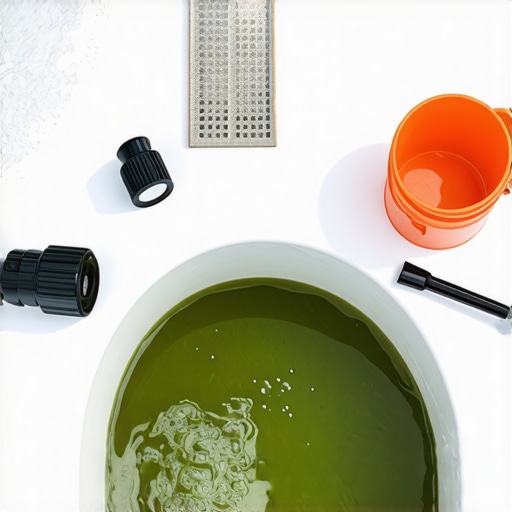
A proper bucket test must last for at least twenty four hours to ensure that slow seeps and capillary leaks are fully identified. You start by plugging the drain with a pneumatic or mechanical test plug. Then you fill the pan up to the top of the curb. I use a Sharpie to mark the water line on the liner or the wall. If that water level drops even an eighth of an inch, you have a problem. You have to account for evaporation, but in a climate controlled house, evaporation is negligible over a single day. If the level is down, go to the floor below with a high powered flashlight. Look for dampness around the drain pipe. Look for darkening of the plywood. If you find a leak, you have to drain the pan, let it dry for two days, and patch the area. Then you do the test again. You do not move forward until that water level stays rock solid for twenty four hours. It is the only way to sleep at night.
- Inspect the drain assembly for tight seals and clear weep holes.
- Ensure the waterproofing membrane extends at least three inches above the curb.
- Verify that all corners and transitions are reinforced with fabric tape.
- Check the subfloor for any signs of deflection under the water weight.
- Confirm that the test plug is holding pressure before timing the test.
The way the bucket test saves your subfloor
Testing the shower pan prevents moisture from reaching the subfloor where it would cause rot, mold growth, and structural failure of the floor joists. I once saw a carpet install in a master bedroom that was ruined because the adjacent shower had a slow leak. The water traveled along the subfloor, under the wall plate, and soaked the padding. The homeowners didn’t notice until the room smelled like a wet dog and the tack strips were rusted through. They thought they had a roof leak. It was just a pinhole in a shower corner. If the previous installer had done a bucket test, they would have seen the leak in ten minutes. Instead, the homeowner had to replace the carpet, the pad, and three sheets of rotted subfloor. It is a hard lesson to learn, but the physics do not lie. Water always wins if you don’t build a proper barrier. Whether you are installing carpet, laminate, or tile, the dry integrity of your subfloor is the most important factor in the longevity of your home. Treat every shower like a structural engineering project, because that is exactly what it is.