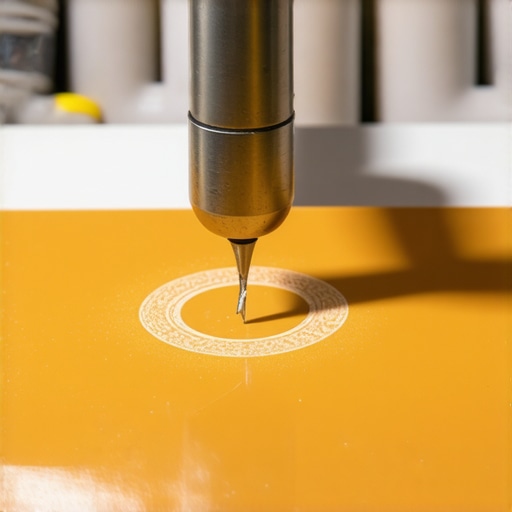
How to Cut a Perfect Circle in Laminate for Plumbing Pipes
Most guys skip the leveling compound. They think the underlayment will hide the dip. It won’t. I spent three days grinding concrete on a job last month just so the floor wouldn’t click like a castanet. That experience taught me that every single cut, especially the circular ones for plumbing, relies on the structural integrity of what is underneath the laminate. You can have the sharpest hole saw in the world, but if your subfloor is bouncing, your cut will be jagged and your floor will eventually fail at the penetration point. I have seen fifteen thousand dollar floors ruined by a lack of patience with a level and a moisture meter.
The mechanics of the circular cut
To cut a perfect circle in laminate for plumbing pipes, you must utilize a carbide-tipped hole saw or a high-speed jigsaw with a fine-tooth blade. The diameter of the hole must include the pipe width plus a mandatory 1/4 inch expansion gap on all sides to allow the floating floor to move. Laminate flooring is a composite product made of high-density fiberboard and a melamine wear layer. These materials expand and contract with changes in relative humidity. If you cut the hole too tight to the pipe, the floor will bind. When it binds, it buckles. I have walked into jobs where the floor was lifting three inches off the subfloor because some installer thought a tight fit looked better. It looked better for two weeks, and then it looked like a disaster. You need that expansion gap. It is the lifeblood of a floating floor system. Using a hole saw is the preferred method because it maintains a perfectly concentric circle which distributes stress evenly across the HDF core. A jigsaw can work, but it requires a steady hand and a blade that will not chip the brittle aluminum oxide top layer.
Why your subfloor is lying to you
A subfloor that looks flat to the naked eye often contains undulations that will compromise your circular cuts and your overall installation stability. You need to use a ten-foot straightedge to identify any dips or humps exceeding 3/16 of an inch. If you find a dip, you fill it with a high-strength Portland cement-based leveling compound. If you find a hump, you grind it down. This is particularly important around plumbing pipes in bathrooms or kitchens. Pipes are fixed points. The floor must be able to move around them. If the subfloor is not level near the pipe, the laminate plank will sit at an angle, making your circular cut appear elliptical once the plank is laid flat. I have spent decades seeing guys try to bridge these gaps with thick underlayment. Underlayment is for sound dampening and moisture protection, not for structural correction. Too much cushion under a laminate floor is a recipe for broken locking mechanisms. The floor flexes too much, and the tongues snap. You want a firm, flat base for every cut you make.
“A floor is only as good as the subfloor beneath it; deflection is the enemy of every joint.” – Master Flooring Axiom
Tool selection for precision geometry
Choosing the correct tool for cutting laminate involves understanding the metallurgy of the blades and the density of the fiberboard core. Carbide-tipped hole saws are the gold standard because they can withstand the abrasive nature of the aluminum oxide wear layer which quickly dulls standard carbon steel. When you use a hole saw, you should always drill from the decorative side of the plank to prevent the exit of the bit from blowing out the finished surface. If you are using a jigsaw, you need a reverse-tooth blade. This pulls the cutting action downward, keeping the chips on the bottom of the board where they will not be seen. I always keep a variety of hole saw sizes on the truck because plumbing pipes are never as standard as the blueprints say they are. A 1/2 inch copper supply line is not 1/2 inch on the outside. You have to measure the outside diameter with calipers if you want to be precise. Then you add your expansion gap. Accuracy here prevents the need for ugly oversized escutcheon plates later.
| Pipe Material | Nominal Size | Actual OD | Recommended Hole Saw Size |
|---|---|---|---|
| Copper Supply | 1/2 inch | 0.625 inch | 1 1/8 inch |
| PEX Tubing | 3/4 inch | 0.875 inch | 1 3/8 inch |
| PVC Waste | 2 inch | 2.375 inch | 3 inch |
| Toilet Flange | 3 inch | 3.5 inch | 4 1/2 inch |
Step by step guide to circular cuts
The process of cutting a circle begins with precise measurement from the edge of the previous row to the center of the pipe. Do not guess. Use a framing square to transfer the center point of the pipe onto your laminate plank. Once you have your mark, follow these steps to ensure a clean finish.
- Measure the distance from the tongue of the last installed row to the center of the pipe.
- Mark the center point on the top surface of the laminate plank using a soft lead pencil.
- Select a hole saw that is at least 1/2 inch larger than the pipe diameter to account for the expansion gap.
- Place the pilot bit on the mark and run the drill at a medium speed to prevent burning the melamine.
- Once the hole is cut, use a miter saw to cut the plank in half through the center of the hole.
- Install the larger piece behind the pipe and the smaller piece in front of it, gluing the seam with a high-quality PVA wood glue.
This method allows the plank to be fitted around the pipe without having to lift the entire row. The glue joint must be tight, and you should use blue painter tape to hold it in place while it cures. If you do this right, the seam will be nearly invisible under the radiator or toilet base.
Understanding expansion and contraction physics
Laminate flooring reacts to temperature and moisture by expanding along its length and width, requiring a perimeter gap and space around all vertical obstructions. The high-density fiberboard core is essentially compressed wood fibers held together with resins. These fibers are hygroscopic. They take in moisture from the air. In a place like Houston, where the humidity is thick enough to chew, a laminate floor will grow significantly. If you did not cut your circles with enough clearance, the floor will hit the pipe and start to peak at the joints. Conversely, in a dry climate like Phoenix, the floor will shrink. If your hole was too big, you might see a gap peeking out from under the trim. You have to find the middle ground based on the local climate. I always advise acclimating the flooring in the room where it will be installed for at least 48 hours. This allows the planks to reach an equilibrium moisture content with the home environment before you ever make your first cut.
“Wood and wood-based products are hydroscopic; they will expand or contract until they reach equilibrium with their environment.” – NWFA Technical Guidelines
Regional humidity impacts on circular tolerances
Installers working in high-humidity coastal regions must strictly adhere to wider expansion tolerances compared to those in arid mountain climates. In the Pacific Northwest, for example, the constant moisture means you should never cheat on the 1/4 inch gap. I have seen guys try to use silicone to fill the gap around a pipe. That is a mistake. Silicone is flexible, but it still provides resistance. The floor needs to move freely. If you are worried about water getting down the hole in a bathroom, use a specialized flexible sealant designed for flooring or an escutcheon plate with a foam gasket. Do not lock the floor down. This is even more important when you are dealing with floor leveling issues. If the floor is not level and it is humid, the stress on the locking joints is doubled. You will hear clicking and popping every time you walk near the pipe. It is the sound of a floor that is being strangled by its own installation.
Final considerations for floor stability
The longevity of a laminate installation is determined by the attention paid to the smallest details at the edges and penetrations. Cutting a circle is not just about the shape. It is about the math of the expansion gap and the quality of the subfloor preparation. If you skip the leveling, your circular cut will eventually fail as the plank flexes and the joint breaks. If you skip the expansion gap, the floor will buckle. If you use the wrong tools, you will chip the surface and leave a jagged mess that no trim can hide. Take your time. Measure twice. Use a sharp carbide bit. Respect the physics of the material. A floor is a structural system, and the holes you cut in it are the most vulnerable points. Treat them with the respect they deserve, and the floor will last for decades. Ignore the rules, and you will be calling someone like me to tear it all out and start over. I have seen it happen too many times to count. It is always cheaper to do it right the first time.