The Flashlight Trick for Finding Micro-Cracks in Your Shower Liner
The Flashlight Trick for Finding Micro-Cracks in Your Shower Liner
I spent three days grinding concrete on a job last month just so the floor wouldn’t click like a castanet. Most guys skip the leveling compound. They think the underlayment will hide the dip. It won’t. I have sawdust under my nails and I smell like a mix of WD-40 and fresh oak. I have seen fifteen thousand dollar walnut floors turn into potato chips because some installer forgot a moisture meter. When it comes to showers, the stakes are even higher. A leak is not just a puddle. It is a structural rot event that eats your floor joists and breeds mold in the dark. You cannot trust a visual check from a standing position. You need to get on your knees and use physics to your advantage. Most homeowners think their waterproof shower is a fortress, but the reality is often a sieve waiting to happen.
Shadows that reveal the truth
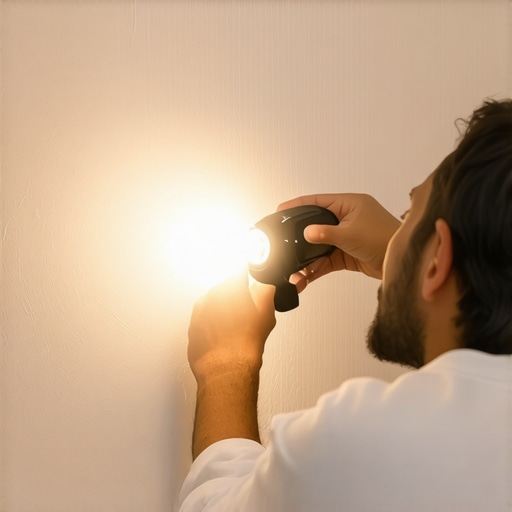
The flashlight trick involves using a high-intensity LED light source at a very low angle to create shadows in surface imperfections. This grazing light technique makes even the smallest micro-cracks in a shower liner visible by highlighting the height difference between the crack and the surface. By placing the light flat against the floor or wall, any depression or protrusion casts a long, dark shadow that the human eye would otherwise miss under standard overhead lighting. This is the same method we use to check for floor leveling before a luxury vinyl plank or laminate installation. If the light shows a gap, the floor is not flat enough for the locking mechanisms.
“A floor is only as good as the subfloor beneath it; deflection is the enemy of every joint.” – Master Flooring Axiom
The 1/8 inch that ruins everything
Standard tolerance for a shower substrate is a 1/8 inch deviation over ten feet. If your subfloor or shower pan has a dip greater than 1/8 inch, the waterproofing membrane is under constant tension. This tension leads to stress fractures in liquid-applied membranes and can even snap the bond of a sheet-applied system over time. When you are performing a carpet install, you can hide a world of sins with a thick pad. Tile is different. Tile is brittle. If the floor leveling is not perfect, the grout will crack first, then the tile, and finally the liner underneath. I have seen guys try to use extra thin-set to level a floor. That is a crime. Thin-set is an adhesive, not a filler. It shrinks as it cures. If you use it to fill a half-inch hole, it will pull on the tiles and create new cracks.
Physical properties of modern membranes
Modern waterproofing relies on polymers that remain flexible but only to a certain point. ANSI A118.10 standards require that a membrane remains waterproof even when subjected to minor structural movement. However, a micro-crack in a PVC or CPE liner often occurs at the corners or where the floor meets the wall. This is usually due to a lack of proper pre-slope. If the water cannot reach the weep holes in the drain, it sits on the liner. This stagnant water can eventually find a path through a microscopic pinhole or a failed solvent weld. The flashlight trick is the only way to see these tiny failures before you spend thousands on tile and grout. You need a light with at least 500 lumens. Darker liners like gray PVC are harder to inspect than lighter ones, so the shadow contrast is vital.
| Membrane Type | Material Composition | Recommended Use | Acclimation Time |
|---|---|---|---|
| Sheet Membrane | Polyethylene | Shower Walls and Floors | 24 Hours |
| Liquid Applied | Polymer Resin | Complex Geometries | 12-24 Hours |
| PVC Liner | Polyvinyl Chloride | Standard Pan Liners | None |
| CPE Liner | Chlorinated Polyethylene | High-End Custom Pans | None |
The path to a flat substrate
Before you ever touch a flashlight, you must ensure the foundation is sound. Floor leveling for a shower requires a mortar bed that is sloped at a rate of 1/4 inch per foot toward the drain. If the slope is inconsistent, the water will pool. This pooling leads to hydrostatic pressure. Over time, that pressure forces water through the smallest voids in the liner. When I check a shower floor, I turn off all the lights in the room. I want total darkness. Then I slide my flashlight across the floor surface. If I see a shadow that looks like a spiderweb, I know the liner was stretched too thin or was damaged during the carpet install in the adjacent room. Sharp tools and heavy boots are the enemies of a fresh liner.
- Inspect all corners for pinholes or tears in the membrane.
- Check the bond at the drain flange for any gaps or peeling.
- Verify that the pre-slope contains no birdbaths or flat spots.
- Test the solvent welds on PVC liners by applying light pressure.
- Look for discoloration that might indicate chemical damage.
The chemistry of the bond
The relationship between the liner and the thin-set is a delicate chemical balance. Modified thin-sets contain polymers that allow for a slight bit of movement while maintaining a massive grip on the substrate. If you use the wrong mortar over a membrane, the tile will simply pop off. This is called a bond failure. Often, people blame the liner when the real culprit is the chemistry of the adhesive. In high humidity regions like Houston, moisture can migrate through the slab and cause the adhesive to emulsify if a proper vapor barrier is not present. This is why I always insist on a moisture test. If your concrete is pushing out more than three pounds of moisture per thousand square feet, you are asking for trouble. No flashlight trick will save a floor that is being pushed up from below by water vapor.
“Shower pan liners must be sloped to the weep holes to ensure proper drainage and prevent stagnant water.” – TCNA Guide
The ghost in the expansion gap
Laminate and LVP need room to breathe. An expansion gap of at least 1/4 inch is required around the entire perimeter of a floor to prevent buckling. If you run your laminate tight against a shower curb, the floor will expand, hit the curb, and then tent in the middle of the room. This movement can also put pressure on the shower liner itself. I have seen floors that expanded so hard they actually cracked the bottom row of wall tile. The flashlight trick should be used on the transition area as well. Shine the light under the baseboards. If you see the floor is touching the wall, get your pull bar and your oscillating saw. You need to create that gap before the summer humidity hits and turns your floor into a mountain range. Hardwood is even worse. It has the power to move walls if it does not have an expansion gap.
The truth about floor leveling
There is no such thing as a floor that is too flat. Self-leveling underlayment is the best tool for correcting large dips in the subfloor before a shower or flooring project begins. If you are working on a wooden subfloor, you must use a primer and possibly a metal lath to keep the leveler from cracking. I have spent decades seeing guys try to eyeball a floor. You cannot eyeball 1/16 of an inch. When you use the flashlight trick, you are seeing the microscopic reality of the surface. It is a humbling experience. You might think you did a great job with the trowel until that LED light hits the floor. Then you see every ridge and every valley. Fix it now. Do not wait until the tile is down and the grout starts to crumble like a stale cookie. Your reputation is built on what is under the floor, not what is on top of it. Article Schema JSON-LD: {“@context”: “https://schema.org”, “@type”: “Article”, “headline”: “The Flashlight Trick for Finding Micro-Cracks in Your Shower Liner”, “author”: {“@type”: “Person”, “name”: “Master Floor Installer”}, “datePublished”: “2023-10-27”, “description”: “Expert guide on using the grazing light technique to identify shower liner failures and the importance of floor leveling in professional installations.”, “publisher”: {“@type”: “Organization”, “name”: “Flooring Architect”}}