Why Your Shower Niche Is Collecting Water Instead of Draining It
The gravity problem in vertical storage
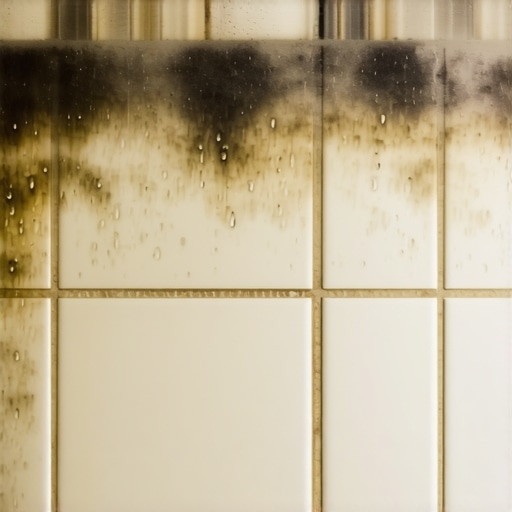
Standing water in a shower niche occurs because the horizontal surface lacks a positive pitch toward the shower floor. A functional niche must have a downward slope of at least 1/8 inch to 1/4 inch per foot to ensure that surface tension does not hold moisture against the grout lines. Without this mechanical advantage, capillary action draws water into the substrate, leading to mold growth and eventual structural rot behind the tile assembly. I have spent twenty-five years on my knees with a level and a grinder. I have seen the carnage of the shortcut. I once opened a wall behind a niche that had been leaking for three years. The installer didn’t pitch the sill. He thought the grout would stop the water. It did not. The 2×4 studs had turned into a black, mushy compost that smelled like a swamp. The homeowner was out ten grand because someone forgot the basic physics of water flow. Most guys skip the leveling compound. They think the underlayment will hide the dip. It won’t. I spent three days grinding concrete on a job last month just so the floor wouldn’t click like a castanet. The same logic applies to your shower walls. If the substrate is not plumb and the niche sill is not pitched, the tile is just a pretty mask for a disaster.
“Tile and grout are not waterproof; the system beneath them is what keeps the structure dry.” – TCNA Handbook Standard
The 1/8 inch that ruins everything
The pitch of the niche sill is the most vital geometric requirement for a long-lasting shower installation. When a niche is built perfectly square, water accumulates in the corners through a process known as pooling. This happens because the molecular bond of water molecules allows them to cling to the surface of the tile and the textured valleys of the grout. To break this bond, gravity must be the dominant force. A slope of 1/8 inch across a standard 4 inch niche depth is enough to overcome the friction of the tile surface. In humid regions like the Pacific Northwest or the coastal Southeast, this drainage is even more vital. The ambient moisture in the air slows down the evaporation process. If the water does not drain mechanically, it stays liquid for hours. This creates a breeding ground for pink slime and black mold. You cannot rely on a thick bed of thin-set to create this pitch after the fact. The mortar will shrink as it cures. This shrinkage can actually pull the tile back into a flat or even a negative pitch if the substrate wasn’t sloped correctly from the start. I use a mechanical level on every single course. If that bubble isn’t leaning toward the drain, the job isn’t done.
Why your substrate fails under pressure
The material used to construct the niche box determines how the assembly reacts to thermal expansion and moisture load. Using standard drywall or even non-waterproofed cement board inside a niche is a recipe for failure. These materials are hydrophilic. They want to drink. When water sits on a flat sill, it finds the micro-fissures in the grout. From there, it migrates into the core of the wall. Modern pros use extruded polystyrene foam boards or pre-fabricated niches. These are hydrophobic. They do not absorb water. However, even a pre-fab niche can be installed incorrectly if the flange is not integrated into the wall membrane. The chemical bond between the niche flange and the wall board must be continuous. I prefer a fleece-lined waterproofing strip embedded in a high-quality modified thin-set. This creates a monolithic barrier. If you are in a high-rise in Chicago or a ranch in Phoenix, the movement of the building will stress these joints. You need a substrate that can handle the shift without cracking the waterproofing skin.
The molecular reality of adhesive chemistry
The thin-set mortar used to set the niche tile must be polymer-modified to handle constant saturation. Cheap, unmodified mortar is a network of portland cement and sand. It is porous. Polymer-modified mortars contain long-chain resins that fill the microscopic voids. This reduces the permeability of the bed. When you are tiling a niche, the coverage must be 100 percent. Any void behind the tile becomes a reservoir for stagnant water. I back-butter every piece of tile that goes into a niche. It is a slow process. It is tedious. It is the only way to ensure there is no room for water to hide. The adhesive bond is not just about holding the tile up. It is about occupying the space where water wants to go.
“A floor is only as good as the subfloor beneath it; deflection is the enemy of every joint.” – Master Flooring Axiom
The level truth about material selection
Selecting the right tile for a niche sill can mitigate drainage issues even when the pitch is minimal. Large format tiles with fewer grout lines are superior for the sill. Every grout line is a dam. It is a physical barrier that water must climb over to reach the edge. If you use a single piece of stone or a large porcelain tile for the bottom of the niche, you eliminate these dams. This allows for a smoother exit for the water. Small mosaics look great in the back of the niche, but keep them off the floor of the niche. They have too much grout. They hold too much water.
Material Comparison for Niche Sills
| Material Type | Porosity Level | Drainage Efficiency | Maintenance Need |
|---|---|---|---|
| Natural Marble | High | Moderate | High |
| Porcelain Slab | Near Zero | High | Low |
| Ceramic Mosaic | Moderate | Low | High |
| Quartz Remnant | Zero | Excellent | Very Low |
The ghost in the expansion gap
Movement joints at the corners of the niche are not optional. Every change in plane in a tile installation requires a flexible sealant. Most installers make the mistake of using hard grout in the corners of the niche. When the house settles or the wood studs expand with the summer humidity, that hard grout will crack. Those cracks are invisible straw-like paths for water. You must use a 100 percent silicone sealant that matches your grout color. Silicone is elastic. It stretches and compresses. It keeps the seal tight while the rest of the house moves. This is especially true if your shower shares an exterior wall. The temperature differential between the hot shower water and the cold exterior air creates significant thermal stress on the niche assembly. Without a flexible joint, the waterproofing will eventually be compromised.
Pre-tiling niche inspection checklist
Before the first tile is set, the niche must pass a rigorous physical check. Do not trust your eyes. Use tools. Verify the following points to ensure your shower does not become a bathtub for your wall studs.
- Check the sill pitch with a digital level to ensure at least 1.5 degrees of slope.
- Verify that all fasteners are covered with waterproofing membrane or liquid sealant.
- Ensure the niche flange is flush with the wall substrate to avoid a lip that traps water.
- Confirm that the waterproofing extends at least six inches beyond the niche opening.
- Check for any deflection in the wall studs that might stress the niche box.
The fix for standing water in existing niches
If you already have a niche that collects water, the solution is rarely a simple topical fix. Some people try to add a layer of tile over the existing sill to create a pitch. This is a gamble. You are relying on the bond between the new thin-set and the old tile. If the original failure was caused by moisture in the substrate, you are just burying the problem. The correct way to fix a failing niche is to remove the sill tile, inspect the substrate for rot, and rebuild the pitch using a rapid-setting mortar bed. Then, you re-apply the waterproofing membrane and set new tile. It is a surgical strike. It requires patience. It is cheaper than replacing the entire wall next year.
The ghost of builder grade shortcuts
The pressure to build fast leads to the most common niche failures seen in modern housing. Volume builders often skip the niche pitch because it takes an extra five minutes per unit. Over a hundred houses, that is a lot of time. But that five-minute shortcut is what causes the mold smell that homeowners can never quite scrub away. The water sits. It stagnates. It seeps. If you are buying a new home, bring a marble to the inspection. Place it on the niche sill. If it doesn’t roll toward the drain, you have a problem. Do not accept a house with a flat niche. It is a defect. It is a ticking clock. I have seen too many people cry over ruined drywall in the hallway because a shower niche on the other side of the wall was built by someone who didn’t care about the physics of a drop of water.