The Real Reason Your Shower Grout Is Cracking at the Floor Joint
The physics of the failing grout joint
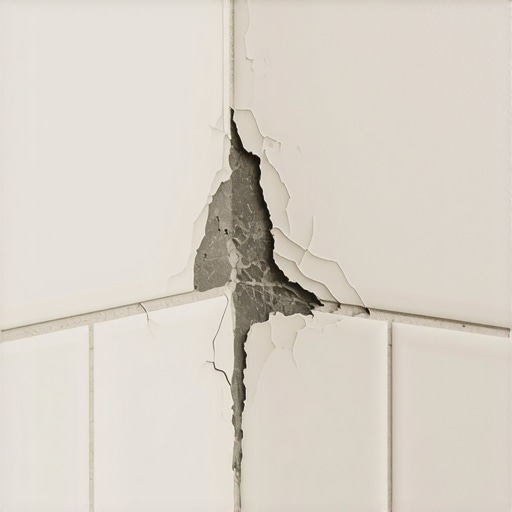
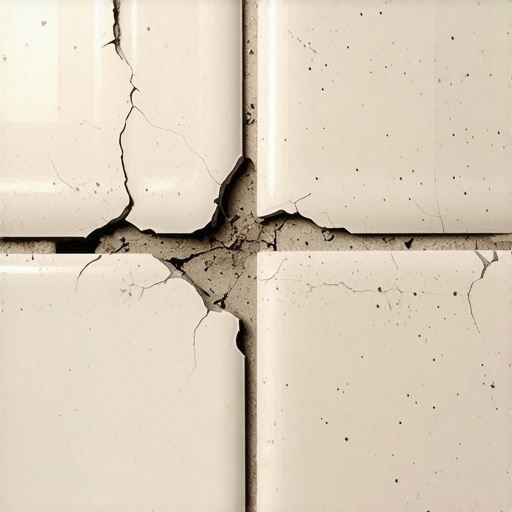
Grout cracks at the shower floor joint because of structural deflection, improper thin-set coverage, and the lack of a movement joint at the change of plane. Movement in the subfloor or the wall studs creates stress that rigid cementitious grout cannot absorb. To prevent this, installers must use 100 percent silicone caulk at all transitions where the floor meets the wall. Most guys skip the leveling compound. They think the underlayment will hide the dip. It won’t. I spent three days grinding concrete on a job last month just so the floor wouldn’t click like a castanet. When you are dealing with a wet environment, those microscopic shifts translate into visible failures. If your subfloor has even a fraction of an inch of bounce, the grout will pulverize under the pressure of daily use. We are talking about the difference between a floor that lasts thirty years and one that fails in thirty days. It is about the chemistry of the bond and the rigidity of the assembly. I have seen countless showers where the installer treated the floor like a carpet install, thinking padding or flexibility would save them. It does not work that way with stone and ceramic. You need a rock-solid foundation. If the subfloor moves, the tile moves. If the tile moves, the grout breaks. It is a simple law of physics that most builders choose to ignore to save a few dollars on self-leveling underlayment.
The ghost in the expansion gap
Expansion gaps are required because every building material expands and contracts with changes in temperature and humidity levels. In a shower, the heat from the water causes the tile and the substrate to grow slightly. If the tile is wedged tight against the wall with no room to move, the force has nowhere to go but out. This results in the grout popping or the tile tenting. I once walked into a house where a wide-plank walnut floor was cupping so bad it looked like a potato chip because the installer didn’t check the crawlspace humidity. The same logic applies to your shower. You cannot fight nature. You have to engineer for it. This is why floor leveling is the most important step in any installation. If the floor is not flat, the tile spans a void. When you step on that tile, it acts like a lever. It puts immense pressure on the grout lines. Over time, that pressure turns the grout into dust. You might smell the wet concrete and the dust in the air when you are working, but the homeowner only smells the mold that grows behind the cracked grout later on. Every joint where two different planes meet must be treated as a movement joint. That is a non-negotiable rule of the TCNA. You use silicone, not grout. Grout is a rock. Rocks do not bend. They break.
“A floor is only as good as the subfloor beneath it; deflection is the enemy of every joint.” – Master Flooring Axiom
The chemical reality of modified thin-set
Modified thin-set contains polymers that increase bond strength and provide a slight amount of flexibility compared to standard unmodified mortar. However, even the best thin-set cannot overcome a subfloor that is out of spec. You need to understand the L/360 rule. This means the floor should not deflect more than the total span divided by 360. For natural stone, that requirement jumps to L/720. If your joists are too small or spaced too far apart, your shower floor is effectively a trampoline. I have spent years explaining to homeowners why their laminate flooring feels bouncy, but you cannot have that bounce in a shower. When we zoom into the molecular level, we see the polymer chains in the mortar trying to hold onto the tile. If the substrate beneath it shifts, those chains snap. The bond is broken. Once the bond is broken, water gets under the tile. Water is the universal solvent. It will find the path of least resistance. Usually, that path leads straight to your subfloor. This is why showers require a level of precision that a standard living room floor does not. You are building a vessel, not just a surface. If the vessel leaks because you were too lazy to check the level, you have failed the trade. I keep my tools clean and my levels calibrated. You should too.
| Material Type | Deflection Requirement | Acclimation Time |
|---|---|---|
| Ceramic Tile | L/360 | 48 Hours |
| Natural Stone | L/720 | 72 Hours |
| Solid Hardwood | N/A (Structural) | 7 to 14 Days |
| LVP / Laminate | L/360 | 24 to 48 Hours |
The 1/8 inch that ruins everything
A variation of just one-eighth of an inch over ten feet can cause a tile to bridge a gap and eventually crack the surrounding grout. You cannot expect thin-set to act as a leveler. Thin-set is meant for bonding, not for building up low spots. When you try to use it as a filler, it shrinks as it cures. This shrinkage pulls the tile downward, creating an uneven surface and putting stress on the grout joints. I have seen guys try to fix this by double-buttering the tile, but that is a band-aid on a gunshot wound. You need to start with a flat surface. This means using a high-quality self-leveling compound that can handle the moisture of a bathroom. In places like Houston, the humidity is a constant battle. The concrete absorbs moisture from the ground, and if you do not have a proper vapor barrier, that moisture will push your leveler right off the floor. It is a messy, difficult job that involves a lot of grinding and dust. My hands are usually stained with the grey residue of portland cement by the end of the day. But that is what it takes to do it right. If you want a floor that stays together, you have to respect the tolerances. You have to be a stickler for the numbers. If you are off by a hair, the grout will tell on you within six months.
- Check the subfloor for deflection using a 10-foot straightedge.
- Ensure joist spacing meets TCNA standards for the specific tile weight.
- Apply a waterproof membrane over the entire shower floor and up the walls.
- Use a perimeter expansion gap of at least 1/4 inch.
- Fill all change-of-plane joints with 100 percent silicone sealant.
Why your subfloor is lying to you
Plywood and OSB may look flat to the naked eye, but they are subject to swelling and seasonal movement that destroys rigid tile installations. You cannot just screw down a piece of backer board and call it a day. The layers of the floor must be bonded and fastened according to a strict schedule. If you miss a screw or use the wrong adhesive, you are inviting disaster. I have seen carpet install crews transition into tile work and fail miserably because they do not understand that tile is a system. It is not a decorative layer. It is a structural component. When the wood underneath the tile expands because of a leak or high humidity, it exerts thousands of pounds of pressure. The grout is the weakest link. It will crumble. This is especially true in regions with extreme weather shifts. The dry air of a desert winter will shrink your subfloor, while the summer humidity will bloat it. Without a proper decoupling membrane, that movement is transferred directly to the grout. It is a silent killer of bathrooms. You do not hear the floor moving, but you see the results in the cracks. I always tell my apprentices that if they are not sweating the details of the subfloor, they are not installers. They are just laborers. The real work happens before the first tile is even pulled from the box. You have to prepare for the movement you know is coming. You have to build a floor that can breathe without breaking. It takes patience and a lot of expensive tools. It takes a willingness to do the boring work of leveling and measuring. But that is the only way to ensure that the grout stays where it belongs.
“Deflection at the floor to wall transition is the leading cause of secondary water damage in residential showers.” – Tile Construction Journal