The Flashlight Trick for Spotting Low Spots in Your Subfloor Prep
I spent three days grinding concrete on a job last month just so the floor wouldn’t click like a castanet. Most guys skip the leveling compound because they think the underlayment will hide the dip. It won’t. I walked into that job site with a seven inch diamond cup wheel and a HEPA vacuum. The client thought I was crazy until they saw the pile of dust and the perfectly flat slab. That is the difference between a floor and a liability. If you do not get the substrate right, the most expensive Italian tile or wide-plank oak is just a ticking time bomb. A floor is a performance surface. It is a structural engineering challenge that starts with the physics of the subfloor. Most homeowners and even some rookie installers fail because they trust their eyes. Your eyes will lie to you. Shadows are the only things that tell the truth.
The science of the grazing light
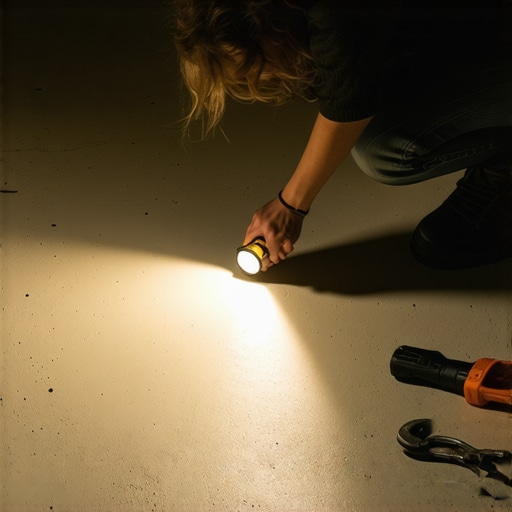
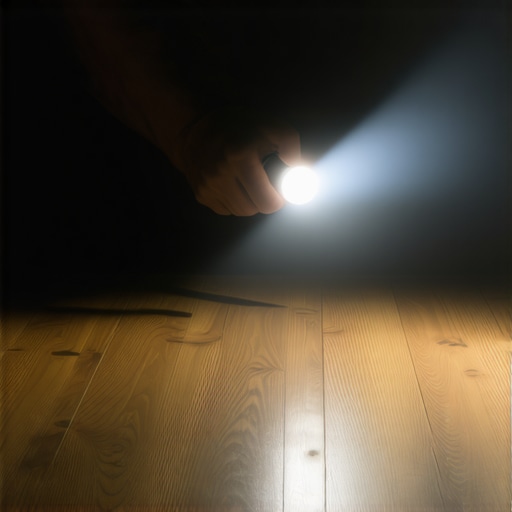
The flashlight trick for spotting low spots in your subfloor prep involves placing a high-lumen LED light source directly on the floor surface to create a grazing light effect. This technique highlights birdbaths and humps by casting long shadows across any deviation in planarity that exceeds 1/8 inch. You must use this method before any laminate or hardwood installation to ensure long-term stability. When you place a flashlight flat on the ground, you are engaging in a basic physics experiment. The angle of incidence is so shallow that any vertical change in the surface topography creates a dramatic shadow. In my twenty five years of experience, this is more accurate than a standard six foot level. A level can bridge a gap, but the light reveals the exact depth of the depression. We call these low spots birdbaths. If you ignore them, your floating floor will bounce. That bounce puts stress on the locking mechanism. Eventually, the tongue and groove will snap. You will hear a click every time you walk across the room. That is the sound of your money breaking.
“A floor is only as good as the subfloor beneath it; deflection is the enemy of every joint.” – Master Flooring Axiom
Why your subfloor is lying to you
Subfloor prep requires an understanding that wood and concrete are living, moving materials that react to ambient humidity and vapor transmission. A subfloor might look smooth, but deflection and micro-dips can cause carpet install wrinkles or laminate joint failure. You must measure the flatness to within 3/16 inch over 10 feet. Plywood subfloors are notorious for crowning at the seams. This happens when the house settles or when the crawlspace moisture is too high. The edges of the sheets swell. If you install over those swollen seams, your floor will have a permanent ridge. Concrete slabs are no better. They often have dips where the finisher got tired or humps where the aggregate settled unevenly. You need to know the chemistry of your slab. Is it high-moisture? Is there a vapor barrier? Most people buy the thickest underlayment they can find, thinking it will cushion the blow. That is a mistake. Too much cushion actually causes the locking mechanisms on LVP to snap under pressure. You want a high-density, low-compression underlayment.
The physics of birdbaths and humps
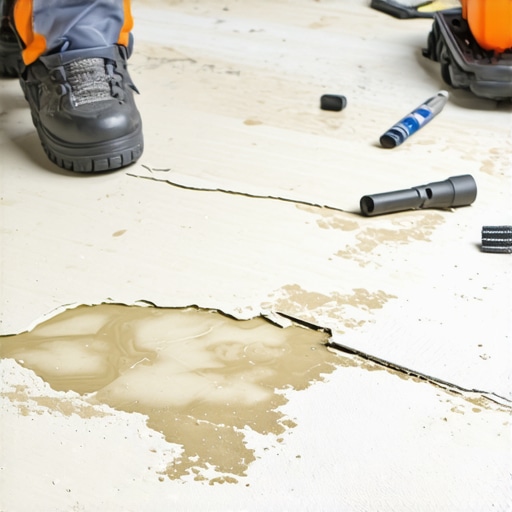
Identifying low spots and high spots in a substrate is essential for floor leveling success before laying down hardwood or tile. The flashlight trick reveals these defects by extending the shadow length proportionally to the depth of the dip. Use a self-leveling compound or a feather finish to correct these topographical errors. When you find a low spot, do not just pour leveler into it. You have to understand the bond. Concrete is porous. If you do not use a primer, the dry concrete will suck the water out of your leveling compound before it has a chance to hydrate. The result is a brittle, chalky mess that will eventually delaminate. I have seen guys try to use thin-set to fill deep holes. Thin-set is meant for setting tile, not for filling two inch deep craters. It shrinks. As it dries, it pulls away from the edges. You need a dedicated Portland-based leveler with a high PSI rating. Check the technical data sheet. You want something that hits at least 4,000 PSI after 28 days.
| Material | Flatness Tolerance (10 ft) | Moisture Limit (Concrete) | Moisture Limit (Wood) | | :— | :— | :— | :— | | Solid Hardwood | 3/16 inch | 3 lbs / 1,000 sq ft | 12% MC | | Laminate | 1/8 inch | 75% RH | 12% MC | | Ceramic Tile | 1/8 inch | 80% RH | 10% MC | | Luxury Vinyl Plank | 3/16 inch | 85% RH | 14% MC |
The ghost in the expansion gap
Expansion gaps at the perimeter of a room are required by the NWFA to allow for the natural expansion and contraction of wood flooring. Without a 1/4 inch to 1/2 inch gap, hardwood or laminate will buckle against the wall as humidity levels rise during the summer months. People hate the look of the gap. They try to push the floor tight against the baseboard. This is a recipe for disaster. Wood is hygroscopic. It takes in moisture from the air and grows. If it has nowhere to go, it will lift off the subfloor. This creates a hollow sound. It is even worse with wide-plank boards. The force of expansion can actually move interior partition walls if the floor is locked in. You must treat the perimeter as a breathing joint. Cover it with shoe molding or baseboard, but never pin the floor down with the trim. The floor must be free to slide underneath. This is the fundamental rule of floating floors.
“The maximum moisture content for wood subfloors should not exceed 12 percent, with no more than a 4 percent difference between the subfloor and the finish wood.” – NWFA Technical Standards
Showers and the slope of despair
Shower floor leveling is a specialized task where the subfloor must be perfectly sloped toward the drain at a rate of 1/4 inch per foot. Failure to achieve this pre-slope leads to standing water, mold growth, and efflorescence in the grout lines of the finished tile install. Most installers think they can just build the slope in the final mud bed. They are wrong. The waterproofing membrane must be sloped. If the membrane is flat, water will sit in the mortar bed forever. It becomes a swamp. You get that musty smell that never goes away. I always use a pre-pitch system. It ensures the water moves toward the weep holes in the drain. If you are doing a curbless shower, the subfloor prep is even more intense. You have to recess the joists. You have to ensure the structural integrity of the floor is not compromised while you are cutting away at the wood. It is a game of millimeters. One wrong cut and you have a bouncy floor that will crack your large format tiles.
The carpet install fallacy
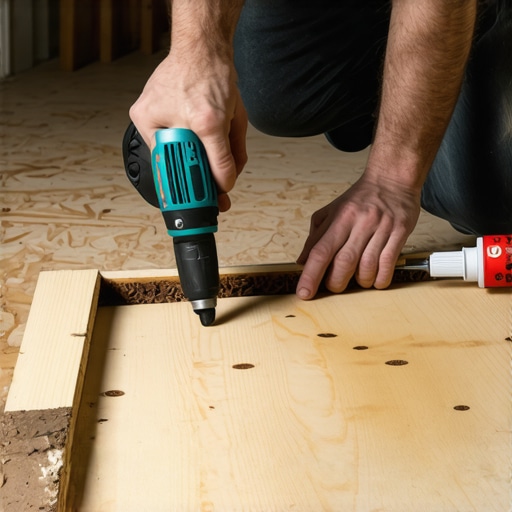
Carpet installation is often viewed as a way to hide a bad subfloor, but subfloor imperfections like squeaks and divots will eventually telegraph through the padding. High-quality carpet install requires a fastened substrate where OSB or plywood sheets are screwed down every six inches to prevent vertical movement. Carpet is a textile. It is flexible. If there is a one inch dip in the hallway, the padding will eventually compress into that dip. The carpet will then stretch unevenly. You will see a low spot that looks like a stain because of how the light hits the fibers. More importantly, if the subfloor is loose, the carpet will not stop the squeak. It will just muffle it. I always go through a room with a box of three inch floor screws before the carpet guys arrive. I find every joist. I drive a screw through the plywood and into the meat of the lumber. If the subfloor does not move, the floor does not speak. Silence is the mark of a pro.
- Verify structural integrity of the joists and check for rot.
- Measure moisture at 20 points per 1,000 square feet using a pin meter.
- Execute the flashlight grazing test for birdbaths and mark them with a pencil.
- Sand down high spots with a 7-inch grinder and 40-grit diamond wheel.
- Vacuum all dust to ensure a proper mechanical bond for the primer.
- Apply the manufacturer-specific primer before pouring any self-leveling compound.
The 1/8 inch that ruins everything
Laminate flooring joints are engineered to micro-tolerances, and a subfloor deviation of just 1/8 inch can cause the HDF core to fail. When a low spot is present, the locking system undergoes cyclic loading every time someone steps on it, leading to fatigue failure and gapping. This is the molecular reality of flooring. The high-density fiberboard used in laminate is strong, but it is brittle. It does not have the elasticity of solid wood. When it flexes, the internal bonds of the wood fibers break. Once those bonds are gone, the joint is dead. You cannot glue it back together. You cannot save it. You have to rip the floor up and start over. This is why the flashlight trick is not a suggestion. It is a requirement. If you see a shadow, you have a problem. Fix the shadow, and you fix the floor. Do not trust the underlayment to do a job it was not designed to do. Level the ground. The floor will follow. It takes patience and a lot of dust. But at the end of the day, you can stand on that floor and know it is solid. That is the only way to work. [{“@context”:”https://schema.org”,”@type”:”HowTo”,”name”:”The Flashlight Trick for Subfloor Prep”,”step”:[{“@type”:”HowToStep”,”text”:”Place a high-lumen LED flashlight flat on the subfloor surface.”},{“@type”:”HowToStep”,”text”:”Scan the floor for shadows cast by humps or dips.”},{“@type”:”HowToStep”,”text”:”Mark the boundaries of the shadows to identify birdbaths.”},{“@type”:”HowToStep”,”text”:”Use a level to confirm the depth of the low spots.”},{“@type”:”HowToStep”,”text”:”Fill low spots with a Portland-based leveling compound or sand down high spots.”}]}]