The ‘Water Ring’ Mistake That Turns Your Floor Leveler Into Chalk
The ghost in the expansion gap
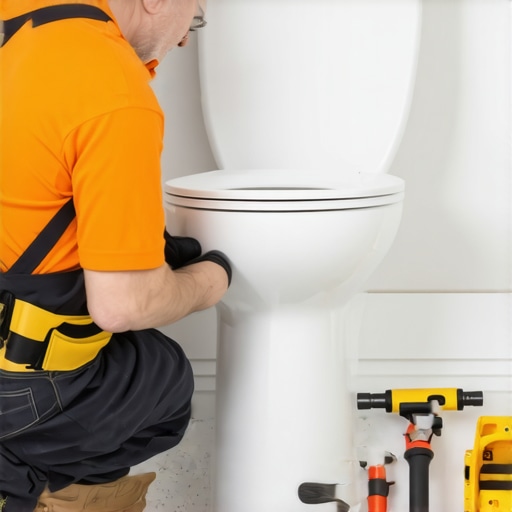
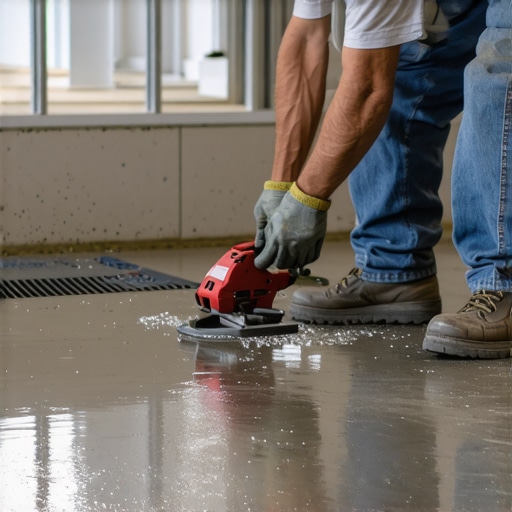
Self leveling compound failure occurs when the water to powder ratio is exceeded, leading to polymer migration and a chalky surface. This structural breakdown prevents adhesive bonding for laminate or carpet install projects. Most installers ignore the manufacturer specifications, resulting in a brittle subfloor that clicks underfoot.
Most guys skip the leveling compound. They think the underlayment will hide the dip. It won’t. I spent three days grinding concrete on a job last month just so the floor wouldn’t click like a castanet. The previous contractor had poured a self-leveler that looked like it was from a horror movie. Every time you stepped on it, a puff of white dust shot out from the baseboards. He had committed the cardinal sin of the trade. He saw the mix getting thick and decided to ‘slop it up’ with another half-gallon of water. He thought he was being smart by making it flow better. Instead, he destroyed the chemical matrix of the cement. When I hit it with my scraper, the whole floor just turned into white powder. It was like trying to glue a floor to a pile of flour. This is the reality of the water ring mistake. It is a silent killer of high-end flooring installs. You cannot cheat the chemistry of a bag of leveler. If the bag says five quarts, you give it five quarts. You do not eyeball it. You do not use a dirty bucket that already has dried chunks in it. You treat it like a lab experiment because that is exactly what it is.
The chemistry of the chalky death spiral
Calcium aluminate cement requires a specific hydration profile to form crystalline structures that provide compressive strength. When excess water is introduced, the polymers float to the surface, creating a white ring or laitance layer. This friable surface lacks the tensile strength to hold flooring fasteners or pressure sensitive adhesives.
When you pour that leveler, a complex dance of molecules begins. The water is the catalyst that wakes up the polymers and the cementitious binders. However, there is only so much ‘room’ in that chemical bond for water molecules. When you add too much, the excess water has nowhere to go. It starts to migrate upward, carrying the lightest particles, usually the expensive polymers and salts, to the very top. This creates that tell-tale white ring around the perimeter of your pour. It looks like a salt stain on a pair of winter boots. That white stuff is essentially chalk. It has zero structural integrity. If you try to perform a carpet install over this, the tack strips will simply pull right out of the floor. If you are laying laminate, the grit of the failing leveler will act like sandpaper against the back of your planks. Every time someone walks across the room, you will hear a crunching sound. That is the sound of your subfloor disintegrating into dust. It is a slow-motion car crash for your investment. This is why we use a slump test. We want to see how the material behaves when it hits the floor. It should flow like thick heavy cream, not like skim milk. If it looks translucent on the edges, you have already lost the battle.
“A floor is only as good as the subfloor beneath it; deflection is the enemy of every joint.” – Master Flooring Axiom
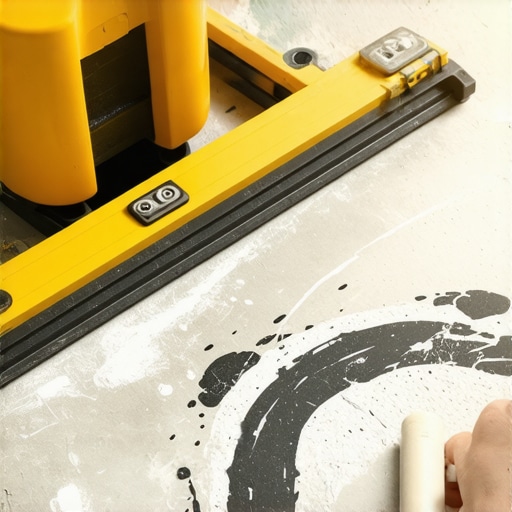
The 1/8 inch that ruins everything
Subfloor flatness is measured by 1/8 inch over 10 feet to ensure laminate locking mechanisms do not fail. Using a 10 foot straightedge is the only way to identify low spots before a laminate or vinyl plank installation. Self leveling underlayment is the industry standard for achieving this structural precision.
I have seen guys try to fix a dip in the floor by doubling up on underlayment. They think the foam or the felt will act like a bridge. It does not work that way. Physics does not care about your shortcuts. When you have a 1/4 inch dip in a ten-foot span, your laminate floor becomes a trampoline. Every step forces the tongue and groove to flex. These locking systems are made of high-density fiberboard, which is fancy talk for compressed sawdust and glue. They can only handle so much stress before they snap. Once that joint snaps, the floor starts to ‘gap.’ Then moisture gets in. Then the edges swell. All of this because someone was too lazy to mix a bag of leveler correctly. You have to understand that the leveler is not just a filler; it is the foundation. It needs to be rock hard. If you can scratch it with your fingernail and leave a mark, it is too soft. It is chalk. A proper pour should be so hard that a hammer bounce sounds like a bell. You need to use a primer too. People skip the primer because they want to save twenty bucks. The primer is what stops the concrete from sucking the water out of the leveler too fast. If the water leaves the mix before the crystals can grow, you get a ‘flash dry’ situation, which leads to cracking and, you guessed it, more chalk.
Laminate failures and the crunching sound
Laminate flooring requires a flat substrate to prevent joint separation and plank breakage. When leveling compound turns to chalk, it creates voids under the laminate planks, leading to vertical movement. This subfloor deflection is the primary cause of warranty denials by flooring manufacturers.
The sound of a failing subfloor is unmistakable. It is a gritty, sandy crunch. It happens because the top 1/32 of an inch of your leveler has turned into a powder. As the laminate moves, it grinds that powder into even finer dust. This dust then works its way up through the joints. You will see a fine white powder appearing on the surface of your beautiful new floor. You will wipe it up, and it will be back the next day. You are essentially living on a giant chalkboard that is being erased by your feet. To fix this, you have to tear the whole floor up. There is no ‘magic spray’ that can soak through laminate to harden the leveler underneath. You are looking at a total loss. This is why I am so obsessed with the mix. I use a digital scale sometimes if the job is sensitive. People laugh until they see my floors are still flat twenty years later. While most people want the thickest underlayment, too much cushion actually causes the locking mechanisms on LVP to snap under pressure. You want a dense, thin underlayment and a perfectly flat, hard subfloor. That is the secret to a floor that feels like a solid slab of stone.
| Metric | Standard Mix | Over-Watered Mix |
|---|---|---|
| Compressive Strength | 4,500 PSI | 1,200 PSI |
| Surface Hardness | High (Mohs 5) | Low (Chalky) |
| Bond Strength | 300 PSI | 50 PSI |
| Drying Time | 16 Hours | 48+ Hours |
| Coloring | Uniform Gray | White Streaks/Rings |
Shower pans and the moisture trap
Waterproof membranes in showers will not bond to a chalky leveler, leading to delamination and leaks. The Tile Council of North America (TCNA) requires substrate integrity for all wet area installations. A failed leveler under tile causes grout cracking and mold growth in the subfloor cavity.
Showers are even less forgiving than living rooms. If you are using a leveler to create a slope or to flatten a bathroom floor before you install a curb-less entry, you are playing with fire. The moisture in a bathroom will find any weakness. If your leveler is chalky, the thin-set will not grab it. It will just sit on top of the dust. Eventually, the tile will start to ‘tent’ or the grout lines will crack. Once water gets under that tile and hits the chalky leveler, it turns back into mud. I have seen shower floors that you could literally scoop out with a spoon because the installer over-watered the base. You need to use a high-flow, high-strength leveler specifically rated for wet areas. And for the love of the craft, let it cure. Do not try to tile over it while it is still ‘green.’ The moisture in the leveler needs to escape. If you trap it under a waterproof membrane too early, you end up with a layer of mush that never hardens. It is basic physics. Water has to go somewhere.
“Substrate preparation is the most overlooked phase of flooring, yet it accounts for ninety percent of all failures.” – TCNA Technical Manual
Carpet install requirements for a flat world
Carpet installation over uneven concrete leads to premature wear on the carpet backing and pad compression. Using floor leveling to fill trench cuts or spalls ensures a uniform walking surface. A solid subfloor prevents the delamination of carpet fibers from the primary backing.
People think carpet hides everything. It is the biggest lie in the industry. Sure, you might not see the dip, but you will feel it. More importantly, the carpet will wear out in that spot three times faster. The pad will bottom out against the concrete, and the constant flexing will break down the latex glue that holds the carpet together. If your leveler is chalky under a carpet, every time you vacuum, you are pulling fine cement dust through the pad and into the carpet fibers. It acts like an abrasive, cutting the fibers from the bottom up. You wonder why your ‘twenty-year’ carpet looks like trash after five years. It is because you are walking on a bed of sandpaper. You have to prep the floor even for the ‘cheap stuff.’ I tell my clients that if they can’t afford the prep, they can’t afford the floor. It is better to have a cheap laminate on a perfect subfloor than a $20,000 hardwood on a subfloor that is falling apart.
The perfect pour checklist
- Vacuum the substrate until you could eat off it.
- Apply the recommended primer with a soft-bristle broom.
- Use a dedicated mixing barrel, never a square bucket.
- Measure water with a graduated cylinder, not a mark on a pail.
- Mix at the exact RPM specified to avoid whipping air into the mud.
- Use a spiked roller to release air bubbles and help the flow.
- Keep the room at a constant temperature during the 24-hour cure.
The final step is the scratch test. Take a screwdriver and try to gouge the surface. It should feel like you are trying to scratch a sidewalk. If it peels up in layers or feels soft, you have failed. You need to grind it off and start over. It is a bitter pill to swallow, but it is better than a lawsuit. I have seen guys lose their entire business over one bad pour. They thought they could save time. They ended up losing everything. The water ring is a warning. It is the floor’s way of telling you that the chemistry is broken. Listen to the floor. It never lies. You need to be the master of the moisture meter and the king of the level. That is how you survive in this trade for twenty-five years without your knees or your reputation giving out. Focus on the microscopic. Focus on the bonds. The rest is just aesthetics. A floor is a structural engineering challenge. If you treat it like a painting, it will fail. Treat it like a bridge. Build it to last a lifetime.