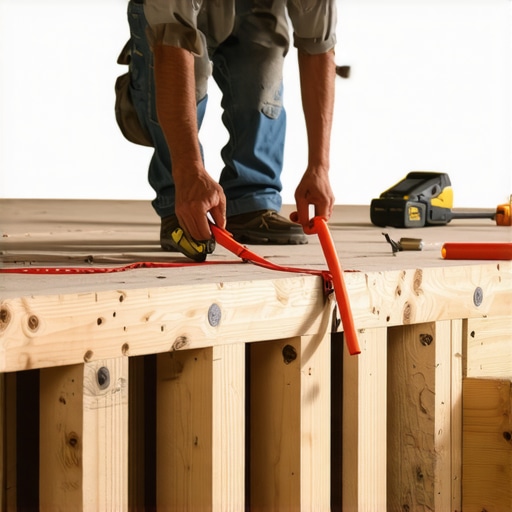
The ‘Chalk Line’ Method for Finding High Joists in Your Subfloor
I spent three days grinding concrete on a job last month just so the floor wouldn’t click like a castanet. Most guys skip the leveling compound. They think the underlayment will hide the dip. It won’t. I have spent 25 years on my knees with a moisture meter and a level. I smell like WD-40 and oak dust. If you think your floor is just a cosmetic finish, you are wrong. It is a performance surface. When you walk across a room and hear that annoying rhythmic thud or feel a soft spot, you are feeling the failure of the structural engineering beneath your feet. I have seen fifteen thousand dollar wide plank walnut floors ruined because the installer ignored a crown in the joists. A floor is only as good as what is under it. If the joists are not flat, the finish will fail. Period.
The physics of joist crowning and subfloor deflection
Subfloor leveling requires an understanding of joist crowning, deflection limits, and the structural integrity of the floor framing system. A high joist is usually the result of a natural crown in the lumber that was not planed down during the initial carpet install or construction phase. Wood is an organic material. It moves. It twists. It bows. When a joist has a crown, it creates a high point in the subfloor. If you are installing laminate, this high point becomes a pivot. Every time you walk over it, the tongue and groove joints are stressed. Eventually, the locking mechanism will snap. This is not a matter of if, but when. The physics of the situation are simple. You cannot put a flat product on a curved surface and expect it to stay together. You must address the humps before the first plank is laid.
“A floor is only as good as the subfloor beneath it; deflection is the enemy of every joint.” – Master Flooring Axiom
The chalk line strategy for structural truth
Floor leveling starts with a chalk line, a straight edge, and a moisture meter to identify high spots and low spots across the subfloor deck. Most people use a six foot level. That is a mistake. A six foot level is too short to see the big picture. You need a string line. This is the oldest trick in the book because it works. You stretch a nylon string tight across the room, from one wall to the other. You pin it down at the baseboards. Now you look for the daylight. If the string is touching the floor in the middle but has an inch of space at the ends, you have a hump. This is where the chalk comes in. You snap a line across the peak of that hump. That blue line is your target. It marks the area that needs to be planed or ground down. It is the honest truth in a world of crooked lumber.
Why your subfloor is lying to you
Plywood subflooring and OSB panels can mask joist issues until a laminate floor or tile shower base is installed, leading to structural failure. The subfloor might look flat to the naked eye. It is a lie. The panels span across multiple joists, creating a bridge. If one joist is a quarter inch higher than the others, the plywood will bend over it. This creates a subtle mound. When you install a rigid product like tile, that mound becomes a stress point. In showers, this is a disaster. A hump in the joist under a shower pan will cause the pan to flex. Flexing leads to cracks in the grout or the waterproofing membrane. Then you have a leak. Then you have rot. All because you didn’t want to spend an hour with a chalk line and a power planer. You have to be aggressive with the truth. If the floor is not within three sixteenths of an inch over ten feet, it is not flat enough.
The 1/8 inch rule that ruins everything
Laminate flooring manufacturers specify a flatness tolerance of 1/8 inch over 10 feet to prevent joint separation and clicking noises. This is the industry standard. It is not a suggestion. When a floor clicks, it is the sound of the underlayment being compressed as the plank spans a void. If the plank is sitting on a high joist, it is like a see-saw. One side goes down, the other goes up. The friction between the planks creates heat and wear. Within two years, the finish will start to peel at the edges. I have seen homeowners blame the product. It is never the product. It is the prep. People want the thickest underlayment thinking it will cushion the blow. Wrong. Too much cushion actually causes the locking mechanisms to snap under pressure. You want a firm, flat base. Nothing else will suffice.
| Subfloor Material | Deflection Limit | Max Humidity | Acclimation Time |
|---|---|---|---|
| Plywood | L/360 | 12% | 48 Hours |
| OSB | L/360 | 10% | 72 Hours |
| Concrete Slab | N/A | 4% (Tramex) | 28 Days |
The chemistry of the bond and the moisture barrier
Moisture vapor transmission through a concrete slab or crawlspace can cause subfloor swelling, which elevates floor joists and ruins carpet install quality. The chemistry of the wood is tied to the humidity of the air. If your crawlspace is wet, the bottom of the joists will swell. This causes the top to crown. You can plane the floor flat, but if you don’t fix the moisture, the wood will keep moving. I always tell clients to look at the chemistry of their adhesives too. If you are using a self-leveling compound, it needs a primer. The primer creates a chemical bridge between the old wood and the new cement. Without it, the leveler will just pop off like a scab. It is about the molecular bond. You need a clean, dry, and primed surface. If you skip the primer, you are wasting your money. The leveler will crack and you will be right back where you started with a clicking floor.
“Wood flooring will perform best when the environment is controlled to stay within a relative humidity range of 30 to 50 percent.” – NWFA Technical Manual
The chalk line method step by step
Finding high joists involves mapping the floor with a grid system and using mechanical fasteners to secure loose subfloor panels. You cannot just guess where the high spots are. You have to be methodical. Here is how you do it right.
- Clear the room of all debris and pull up any old staples or tacks.
- Identify the direction of the floor joists by looking at the nail pattern in the subfloor.
- Stretch a string line perpendicular to the joists every two feet across the room.
- Mark any spot where the string touches the floor while being elevated at the ends.
- Use a long straight edge to connect these marks with a chalk line.
- Circle the high areas with a carpenter pencil to indicate where the planer needs to go.
- Check the subfloor fasteners. If the plywood is squeaking, drive a screw into the joist.
Showers and the structural integrity of wet areas
Shower pan installation requires a perfectly level subfloor to ensure proper drainage and prevent waterproofing breaches in the tile assembly. If you have a high joist running through the center of a bathroom, your shower will never drain correctly. Water follows gravity. If the joist creates a ridge, water will pool on one side of the drain. I have seen beautiful tile jobs ripped out because the installer didn’t check the floor for level. In a shower, the TCNA standards are clear. You need a slope, but that slope must be intentional. It cannot be caused by a warped joist. You must plane the joist down or sister a new, level joist to the side of the crooked one. This is the only way to ensure the pan sits flat. A shower is a box of water in your house. You do not play games with the structural integrity of a water box.
Mechanical grinding versus leveling compounds
Floor leveling solutions include mechanical grinding for high spots and cementitious underlayment for low spots to achieve a flat surface. Sometimes you can’t just plane the wood. If you are dealing with a concrete slab, you have to grind. This is a dusty, miserable job. You need a diamond cup wheel and a high quality vacuum. If you have a hump in the concrete, you grind it until it’s gone. For wood, a power planer is your best friend. But be careful of nails. A single nail will ruin your planer blades in a heartbeat. If the floor has a dip, use a high quality self-leveling underlayment. Don’t buy the cheap stuff at the big box store. Get the professional grade stuff that has high compressive strength. You want something that can handle at least 4,000 PSI. This ensures that the weight of your furniture won’t crack the leveler over time.
The ghost in the expansion gap
Expansion gaps are the breathing room for hardwood and laminate, allowing for thermal expansion without buckling the floor. People forget that floors move. If you run your laminate tight to the wall, and then you have a high joist in the middle of the room, you are asking for a blowout. The floor needs space to move. As the humidity rises, the planks expand. If they hit the wall and they are already stressed by a high joist, they will pop up like a tent. I have seen floors lift three inches off the subfloor because of this. Always leave your half inch gap. Hide it with baseboards or shoe molding. It is not an aesthetic choice. It is a mechanical necessity. The floor is a living thing. Treat it with respect or it will bite you. Focus on the prep. Use the chalk line. Grind the humps. Sleep better at night knowing the floor isn’t going to fail.