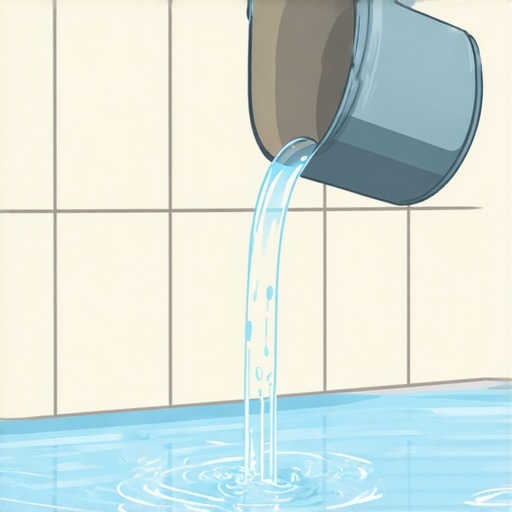
The ‘Bucket Pour’ Method for Testing Shower Floor Slope
I spent three days grinding concrete on a job last month just so the floor wouldn’t click like a castanet. Most guys skip the leveling compound. They think the underlayment will hide the dip. It won’t. When you are dealing with a shower, that laziness turns into a swamp. I once saw a custom shower where the homeowner spent eight thousand dollars on Carrera marble only to have the entire thing smell like a locker room after three weeks. The installer relied on a two foot bubble level and called it a day. He missed a slight dip in the back corner. That dip became a birdbath, a permanent puddle that never reached the drain. This is why the bucket pour method is the only way to prove a floor actually works before you commit to the tile.
The hidden physics of the shower floor
The bucket pour method is a diagnostic procedure where an installer discharges a significant volume of water across a cured mortar bed to verify drainage efficiency. This test identifies low spots, known as birdbaths, which are areas where water stagnates due to improper pitch. According to TCNA standards, a shower must have a slope of 1/4 inch per linear foot toward the drain. Without this precise incline, surface tension and gravity work against the longevity of the installation. Water that sits on a flat spot eventually migrates into the grout joints and saturates the setting bed. This leads to efflorescence, which is that white crusty salt you see on grout lines, and eventually, the structural failure of the adhesive bond.
The bucket pour method and its application
To perform a bucket pour, you must ensure the waterproofing membrane or the mortar bed has fully cured to prevent erosion. You take a five gallon bucket and fill it at least halfway. You do not just dump it over the drain. You pour it slowly at the furthest perimeter of the shower, near the curb or the back wall. You are watching for the velocity of the water as it moves toward the center. A properly pitched floor will move the water in a steady sheet. If the water splits and circles back, or if a pool remains after five minutes, you have a major problem. This is a physics test. Water has a specific gravity of 1.0, and it will always seek the path of least resistance. If that path is a depression in your mud bed, the water stays there until it evaporates or rots your subfloor.
Why water finds the low spots you missed
A bubble level is a liar in a small space. You can have a level that shows a perfect 1/4 inch pitch at twelve inches, but if there is a 1/8 inch deviation in the middle of that span, the level will bridge over it. This is why I always use a straightedge in conjunction with the bucket pour. Most installers fail because they do not understand the mechanics of the mud bed. When you mix sand and Portland cement, you are creating a porous structure. If the slope is not perfect, the water does not just sit on top. It sinks into the pores of the mortar. This creates a reservoir of stagnant water under your tile. Over time, the moisture breaks down the polymers in your thin set. I have pulled up tiles that looked perfect from the top but were floating on a layer of gray slime because the installer did not check his pitch with a bucket test.
“A floor is only as good as the subfloor beneath it; deflection is the enemy of every joint.” – Master Flooring Axiom
The sand and cement ratio for a perfect pitch
The chemistry of the substrate determines the success of the slope. A standard dry pack mortar for a shower pan is usually a 4 to 1 ratio of masonry sand to Portland cement. You want just enough water so the mix holds its shape when you squeeze it in your hand. If the mix is too wet, it will shrink as it cures, creating those dreaded low spots. If it is too dry, it will be friable and crumble under the weight of the tile. I have spent years perfecting the feel of the mud. You have to pack it tight with a wood float. You are essentially building a custom piece of concrete engineering on every job. Once that bed is packed, you check it with a screed. But even a perfect screed job can settle. That is why the bucket pour is the final exam. It reveals the microscopic settlement that happens during the hydration process of the cement.
Drainage dynamics and the TCNA standards
The Tile Council of North America is very specific about drainage. You cannot have a slope that is too shallow, but you also cannot have one that is too steep. If you exceed 1/2 inch per foot, the floor becomes a slip hazard. You also run into issues with lippage, where the edge of one tile is higher than the edge of the next because the angle of the floor is too aggressive for the tile size. Large format tiles are particularly difficult in showers. If you have a 12 by 24 inch tile on a sloped surface, you have to use an envelope cut to make the tile follow the pitch. If you do not, you will have sharp corners sticking up. The bucket pour will show you exactly where the water will hit those corners and pool. It is about the fluid dynamics of the entire assembly.
| Substrate Component | Minimum Slope Per Foot | Maximum Slope Per Foot | Primary Function |
| Pre Pitch Mortar | 0.25 Inches | 0.50 Inches | Directs Water To Weep Holes |
| Final Mud Bed | 0.25 Inches | 0.50 Inches | Support For Tile Finish |
| Waterproof Membrane | 0.25 Inches | 0.50 Inches | Protects Structural Subfloor |
Dealing with structural deflection in older homes
In many of the older homes I work on, the floor joists have sagged over the last fifty years. You cannot just throw a shower pan on a bouncy floor. You have to address the deflection first. Deflection is the amount a floor bends under a load. For tile, you need a deflection rating of L over 360. If your subfloor moves, your mortar bed will crack, and your slope will change. I have seen guys try to fix a sagging floor by just adding more mud to the shower pan. This adds hundreds of pounds of weight, which only makes the sag worse. You have to sister the joists or add blocking to ensure the structure is rigid. Only then can you trust your bucket pour results. If the house moves, the water moves, and usually it moves away from the drain.
How to test for birdbaths before it is too late
Once you have poured your water, let it sit. Walk away for ten minutes. When you come back, look at the surface under a bright work light. A true birdbath will look like a dark mirror. These small puddles are the primary cause of mold in modern showers. Even if you use a topical waterproofing membrane like Kerdi or RedGard, the water sitting on top of the membrane will eventually cause the grout to discolor. If you find a low spot, you have to patch it with a high quality floor patch or more mortar. Do not try to fix a low spot with thin set. Thin set is an adhesive, not a structural filler. It has too much shrinkage. If you fill a 1/4 inch hole with thin set, it will simply become a 1/8 inch hole after it dries.
- Ensure the drain is plugged before the bucket pour to see how water levels out.
- Use a five gallon bucket to simulate a high flow shower head.
- Mark any slow draining areas with a wax pencil once the floor dries.
- Check the perimeter corners where the wall meets the floor.
- Verify that water does not escape over the curb during the test.
The myth of the waterproof grout
People think that if they buy the expensive epoxy grout, they do not need to worry about the slope. This is a dangerous misconception. No grout is 100 percent waterproof. Grout is a sacrificial element in a tile system. It is designed to be the breathable part of the floor. Water will eventually find its way behind the tile. When it does, it relies on the slope of the membrane to guide it into the weep holes of the drain. If your bucket pour shows a puddle, that puddle will exist under your tile for the life of the shower. It will become a breeding ground for bacteria. You can spend all the money you want on beautiful stone, but if the water does not move, the shower is a failure. I have seen million dollar homes with showers that had to be gutted after six months because the installer did not understand the chemistry of water and the physics of a slope.
“A shower is a managed leak; if you do not manage the water, it will manage your bank account.” – Master Flooring Axiom
Chemical considerations for waterproofing membranes
When you are applying a liquid waterproofing membrane over your sloped mortar bed, you have to be careful about the mil thickness. If you apply it too thick in the corners, you can actually create a dam that holds water back from the drain. The bucket pour should be done both before and after the waterproofing application. This ensures that your membrane did not change the pitch of the floor. Some of these modern membranes are very thick and can easily fill in a small drainage channel you worked hard to create. You also have to consider the curing time. If you pour water on a membrane that hasn’t fully cross linked, you will ruin the chemical bond. Always follow the manufacturer instructions for dry times before introducing any moisture to the system.
The 1/8 inch that ruins everything
Precision is not a suggestion in flooring. It is the law. A 1/8 inch deviation over a three foot span might not seem like much, but for water, it is a mountain. Water has surface tension that allows it to cling to surfaces. If the slope is too shallow, that surface tension will keep the water from moving toward the drain throat. It will just sit there, held in place by its own molecular structure. By using the bucket pour method, you are using the weight of the water to break that tension and prove the path to the drain is clear. I have seen installers get angry when I tell them to rip out a pan because of a small puddle. But I would rather have a mad installer today than a lawsuit from a homeowner in a year when their subfloor is rotted out. You have to do it right the first time, every time. There are no shortcuts in a wet environment.