Why Your Shower Curb Is Rotting Despite Using a Vinyl Liner
I spent three days grinding concrete on a job last month just so the floor wouldn’t click like a castanet. That is the kind of detail most installers run away from. They want the fast check, the quick carpet install, or the snap-together laminate that hides their sins for a year before the joints fail. But when it comes to a shower curb, shortcuts do not just cause a noise or a gap. They cause structural rot that can eat through a subfloor and drop a bathroom into the crawlspace. I have torn out enough showers to know that a vinyl liner is often the very thing that accelerates the rot if it is not handled with surgical precision. People think a thick sheet of plastic is a magic shield. It is not. It is a tool, and like any tool, if you use it wrong, you are going to break something. Most guys skip the leveling compound on the floor and they skip the pre-slope under the liner. They think the underlayment or the mud bed will hide the dip. It won’t. If that water has no path to the drain, it sits on that liner and waits for a way out. Eventually, it finds one through your curb.
The anatomy of a slow motion disaster
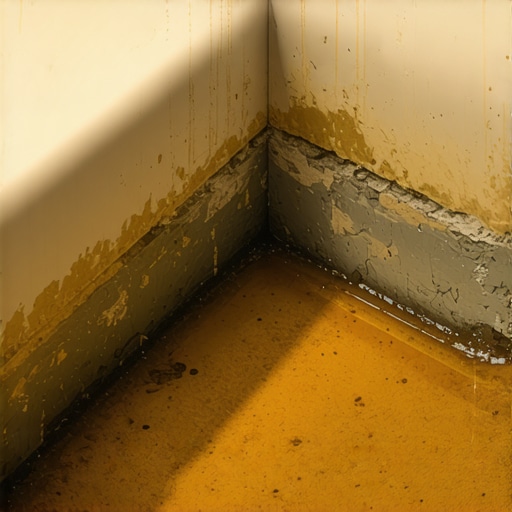
Shower curb rot occurs when moisture bypasses the primary drainage layer and becomes trapped against organic framing members like 2×4 studs. Even with a PVC vinyl liner, the lack of a pre-slope beneath the membrane allows stagnant water to accumulate, leading to wicking and capillary action that rots the wood. This is not a failure of the material but a failure of the mechanical system designed to move water toward the weep holes. When you see a shower curb swelling or the tile popping off, you are looking at the result of months or years of saturation. The wood absorbs moisture, expands, and then the fungal growth begins. It is a silent killer of bathrooms because it happens from the inside out.
How water bypasses your primary barrier
Grout joints and porous tiles are never truly waterproof regardless of how much sealer you apply to the surface. Water moves through the cementitious mortar bed via hydrostatic pressure and gravity, eventually reaching the vinyl liner. If the liner is flat on the floor, the water has nowhere to go. Most installers fail to realize that the liner is the secondary defense, not the only defense. In a typical flooring project, you might worry about floor leveling for laminate or carpet install, but in a shower, you are managing a fluid dynamic. If the water cannot reach the weep holes in the drain assembly, it will sit in the mud bed, saturating the curb from the bottom up.
“A floor is only as good as the subfloor beneath it; deflection is the enemy of every joint.” – Master Flooring Axiom
The capillary wick effect in cementitious materials
Portland cement and sand mixes act like a hardened sponge that pulls liquid water upward against the force of gravity. This capillary action is powerful enough to lift water several inches above the actual water line in the pan. If your vinyl liner does not wrap the curb correctly or if it was cut too short at the corners, this wicking water will find the wood framing. Once the wood reaches a moisture content above 20 percent, wood-decay fungi begin to thrive. You might think your floor leveling efforts elsewhere in the room saved the day, but if the curb is the low point of the moisture migration, it will bear the brunt of the damage.
Why fasteners are the enemy of a dry curb
Mechanical fasteners like staples and nails should never penetrate the top or inside face of a shower curb. Every single hole you poke in that vinyl liner is a leak point waiting to be exploited by saturated mortar. Traditional installers often staple the liner to the top of the 3-stud curb stack to keep it in place while they throw their mud. This is a fatal mistake. The TCNA B415 standards are very clear about where fasteners can go. If you must use them, they stay on the outside face of the curb, near the floor. Ideally, you use curb wraps or mortar to hold things in place. When water wicks up the mud bed, it reaches those staple holes and travels directly into the Douglas Fir or Hem-Fir studs. The wood swells, the liner stretches, and the rot accelerates.
| Feature | Traditional PVC Liner | Bonded Waterproof Membrane |
|---|---|---|
| Placement | Under the mortar bed | Top of the mortar bed |
| Pre-slope Required | Yes, mandatory | No, slope is in the bed |
| Fastener Risks | High at the curb | Zero penetrations |
| Wicking Potential | High in the mud bed | Non-existent |
| Complexity | Difficult at corners | User friendly |
The physics of pre-slope and the law of gravity
Gravity dictates that water will always move to the lowest point available in the shower assembly. A pre-slope is a layer of deck mud installed under the vinyl liner to ensure that the liner itself slopes at a 1/4 inch per foot toward the drain. Without this, the liner sits flat on the subfloor. Water that permeates the tile and grout sits on the plastic, turns into a biofilm-rich soup, and eventually saturates the curb through osmosis or wicking. Many contractors skip this because it is hard work and requires floor leveling expertise to get the heights right. They just throw the liner on the plywood and call it a day. This is why your curb is rotting. You cannot fight gravity and win.
The 1/8 inch that ruins everything
In the world of high-end flooring, we talk about tolerances. For a carpet install, a 1/8 inch dip is nothing. For laminate, it is a clicking sound. For a shower curb, a 1/8 inch gap in your waterproofing is a highway for water damage. It takes very little moisture to start the oxidation of fasteners and the delamination of plywood subfloors. I have seen expensive stone floors ruined because the installer did not understand the deflection limits of the joists. If the curb flexes even a tiny bit when you step on it, the waterproof seal can break. This is why we use structural adhesives and blocking to ensure the curb is a solid, monolithic block before the waterproofing even starts.
How modified thin-set interacts with PVC membranes
Chemical compatibility is a foundational concept that many tilers ignore. Modified thin-sets contain polymers and latex additives that help them bond to non-porous surfaces. However, some solvents in certain adhesives can actually degrade PVC over time if they are not rated for that use. More importantly, unmodified thin-set is often required between the liner and the mud bed to prevent moisture trapping. If you use the wrong chemistry, you end up with a bond failure. A hollow sound in your curb tile is the first sign that the bond has broken, likely because moisture has compromised the thin-set layer. Always check the Manufacturer Data Sheets before mixing your mortar.
“The integrity of a waterproof system is determined by its weakest penetration, not its strongest surface.” – TCNA Technical Bulletin
The better way to build a threshold
Bonded membranes have largely replaced vinyl liners in high-performance installations. These topical waterproofing systems, like liquid-applied membranes or sheet membranes, sit directly behind the tile. This means the mortar bed stays dry. There is no wicking, no pre-slope under a liner, and no fasteners through the waterproofing. While traditional guys might complain about the cost, the security they provide is worth every penny. You treat the shower curb as an extension of the waterproof pan, wrapping it in a continuous, unbroken layer. This eliminates the reservoir effect where water sits in a mud bed for weeks at a time.
Practical steps for a dry shower
- Verify the subfloor is level and structurally sound before framing the curb.
- Install a pre-slope using sand mix or sloped foam boards.
- Ensure the vinyl liner extends at least 6 inches up the walls.
- Fold corners instead of cutting them to maintain integrity.
- Use dam corners at the junction of the curb and the door jamb.
- Never drive a nail into the top of the curb.
- Perform a 24-hour flood test before tiling.
The ghost in the expansion gap
Every flooring material, from solid oak to porcelain tile, moves. Thermal expansion and moisture-induced swelling are real forces. In a shower, the curb is often tied into the main floor of the bathroom. If you do not leave an expansion gap or use a flexible sealant at the change of plane, the movement will crack the grout. Once the grout cracks, bulk water enters the system. This is where information gain is vital. While most people want the thickest underlayment, too much cushion or movement actually causes the waterproofing to snap under pressure. You want a rigid assembly for the tile, but a flexible system for the waterproofing.
The 1/8 inch that ruins everything
Consistency is the hallmark of a master tradesman. When I am doing floor leveling, I am looking for a deviation of less than 1/8 inch over 10 feet. The same precision applies to shower curbs. If your curb is not perfectly level along its length, water will pool in one corner. This localized saturation is often where rot starts. Even if you have a perfectly installed vinyl liner, a low spot on the curb will keep that mortar bed wet forever. Evaporation cannot keep up with the daily use of a shower. Eventually, the alkalinity of the water begins to break down the wood fibers. It is a chemical attack as much as a biological one.
Final thoughts on structural integrity
You cannot build a waterproof shower on a rotting foundation. If you are remodeling and you find water damage, you must replace the lumber. Do not just cover it up with a new liner. The mold spores are already there, and they will reactivate as soon as the humidity rises. Treat your shower like a swimming pool. Every joint, every fastener, and every slope must be engineered for performance. If you treat it like a cosmetic upgrade, you will be tearing it out in five years. Focus on the subfloor, master the pre-slope, and keep your fasteners out of the waterproofing zone. That is the only way to guarantee a dry home.