The ‘Trowel Notch’ Mistake That Leads to Hollow Shower Tiles
I spent three days grinding concrete on a job last month just so the floor wouldn’t click like a castanet. Most guys skip the leveling compound. They think the underlayment will hide the dip. It won’t. I have spent twenty-five years on my knees with a moisture meter and a level. I have seen every shortcut in the book and most of them lead to a jackhammer in the hands of a frustrated homeowner. When you hear that hollow thud under your feet in a shower, you are not just hearing a cosmetic flaw. You are hearing the sound of air where there should be stone. You are hearing the precursor to a structural failure that will eventually rot your subfloor and grow a garden of black mold behind your expensive marble. The flooring industry has become obsessed with aesthetics while ignoring the physics of the bond. I have little patience for installers who treat a shower like a dry living room. A shower is a high-stress hydraulic environment. If your mortar coverage is not a perfect hundred percent, you are essentially building a very expensive drum that is destined to crack. This is the reality of the industry today. People want the look of luxury without the sweat of the preparation. They want the finish but they ignore the foundation.
Why your shower floor sounds like a drum
Hollow shower tiles are caused by inadequate mortar coverage and trapped air pockets between the tile and the substrate. This occurs when installers use incorrect trowel sizes, improper notch techniques, or the forbidden practice of spot bonding. Achieving a 100% bond is the only way to prevent tile failure. Most people assume that tile is waterproof. It is not. Tile and grout are porous. Water will migrate through the assembly and sit in the voids created by poor trowel work. I have pulled up floors where the water was standing in the ridges of the mortar, stagnant and smelling like a swamp. This is why the National Wood Flooring Association and the Tile Council of North America are so strict about subfloor preparation. If the floor is not flat, the trowel cannot do its job. A 1/8 inch dip over ten feet might not seem like much to a DIYer, but to a large format tile, it is a canyon. When you press that tile down, it hits the high spots and leaves a bridge over the low spots. That bridge is where the hollow sound lives. It is where the crack will start. It is where the bond fails.
“A floor is only as good as the subfloor beneath it; deflection is the enemy of every joint.” – Master Flooring Axiom
The physics of the mortar ridge
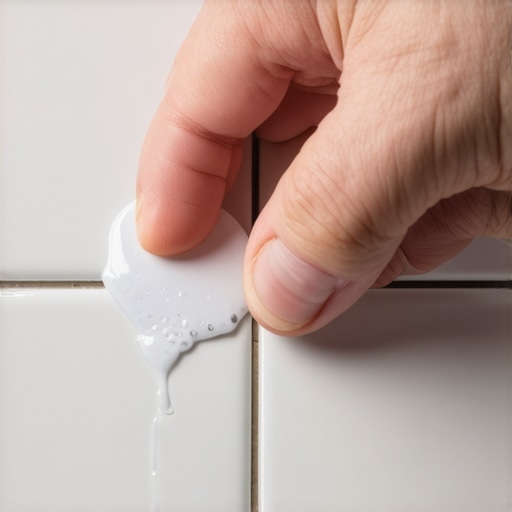
Directional troweling is the only professional method for installing tile because it allows air to escape as the tile is embedded. By combing mortar in straight lines, the ridges can collapse into the valleys when the tile is pressed down, creating a solid bed of support. When you see an installer making swirls or patterns like they are frosting a cake, you are looking at a future failure. Swirls trap air. Air cannot be compressed. When you set a tile on top of a swirl, you create a pocket. That pocket is a weak point. If you drop a shampoo bottle or a heavy soap dish on that spot, the tile will shatter. I use a 1/2 inch by 1/2 inch square notch trowel for most large format jobs. You have to pull that trowel at a consistent 45 degree angle. This ensures the ridges are the same height. If you vary the angle, you vary the amount of mortar. It is pure geometry. The chemical bond of a modified thin-set is an incredible thing, but it requires surface area. If only 50 percent of your tile is touching the mortar, you have 50 percent of the strength you paid for. It is that simple. IMAGE_PLACEHOLDER_1
Floor leveling and the ghost of deflection
Floor leveling is a mandatory step for any professional installation involving tile, laminate, or hardwood. Using a high-quality self-leveling underlayment ensures the substrate meets the flatness requirements of L/360 for ceramic and L/720 for natural stone to prevent cracking. If you think you can fix a bad subfloor with more mortar, you are wrong. Mortar is not a leveler. It is an adhesive. As it cures, it shrinks. If you have a big glob of it in one spot to fill a hole, it will pull on the tile as it dries. This can cause the tile to cup or the bond to break. I have walked onto jobs where the carpet install was being ripped out to put in tile, and the wood subfloor was bouncing like a trampoline. You cannot put tile on a trampoline. You need to check the joist spacing. You need to check the thickness of the plywood. You might need a double layer of subflooring. I don’t care if it adds cost. I care that the floor is still there in twenty years. People who complain about the price of floor leveling are the same people who complain when their grout starts crumbling out of the joints six months later.
| Substrate Type | Required Flatness | Recommended Trowel | Bond Strength Requirement |
|---|---|---|---|
| Concrete Slab | 1/8 inch per 10 ft | 1/2″ x 1/2″ Square | High (ANSI A118.15) |
| Plywood Subfloor | 1/16 inch per 6 ft | 1/4″ x 3/8″ Square | Medium (ANSI A118.4) |
| Cement Backer Board | Perfectly Flush | 1/2″ x 1/2″ Square | High (ANSI A118.15) |
Laminate is not for wet rooms
Laminate flooring is a wood-based product that will fail in a shower or bathroom environment due to hydrostatic pressure and surface moisture. Even waterproof laminate has a core that will swell if water penetrates the locking mechanisms or the perimeter expansion gaps. I see people putting laminate in bathrooms all the time because the box says it is waterproof. That is marketing, not science. The top layer might be waterproof, but the joints are the weak link. In a shower area, you have constant humidity. That moisture gets into the expansion gaps. It gets under the baseboards. Once it touches the HDF core, the floor starts to grow. It will buckle. It will peak at the seams. If you want a wood look in a bathroom, you use a porcelain plank. You don’t use a picture of wood glued to a piece of compressed sawdust. My shop is full of samples that show exactly what happens to laminate when it sits in an inch of water for an hour. It is not pretty. Stick to tile for the wet stuff and save the laminate for the bedrooms where the stakes are lower. No amount of carpet install logic applies here either. You need a rigid, waterproof system.
- Check subfloor moisture levels with a pin-type meter before starting.
- Apply a liquid-applied waterproofing membrane like Kerdi or RedGard.
- Burn a thin layer of mortar into the back of the tile for 100% coverage.
- Always trowel in the direction of the shortest dimension of the tile.
- Use a leveling system to prevent lippage on large format tiles.
The expansion gap that everyone forgets
Expansion gaps are the lungs of a flooring system, allowing for the natural movement of the structure without stressing the tile or the grout. Every perimeter where the floor meets a wall must have a gap that is filled with 100% silicone caulk rather than hard grout. Buildings move. They breathe with the seasons. In the summer, the humidity goes up and things expand. In the winter, they shrink. If you grout your tile tight against the wall, that movement has nowhere to go. The floor will tent. The tiles will pop off the ground. It is basic physics. I have seen entire bathroom floors lift up like a tent because the installer didn’t leave a 1/4 inch gap at the wall. This is even more critical in regions with high humidity. You have to think about the long term. A floor is a living thing in a house. It is not a static object. If you don’t give it room to move, it will make its own room, and you won’t like how it does it.
“Mechanical bonds fail, but a properly prepared chemical bond lasts a lifetime.” – Master Flooring Axiom
The myth of the thick underlayment
Thicker underlayment is often marketed as better for sound and comfort, but it can actually compromise the locking mechanisms of click-lock floors by allowing too much vertical deflection. Too much cushion causes the joints to flex and eventually snap under foot traffic. This is a common mistake I see with DIYers. They buy the thickest foam they can find, thinking it will make the floor feel soft. It makes the floor feel like a sponge. And it kills the floor. For a tile job, you want zero deflection. For a carpet install, you want the pad. But for anything with a locking joint, you want a firm, high-density underlayment. The floor needs to be supported from beneath. If there is a void, the joint will fail. If there is too much squish, the joint will fail. You have to find that sweet spot. It is the same with the mortar under a tile. It needs to be a solid, unyielding bed. That is why we spend so much time on the prep. The finish is the easy part. The prep is the job. If you do the prep right, the floor installs itself. If you mess up the prep, you will be fighting that floor for the rest of its short life. This is the truth that big box stores won’t tell you. They just want to sell you the boxes. I want to build you a floor that lasts.