How to Stop Kitchen Tiles from Cracking Near the Dishwasher
The microscopic war under your appliance
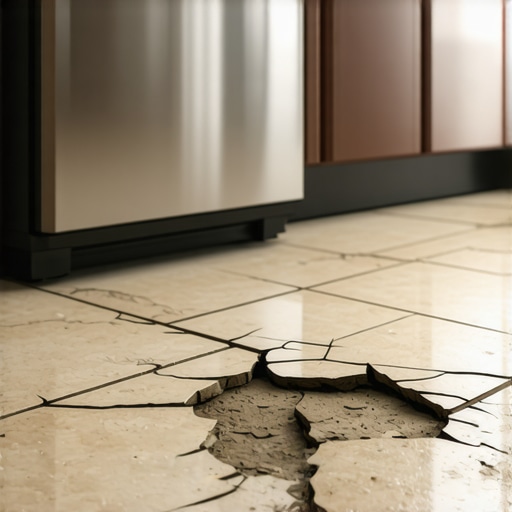
To stop kitchen tiles from cracking near the dishwasher, you must decouple the tile from subfloor movement and mitigate thermal expansion. This is achieved by using an isolation membrane, ensuring the subfloor meets L/360 deflection standards, and applying a high-polymer modified thin-set that handles the dishwasher heat. Most installers fail because they treat the area under the dishwasher like the rest of the kitchen, ignoring the localized stress of heat and vibration. I spent three days grinding concrete on a job last month just so the floor wouldn’t click like a castanet, and that experience taught me that most guys skip the leveling compound and pay for it later when the grout lines start to powder and the porcelain snaps. Most guys think the underlayment will hide the dip. It won’t. You need a substrate that is flat to within 1/8 inch over 10 feet. When you add a dishwasher into the mix, you are adding a machine that cycles between cold water and 150 degree steam, creating a thermal shock environment that will destroy a rigid bond. You need a strategy that accounts for the physics of the machine and the chemistry of the adhesive. If you are coming from a carpet install or a laminate background, forget what you know. Tile is a different beast that requires zero flex.
The physics of thermal shock and ceramic stress
Thermal shock occurs when the dishwasher vents hot steam onto the floor, causing the tile and the subfloor to expand at different rates. To prevent this, you must use a movement joint filled with color-matched silicone caulk instead of rigid grout at the dishwasher interface. The coefficient of thermal expansion is a calculation that many installers ignore. When that heating element kicks in during the dry cycle, the underside of your cabinet can reach temperatures that significantly expand the wooden subfloor. If your tile is bonded directly to that wood without an uncoupling layer, the wood moves and the tile cracks. This is basic structural engineering. The kitchen floor is not a static surface. It is a dynamic environment. You have to look at the ANSI A108 standards for movement joints. Every time the dishwasher runs, the subfloor is subjected to a humidity spike. If you did not seal the subfloor or use a proper vapor barrier, that plywood is drinking in steam, swelling, and then shrinking once the cycle ends. That constant cycle of expansion and contraction is what shears the bond between the thin-set and the tile.
“A floor is only as good as the subfloor beneath it; deflection is the enemy of every joint.” – Master Flooring Axiom
Why your subfloor is lying to you
Subfloor deflection is the primary cause of cracked tiles near heavy appliances like dishwashers where concentrated loads meet vibration. You must verify that your joist spacing and subfloor thickness meet the TCNA L/360 standard for ceramic or L/720 for natural stone. Many homeowners assume that because their floor feels solid when they walk on it, it is ready for tile. It isn’t. A floor can be strong enough to hold a grand piano but still have enough bounce to crack a porcelain tile. When the dishwasher’s motor spins at high RPMs, it sends micro-vibrations through the legs of the unit. These vibrations find the weakest point in your installation, which is usually a pocket of air under the tile or a spot where the thin-set has reached its limit of elasticity. Proper floor leveling is not about making the floor pretty, it is about creating a monolithic slab that can dissipate those vibrations. If you have a dip under the dishwasher, the weight of the machine combined with the water weight during a cycle will cause the subfloor to bow just enough to snap the grout. Use a high-quality self-leveling underlayment (SLU) to ensure the surface is dead level before the first trowel of mortar hits the ground.
The chemistry of a failed bond
To prevent bond failure near heat-producing appliances, you must use an ANSI A118.4 or A118.11 compliant modified thin-set containing high levels of polymer. These polymers allow the mortar to remain flexible enough to absorb the differential movement between the tile and the substrate. Standard unmodified thin-set is too brittle for this application. It works fine for showers where the temperature changes are gradual, but not under a dishwasher. I prefer a mortar with a high concentration of ethylene-vinyl acetate. This creates a rubberized bridge. When the heat hits the tile, the polymer chains stretch rather than snap. If you use a cheap, big-box store bag of mortar, you are basically using sand and cement. It has zero tensile strength. You also need to ensure 95% coverage under the tile. Most installers use a spot-bonding method, leaving air gaps. Those air gaps act as heat sinks and stress points. When the dishwasher vibrates, those hollow spots are where the cracks originate. You must back-butter every single tile that goes near that appliance to ensure there are no voids. It is a tedious process, but it is the only way to guarantee the floor lasts twenty years instead of twenty months.
| Material Property | Standard Thin-set | Polymer Modified Thin-set | Epoxy Grout |
|---|---|---|---|
| Flexibility | Very Low | High | Extreme |
| Heat Resistance | Moderate | High | High |
| Vibration Damping | None | Moderate | High |
| Moisture Barrier | No | Partial | Yes |
The 1/8 inch gap that saves your grout
Leaving an expansion gap of at least 1/8 inch around the perimeter of the dishwasher opening is essential for preventing pressure-related cracks. This gap should never be filled with grout but rather with a 100% silicone sealant that remains flexible for years. Grout is essentially concrete. It does not compress. When the tiles near the dishwasher expand due to heat, they need somewhere to go. If they hit a cabinet base or another tile, the pressure builds until something gives. Usually, it is the tile that gives, resulting in a hairline crack. By using silicone at the change of plane or where the tile meets the appliance, you create a shock absorber. This is a contrarian point because most people want a uniform look with grout everywhere. But grout in a movement zone is a mistake. Silicone comes in hundreds of colors now, so there is no excuse for not using it. This is especially true if you are transitioning from tile to a laminate or wood floor nearby. Different materials have different expansion rates, and without that 1/8 inch of breathing room, you are asking for a structural failure.
“Movement joints are not optional; they are the lungs of a high-performance floor installation.” – TCNA Handbook Supplement
The subfloor secret and the uncoupling advantage
Using an uncoupling membrane like Schluter-Ditra is the most effective way to isolate the tile from the subfloor movements caused by dishwasher cycles. These membranes feature a geometric design that allows for independent movement of the substrate and the tile. I have seen floors that were perfectly leveled and used the best thin-set still crack because they didn’t have an isolation layer. The membrane acts as a shear plane. When the wood subfloor beneath the dishwasher expands from the heat, the membrane deforms slightly to take up that stress, so the tile on top stays perfectly still. It also acts as a waterproof barrier. Dishwashers leak. It is not a matter of if, but when. If water gets under your tile and into the plywood, it will rot the subfloor and cause the tile to pop. An uncoupling membrane keeps that water on the surface where it can dry out or be wiped up. This is why I tell people to stop looking at tile as a cosmetic choice and start looking at it as a mechanical system. You are building a sandwich of layers, and every layer has a job to do. If one layer fails, the whole system collapses. Don’t be the guy who saves $100 on a roll of membrane only to spend $5,000 tearing out a cracked floor three years later.
- Check subfloor deflection using an L/360 calculator before starting.
- Apply a liquid-applied or sheet-form moisture barrier to the plywood.
- Use a self-leveling compound to eliminate any dips greater than 1/8 inch.
- Install an uncoupling membrane to isolate the tile from thermal expansion.
- Back-butter every tile to achieve 95 percent mortar coverage.
- Fill the expansion gaps around the dishwasher with 100 percent silicone.
- Allow for a full 72-hour cure time before installing the dishwasher.