Why Your New Shower Niche is Holding Water and How to Fix the Pitch
The moldy secret behind that expensive bathroom tile
A shower niche holds water because the bottom shelf lacks a positive slope toward the drain which allows capillary action to keep moisture trapped against the grout lines. Proper drainage requires a minimum one eighth inch pitch to ensure gravity overcomes the surface tension of the water. I spent three days grinding concrete on a job last month just so the floor wouldn’t click like a castanet and it reminded me of why I hate seeing lazy niche work. Last year I walked into a five thousand dollar master bath where the niche smelled like a swamp. The homeowner was devastated. The installer had used a beautiful piece of Carrara marble for the sill but he set it perfectly level. In the world of wet rooms level is actually a failure. If that shelf is not tilting toward the shower floor you are not building a storage space. You are building a petri dish. Most guys skip the leveling compound or the proper shimming. They think the thin-set will take up the slack. It won’t. Water is a relentless detective. It finds the lowest point and stays there until it rots your substrate or breeds black mold. This is not about aesthetics. This is about the structural engineering of a vertical wet environment.
The physics of the standing pool
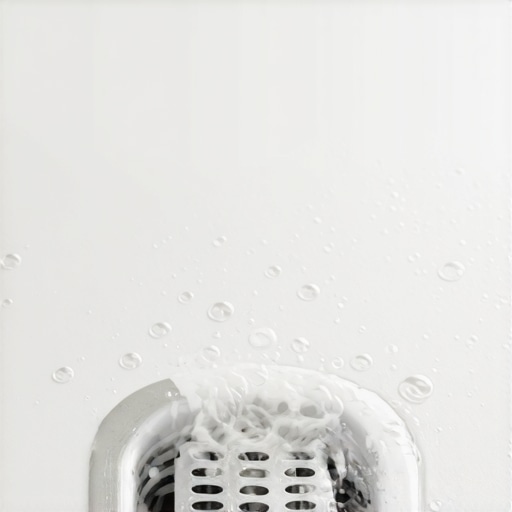
Surface tension and hydrostatic pressure dictate exactly where water goes when you turn off the shower head. When water sits on a flat horizontal surface it forms beads that cling to the microscopic imperfections in the tile glaze or the porous openings in the grout. Over time this water dissolves the minerals in your soap creating a film that further traps moisture. This is why your niche feels slimy after only a week. The bond between the water and the tile is stronger than the pull of evaporation in a humid bathroom. You need to break that bond with a mechanical advantage. That advantage is a quarter inch slope. Without it the water just sits. It saturates the grout. It eventually works its way behind the tile to the waterproofing membrane. If that membrane has even a pinhole leak you are looking at stud rot within twenty four months. Every shower I tear out that has failed usually has a niche as the primary suspect.
The framing error that ruins everything
The failure of a shower niche usually begins long before the first tile is buttered. It starts with the rough framing. Most plumbers or general contractors slap a couple of two by fours between the studs and call it a day. If those blocks are not perfectly square and slightly angled the tile setter has to fight the house itself. I prefer to use pre-fabricated niches made of high-density closed-cell extruded polystyrene foam. These units come with a built-in slope. When you build a niche from scratch using cement board and screws you are asking for trouble. The screws create paths for moisture. The joints are hard to waterproof. If the bottom plate of the niche framing is dead level your tile sill will likely end up level or worse back-pitched. Back-pitched means the water runs toward the back wall. That is a death sentence for your shower wall.
“A floor is only as good as the subfloor beneath it; deflection is the enemy of every joint.” – Master Flooring Axiom
The chemistry of the bond
Thin-set is not a filler and it is not a leveling agent. High-quality modified thin-set with polymers is designed to bond two surfaces in a thin layer. When installers try to create a pitch by piling up a half inch of thin-set under the front of a marble sill they create a shrinkage problem. As the water evaporates from the drying mortar the material shrinks. This can pull the tile out of alignment or create voids where water can pool. I use ANSI A118.15 mortar for niches because it has the highest bond strength and can handle the thermal expansion of hot water hitting cold stone. The molecular structure of these polymers allows for a tiny bit of flexibility. In a shower niche flexibility is key because the walls of a house are always moving. If your mortar is brittle the grout will crack. Once the grout cracks the pitch of the tile no longer matters because the water is going under it.
The one eighth inch that ruins everything
Precision is the only thing that separates a master from a handyman. You should be using a digital level. A bubble level is not accurate enough for a four inch deep shelf. If you see the bubble touching the line you might think you are good. You aren’t. You need to see a three degree tilt. I have seen guys try to fix a flat niche by adding a second layer of tile on top of the first. This is a hack move. It creates a double bond line that will eventually delaminate. The only real fix for a flat niche is to pop the bottom sill tile and grind the mortar bed down. You have to rebuild the slope from the substrate up. It is a messy dusty job that most people avoid. That is why so many bathrooms have moldy niches. People would rather ignore the smell than do the hard work of a mechanical correction.
Materials and their performance in wet zones
The choice of material for your niche sill determines how much pitch you can actually get away with. Large format tiles have fewer grout lines and thus less friction for the water. Natural stone like marble or granite is beautiful but porous. Even if you pitch it correctly it will absorb some water. This is why I always advocate for a solid surface sill rather than tiled-in pieces with grout lines on the bottom shelf.
“The installation of ceramic tile is a system that includes the substrate, the mortar, and the tile itself; failure in any one part is a failure of the whole.” – Tile Council of North America Standards
| Material Type | Water Absorption Rate | Minimum Recommended Pitch | Durability Rating |
|---|---|---|---|
| Ceramic Tile | 0.5% to 3.0% | 1/8 inch | Medium |
| Porcelain Tile | Less than 0.5% | 1/8 inch | High |
| Natural Marble | 0.1% to 2.0% | 1/4 inch | Medium-Low |
| Pre-fab Foam Niche | 0% | Built-in | High |
| Solid Surface Quartz | 0% | 1/8 inch | Very High |
The ghost in the expansion gap
Every change of plane in a shower requires a flexible sealant. This means where the niche floor meets the niche back wall you cannot use grout. You must use 100 percent silicone. Grout is rigid. Houses move. When the house moves the joint in the back of the niche will crack. If you have a flat pitch and a cracked grout joint in the back of your niche you are funneling water directly into your wall cavity. I see it every single day. People think silicone is just for the corners of the shower floor but it is vital for the niche. I use a color-matched silicone that resists mildew. It stays flexible and maintains the seal even when the temperature swings from a sixty degree room to a hundred degree shower. This is the structural engineering of the bathroom. If you miss this detail the best pitch in the world won’t save you from a leak.
Why your subfloor is lying to you
If the floor of your bathroom isn’t level the walls likely aren’t plumb. If the walls aren’t plumb the niche box will be crooked. I always check the floor leveling before I even think about the shower. If the joists are sagging it pulls the studs out of alignment. You can’t build a precision shower in a crooked house without correcting the geometry first. I’ve spent more time with a planer and shims than I have with a trowel on some jobs. Most installers are in a rush. They want to get the tile on the wall so they can get paid. They don’t care about the physics of the water that will be hitting that wall five times a day for the next ten years. You have to be an architect first and a tile setter second.
The cure for a back pitched shelf
If you find yourself with a niche that holds water you have three options. First you can try to strip the sealer and apply a topical wedge of epoxy but that looks terrible and rarely lasts. Second you can pop the tile and start over which is the correct way. Third you can use a specialized diamond grinding pad to create a slope on the existing stone. This only works if you have a thick solid stone sill. If you have porcelain tile you will grind right through the glaze and ruin the look. Fixing the pitch is about restoring the gravitational path. You have to ensure that every drop of water has a clear downhill run to the drain. Check your work with a spray bottle. If the water beads up and stays there you still have a surface tension problem. If it runs off immediately you have a successful installation.
Technical Checklist for a Waterproof Niche
- Verify rough framing is square and plumb before installing backer board.
- Ensure the bottom horizontal plate has a slight forward tilt.
- Use a pre-fabricated waterproof niche box whenever possible to minimize joints.
- Apply two coats of liquid waterproofing membrane over all seams and screw heads.
- Select a solid surface material for the bottom sill to eliminate grout lines.
- Set the sill with a minimum 1/8 inch per foot slope toward the shower drain.
- Use 100 percent silicone caulk at all internal niche corners.
- Perform a water bead test before the final inspection.
The reality of shower construction is that it is a high-stakes environment. Water is the universal solvent. It wants to destroy your home. Your job as a builder or a homeowner is to make it as difficult as possible for water to stay still. Keep the pitch steep. Keep the joints sealed. Don’t trust a level bubble that is just close enough. Close enough is how you end up with a bathroom that smells like a pond. Stick to the TCNA standards and don’t let anyone tell you that a flat shelf is fine because it looks better. A dry floor is the only floor that lasts.