How to Fix Laminate Floor Tenting Without Taking the Whole Room Apart
I once walked into a house where a fifteen thousand dollar wide-plank walnut floor was cupping so bad it looked like a potato chip because the installer did not check the crawlspace humidity. While that was a hardwood job, the physics of laminate floor tenting are just as brutal. Homeowners always ask why their waterproof vinyl or laminate is buckling. Usually, it is because they locked it under a heavy kitchen island, killing the floor ability to breathe. My name is Mike, and I have spent twenty-five years looking at floors from the perspective of the subfloor. I smell like oak dust and floor wax, and I am here to tell you that your floor is a living, moving system. When it starts to peak in the middle of the room, it is screaming for space. It is not a manufacturing defect. It is an installation failure. Most guys skip the floor leveling compound. They think the underlayment will hide the dip. It won’t. I spent three days grinding concrete on a job last month just so the floor would not click like a castanet.
The physics of the peak
Laminate floor tenting occurs when the individual planks expand due to thermal or hygroscopic changes and encounter a fixed obstruction that prevents lateral movement. This force is transferred through the tongue-and-groove locking system, forcing the boards to lift at the joints into a peaked or tented position. You do not need to tear the whole room out. You need to find where the floor is hitting the wall. Laminate is a floating floor. It is never supposed to be attached to the subfloor. It sits on an underlayment, held down only by gravity and its own collective weight. When you install a floor in a room, you must leave a gap around the entire perimeter. This is usually a quarter inch to three-eighths of an inch. If the installer was lazy and pushed the boards tight against the drywall, the first time the humidity hits sixty percent, that floor is going to rise.
“A floor is only as good as the subfloor beneath it; deflection is the enemy of every joint.” – Master Flooring Axiom
The ghost in the expansion gap
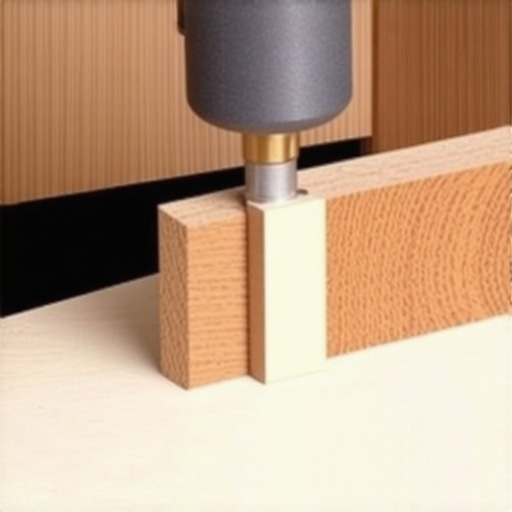
The expansion gap is the empty space left between the edge of the flooring and the wall to allow for natural movement caused by seasonal climate shifts. If you see a tent, the first step is to remove the baseboards and shoe molding around the perimeter of the room. You are looking for any place where the flooring is touching the drywall or the wall studs. Even a single nail driven through the baseboard and into the laminate board can act as a fixed anchor. This anchor point prevents the entire floor from shifting. When the boards expand, that anchor point forces the energy to the weakest part of the floor, which is the joint in the center of the room. This is common near door frames where the laminate was not undercut properly. If the floor is wedged tight against a door jamb, it has no room to grow. You need to use an oscillating multi-tool to cut a gap. I call this precision surgery. You are relieving the pressure without disturbing the rest of the layout.
Why your kitchen island is a floor killer
Heavy furniture or fixed cabinetry like kitchen islands can pin a floating floor to the subfloor, creating a permanent anchor point that causes tenting when the rest of the floor expands. Many DIY installers make the mistake of installing the kitchen island on top of the laminate. This is a violation of the National Wood Flooring Association standards. A floating floor must be allowed to move as a single monolithic slab. If you pin one side down with three hundred pounds of cabinetry and the other side expands toward a wall, the floor will buckle. The fix for this is difficult without removal, but you can sometimes use a toe-kick saw to cut the laminate around the perimeter of the island, then cover the gap with a decorative molding. This effectively turns the floor back into a floating system. The same logic applies to a carpet install where the transition strip is screwed through the laminate. If you have a transition between the laminate and a carpeted bedroom, check those screws. If they are tight through the laminate, they are likely the cause of your peak.
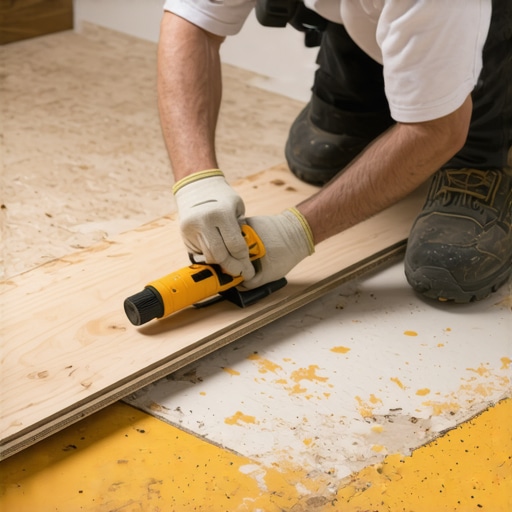
The surgical approach to board relief
Repairing a tented floor without removal involves identifying the pinch point and using a plunge saw or oscillating tool to create the necessary expansion space. Once the baseboards are off, you will likely find a board that is jammed against the wall. Mark a line a quarter inch back from the wall. Using a plunge saw set to the exact thickness of the laminate, cut away the excess material. You must be careful not to cut into the subfloor or the drywall. Once the material is removed, the floor should settle. Sometimes you need to walk on the peak or place a few heavy boxes of flooring on it overnight to encourage it to lay flat. If the peak has been there for months, the locking mechanism might be slightly deformed. In those cases, the mechanical bond of the tongue and groove has been stressed near its breaking point. You might need to use a tapping block to gently nudge the boards back into alignment once the pressure is relieved.
| Material Type | Required Gap | Sensitivity to Humidity |
|---|---|---|
| Standard Laminate | 3/8 Inch | High |
| Engineered Wood | 1/2 Inch | Medium |
| Rigid Core LVP | 1/4 Inch | Low |
| Solid Oak | 3/4 Inch | Extreme |
Moisture vapor and the concrete slab
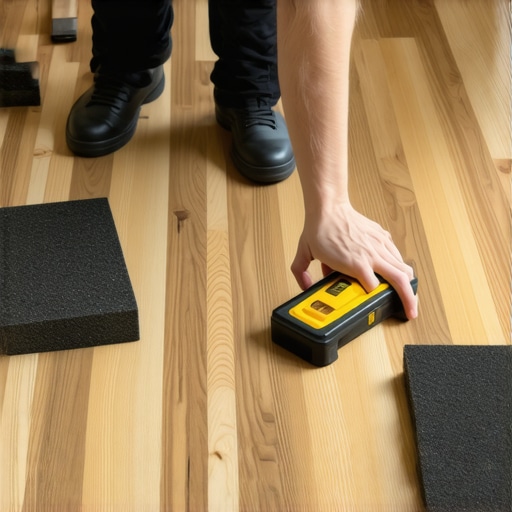
Moisture vapor transmission from a concrete subfloor can cause the high-density fiberboard core of laminate to swell, leading to chronic tenting issues. Even if you have the perfect expansion gap, a wet slab will ruin your floor. This is common in homes where showers or bathrooms are nearby and moisture migrates through the walls or subfloor. I always use a calcium chloride test or a pinless moisture meter before I lay a single plank. If the slab is putting out more than three pounds of moisture per thousand square feet, you need a six-mil poly film moisture barrier. Without this barrier, the HDF core absorbs the water. The fibers expand at a molecular level. The resin bonds start to fail. This is why the floor feels soft or bouncy. If the floor is tenting because of moisture, relieving the edges might not be enough. You might need to address the humidity in the crawlspace or the ventilation in the room. In places like Houston or New Orleans, the ambient humidity can be so high that solid wood is a death wish. You need to be aware of your regional climate before choosing your material.
“The National Wood Flooring Association requires that the subfloor be flat to within 3/16 inch in a 10 foot radius to prevent joint failure.” – NWFA Technical Manual
Checklist for a tent-free restoration
- Remove all baseboards and check every inch of the perimeter for wall contact.
- Inspect door jambs to ensure they are undercut and the floor is not bound.
- Check transition strips for screws that have pinned the laminate to the subfloor.
- Verify that no heavy cabinetry or islands are sitting on top of the floating boards.
- Use a moisture meter to check for subfloor dampness near showers or exterior walls.
- Cut back at least 1/4 inch of material at any identified pinch point.
- Weight the tented area for 24 hours to help the locking mechanism reset.
Why your subfloor is lying to you
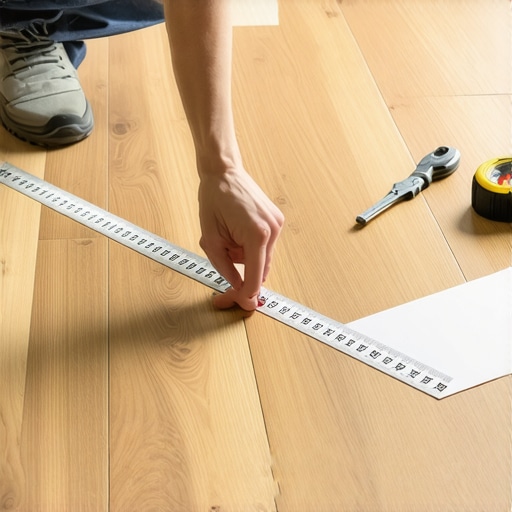
A subfloor that looks flat to the eye often contains subtle dips and ridges that interfere with the way a laminate floor distributes expansion pressure. If the floor is tenting in a specific spot and the perimeter is clear, you likely have a high spot in the subfloor. This high spot acts as a fulcrum. As the floor moves, it gets caught on that ridge. Proper floor leveling is not optional. I use a ten-foot straightedge on every job. If I find a dip deeper than an eighth of an inch, I fill it with a high-strength Portland cement-based leveler. If I find a hump, I grind it down. Many installers think the foam underlayment will fill these gaps. It won’t. In fact, using an underlayment that is too thick can make the problem worse. Too much cushion allows the joints to deflect too much when you walk on them, which eventually snaps the click-lock tongue. This is the difference between a floor that lasts thirty years and one that fails in three. You have to respect the structural reality of the surface. A floor is not a decoration. It is a performance surface that must withstand thousands of pounds of pressure and constant environmental shifts.