The ‘Flashlight Test’ for Finding Grout Pinholes in Your Shower Floor
The Flashlight Test for Finding Grout Pinholes in Your Shower Floor
I once spent three days grinding concrete on a job last month just so the floor wouldn’t click like a castanet. People think floor leveling is a suggestion, but when you are dealing with a shower, that level of precision becomes a matter of structural life and death. I have seen a five thousand dollar tile job turned into a moldy pile of rubble because a guy missed a single pinhole. Grout is not a solid wall; it is a porous, chemical suspension that requires absolute density to function. When that density fails, water finds a way. It does not just sit there. It travels. It migrates into your subfloor and rots the joists from the inside out. My hands are permanently stained with thin-set because I refuse to walk away from a job until every joint is packed tight. The flashlight test is the only way to be sure that your installation is actually waterproof and not just a ticking time bomb of property damage.
The invisible killer of bathroom subfloors
Grout pinholes and voids are microscopic structural failures that allow water to bypass the tile surface and saturate the mortar bed below. These tiny openings act as conduits for moisture, triggering wicking action that rots wooden subfloors, destroys drywall, and facilitates toxic mold growth within the wall cavity. I have walked into bathrooms where the homeowner bragged about their waterproof LVP but ignored the shower floor. It was a disaster. The water does not just disappear. If you have a pinhole, gravity pulls that moisture down. If the installer did not use a proper pre-slope or waterproofing membrane like Schluter-Kerdi or Laticrete Hydro Ban, you are in trouble. The grout is your first line of defense. When it fails, the entire assembly is compromised. Most guys think a quick wipe with a sponge is enough. It is not. You have to understand the chemistry of the mix. If you add too much water to your grout, the evaporating moisture leaves behind air pockets. Those air pockets are the pinholes that will ruin your house. You need to look at grout through a 25-year lens, not a two-day lens. Structural integrity starts at the molecular level of the cement bond.
Capillary action and the geometry of a grout joint
Capillary action in grout refers to the physical process where water is pulled into narrow spaces without the assistance of external forces. This hydrostatic pressure can force liquid through a hole smaller than a needle, saturating the cementitious layers and leading to efflorescence or structural rot. Think about it like a straw. The smaller the hole, the more pull it has. When you are looking at a shower floor, you are looking at thousands of potential straws. This is why I preach the gospel of high-density grout. The NWFA and TCNA standards are very clear about coverage and density. If you are not hitting 95 percent coverage on your tile back, you are leaving voids. Those voids collect water. That water sits there and stagnates. It smells like a wet dog and eventually turns into a black sludge. I have torn out showers where the subfloor was so soft I could push my thumb through it. All because of a pinhole. We are talking about ASTM C1193 standards for sealants and joints. If the joint is not packed to the bottom of the tile, it is a failure. You cannot just skim the top. You have to pack it until the grout starts to resist you.
“A floor is only as good as the subfloor beneath it; deflection is the enemy of every joint.” – Master Flooring Axiom
[IMAGE_PLACEHOLDER]
Why carpet install logic fails in wet areas
Carpet installation techniques rely on mechanical fastening and tension, whereas shower floor tile requires chemical bonding and total moisture isolation. Applying the fast-paced logic of a carpet installer to a shower floor results in grout cracking, delamination, and water infiltration. I see guys transition from a carpet install to a tile job and they move too fast. They think they can just stretch and go. No. Tile is about the cure. It is about the hydration of the cement. If the thin-set dries too fast because you did not wet the substrate, it steals the water from the grout. This creates a weak, powdery joint that pinholes instantly. You need to respect the materials. Carpet is forgiving. You can hide a dip in the floor with a thick pad. In tile, a dip is a puddle. A puddle is a leak. A leak is a lawsuit. I always tell the younger guys that if they want to be fast, go back to laying laminate in a bedroom. Shower floors are for the patient. You have to wait for the slake time. You have to mix at low RPMs to avoid whipping air into the bucket. Air is the enemy of density. Every bubble in that bucket is a potential hole in your shower floor.
Floor leveling for shower pans and drainage
Floor leveling in a shower context requires a precise slope of 1/4 inch per foot toward the drain to ensure proper drainage. Failure to achieve this topographic accuracy leads to standing water, which puts constant hydrostatic pressure on grout joints and increases the risk of moisture penetration. I have seen guys try to use self-leveling compound in a shower pan and end up with a flat floor. That is a nightmare. You need a dry pack mortar bed or a pre-sloped foam tray. You need to verify the pitch with a level before a single tile is set. If the water does not move, the grout is always under attack. Water is a universal solvent. It will eventually find a weakness. If you have a low spot, the minerals in the water will deposit in the grout, weakening the bond. I spent twenty years learning how to read the bubble on a level. It is not just about being flat; it is about being correct. If the floor is not leveled and sloped properly, no amount of grout sealer will save you. You are just putting a band-aid on a broken bone.
The flashlight technique for shower inspections
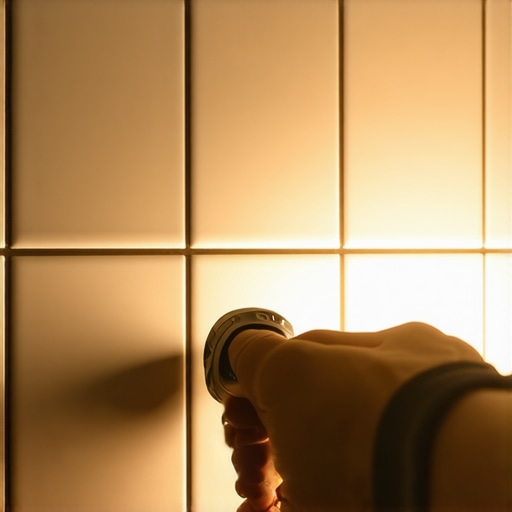
The flashlight test involves placing a high-lumen LED light flush against the tile surface to create grazing light across the grout joints. This low-angle illumination reveals micro-shadows, indicating pinholes, cracks, or low spots that are invisible under standard overhead bathroom lighting. This is the secret weapon of every master inspector. Turn off the lights. Get down on your knees. Slide that flashlight along the floor. When the light hits a hole, the shadow will look like a crater. It is brutal. It shows every mistake. It shows where the sponge was too wet and washed out the pigment. It shows where the installer did not push the grout deep enough. I do this on every job. If I see a shadow, I dig out the joint and redo it. You cannot just smear a little more on top. It will not bond. You have to do it right. This test separates the pros from the guys who just bought a bucket and a float yesterday. It is about accountability. If you are a homeowner, do this before you pay the final bill. If you see shadows, the job is not done.
Comparing grout performance and density
Choosing the right grout is a decision between porosity, compressive strength, and chemical resistance. Modern epoxy grouts and high-performance cementitious grouts offer superior density compared to traditional sanded grout, significantly reducing the likelihood of pinhole formation. Look at the data. Traditional grout has a water absorption rate that is often too high for constant immersion. Epoxy is zero. It is harder to work with, it smells like a chemistry lab, and it will ruin your tile if you do not clean it fast enough. But it will not pinhole. It forms a solid plastic-like bond that water cannot touch. I prefer the high-performance stuff like Mapei Ultracolor Plus FA. It has drop-effect technology that makes water bead up like it is on a freshly waxed car. It is about picking the right tool for the environment. You do not use a hammer to turn a screw.
| Grout Type | Porosity Level | Durability Rating | Application |
|---|---|---|---|
| Sanded Cement | High | Moderate | Large joints, dry areas |
| Unsanded Cement | High | Low | Narrow wall joints |
| High Performance | Low | High | Shower floors, heavy traffic |
| Epoxy Grout | Zero | Extreme | Commercial kitchens, pools |
Professional checklist for shower grout maintenance
Maintaining your shower grout requires regular inspections and ph-neutral cleaning to preserve the structural integrity of the joints. Use the following checklist to ensure your floor stays watertight and prevents subfloor degradation over time. If you ignore your grout, you are inviting moisture to destroy your investment.
- Perform the flashlight test every six months to identify new cracks or pinholes.
- Seal cementitious grout joints annually with a high-quality penetrating sealer.
- Avoid acidic cleaners like vinegar which dissolve the lime in cement grout.
- Inspect the perimeter caulk for any signs of peeling or mold.
- Check the drain assembly for any gaps between the tile and the metal flange.
- Look for efflorescence which indicates water is already trapped behind the tile.
“Grout is the most vulnerable part of any tile installation; treat it with the respect it deserves.” – TCNA Handbook Wisdom
The chemistry of grout failure
Grout failure chemistry is often linked to improper water-to-powder ratios during the mixing phase. Excess water creates capillary voids as the liquid evaporates, leaving a honeycomb structure that lacks the compressive strength needed to withstand structural movement. I see this all the time. People use a drill and a paddle on high speed. They whip air into the mix like they are making a cake. That air stays in the grout. When you spread it, the bubbles pop. That is where your pinholes come from. You have to mix by hand or use a slow-speed mixer. Let it slake. This allows the chemicals to fully hydrate. If you skip the slake, you are working with a half-baked product. The density of the cured grout is what stops the water. If the density is low, the water will travel. It is basic physics. You have to be a chemist on the job site. You have to understand that the water you add is part of a chemical reaction, not just a way to make the mud easier to spread. If it is too runny, it is ruined. If it is too dry, it will not bond. There is a sweet spot that only comes with twenty years of practice.
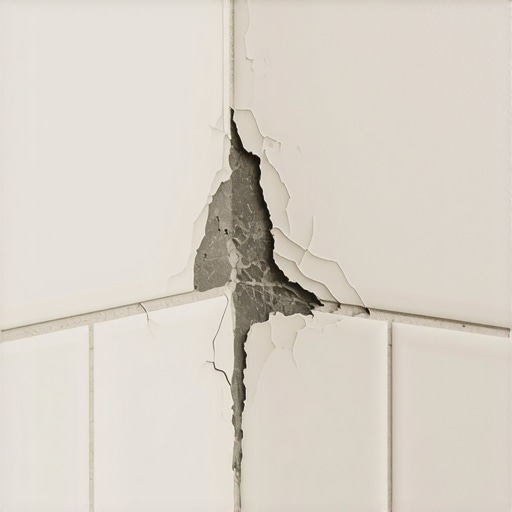
The ghost in the expansion gap
Expansion gaps at the perimeter are required by TCNA EJ171 standards to allow for thermal expansion and structural shifting. Filling these gaps with rigid grout instead of flexible silicone sealant causes the grout to crack and pop, creating entry points for moisture. This is where most people fail. They grout the corners where the floor meets the wall. Walls move. Floors move. They move at different rates. If you put grout in that corner, it will crack. When it cracks, water goes in. You must use 100 percent silicone. It stays flexible. It handles the movement. I see guys get lazy and just use the same grout float for the whole floor. That is how you end up with a rotten wall. You have to think about the house as a living thing. It breathes. It shifts. If you do not give it room to move, it will break your tile. And once the tile breaks, the water is in. There is no stopping it then. You have to be smarter than the house. You have to anticipate where the stress will go and plan for it. That is the difference between a floor that lasts five years and a floor that lasts fifty.