The ‘Spray Bottle’ Test for Checking Subfloor Porosity Before Leveling
The physics of concrete thirst
Concrete porosity determines how well a self-leveling compound bonds to the slab by allowing the liquid to penetrate the capillary pores. Using a spray bottle test identifies if the surface is open, sealed, or contaminated, which prevents delamination and ensures a structural bond between the old concrete and new underlayment. Most guys skip the leveling compound. They think the underlayment will hide the dip. It won’t. I spent three days grinding concrete on a job last month just so the floor wouldn’t click like a castanet because the leveling compound had peeled right off the substrate. The homeowner thought the underlayment would hide the dip, but instead, the floor sounded like a tap dancer in a hollow hallway. That failure happened because the installer didn’t understand the chemistry of the bond. When you pour a self-leveler onto a slab that hasn’t been tested for porosity, you are essentially gambling with the entire project budget. Concrete is a sponge. If that sponge is already full of oil or sealed with a siloxane coating, the leveler just sits on top like water on a waxed car. Eventually, the mechanical bond fails. You get movement. You get noise. You get a phone call six months later that costs you the profit of ten other jobs. My hands still feel the vibration of the grinder from that week, and the smell of pulverized lime and old adhesive is something you never quite get out of your nostrils. Flooring is not about the pretty boards you see at the end. It is about the brutal, invisible work you do on your knees before the first plank is ever pulled from the box.
The spray bottle test procedure
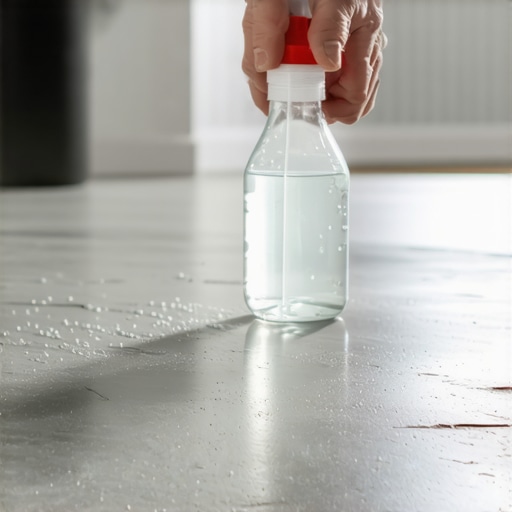
The spray bottle test involves misting clean water onto several areas of a concrete subfloor to observe the rate of absorption. If water beads, the floor is non-porous and needs grinding. If it absorbs instantly, it is highly porous and requires specialized priming to prevent pinholes and bubbles. You need to perform this test in at least ten different spots for every thousand square feet. Do not just do the middle of the room. Test the corners where the drywall mud might have spilled. Test the area near the kitchen where grease might have saturated the slab for twenty years. Take a simple spray bottle filled with distilled water. Set the nozzle to a fine mist. Spray a circle about six inches wide. Now, you watch. You watch the surface tension. If the water maintains a high bead, you have a bond breaker. This could be paint, sealer, or laitance, which is that weak, milky layer of cement that rises to the top during a poor pour. If the water disappears in under sixty seconds, the slab is thirsty. A thirsty slab will suck the moisture out of your self-leveling compound too fast, causing it to crack and go ‘short.’ This leads to a weak surface that will crumble under the weight of a refrigerator or a heavy wardrobe. [image_placeholder]
“The subfloor must be structurally sound, clean, and free of any contaminants that may hinder the bond of the flooring material.” – TCNA Handbook for Ceramic, Glass, and Stone Tile Installation
The chemistry of the mechanical bond
A successful bond between concrete and underlayment relies on the mechanical interlocking of polymers within the pore structure of the substrate. When the subfloor porosity is correctly managed, the primer creates a bridge that allows the leveling compound to fuse with the concrete at a molecular level. If you are working in a high humidity region like New Orleans, your concrete is going to behave differently than a slab in the high desert of Santa Fe. In humid environments, the concrete stays saturated longer, which can trick you into thinking it is less porous than it actually is. You have to consider the vapor drive. If the slab is non-porous because it is filled with moisture from the earth below, your leveler will eventually bubble and blow off the floor. This is why we use epoxy moisture mappers alongside the spray bottle test. We are looking for the ‘interfacial transition zone,’ the area where the two materials meet. If that zone is compromised by dust or oils, the shear strength of the floor drops to nearly zero. I have seen entire laminate floors fail because the installer thought a thick foam underlayment would compensate for a subfloor that was dipping an inch over six feet. It does not work that way. The foam eventually compresses, the locking mechanisms on the laminate snap under the stress, and the floor is ruined. You must level the floor. You must prep the slab. There are no shortcuts that the physics of gravity will not eventually find and punish.
| Absorption Time | Porosity Level | Required Primer Strategy |
|---|---|---|
| Under 60 seconds | High Porosity | Two coats of acrylic primer or a high-solids sand-broadcast primer |
| 1 to 10 minutes | Moderate Porosity | Standard single coat of diluted acrylic primer |
| Over 10 minutes | Non-Porous | Mechanical grinding to CSP 3 or use of a specialty non-porous primer |
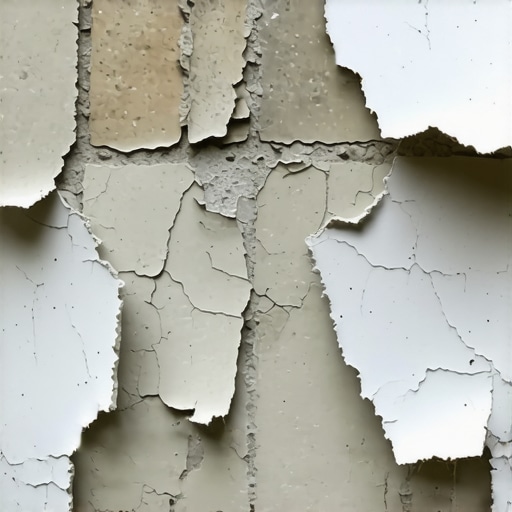
Why your leveler will peel like a sunburn
Bond breakers like drywall compound, overspray, and old carpet adhesive create a barrier that prevents self-leveling underlayment from grabbing the concrete. Failure to remove these contaminants results in a floor that delaminates, leading to hollow spots and eventual structural cracking in the finished surface. When you see water beading on the surface, the concrete is telling you it is closed. You cannot prime over a closed slab with a standard water-based primer. It will just sit on the surface like a film of plastic. You have to get aggressive. This means getting out the diamond grinder or a shot blaster to open those pores up. You want a Concrete Surface Profile (CSP) of at least 2 or 3. It should feel like 80-grit sandpaper under your fingers. If you try to skip the grinding and just use a ‘fancy’ primer, you are asking for trouble. I remember a job where a ‘pro’ tried to level a slab that had old black cutback adhesive on it. He didn’t test the porosity. He didn’t grind. He just poured. Two weeks later, the whole floor sounded like you were walking on potato chips. Every time the HVAC kicked on and the humidity shifted, the leveler curled up and pulled away from the slab. We had to rip out three thousand dollars of material and start over. That is the cost of ignoring a five-minute spray bottle test.
“Moisture testing is not a suggestion; it is a requirement for any successful wood flooring installation, as the slab must be within the specified moisture content range.” – NWFA Technical Publication No. C100
Preparation checklist for subfloor leveling
- Vacuum the entire floor with a HEPA-filtered shop vac to remove every speck of dust.
- Perform the spray bottle test in a grid pattern across the entire room.
- Circle any non-porous areas with a wax-free pencil for targeted grinding.
- Verify the slab temperature is within the range specified by the primer manufacturer.
- Apply the correct primer based on the absorption timing recorded during the test.
- Allow the primer to dry until it is tacky but does not transfer to your finger.
Correct priming technique ensures the self-leveling compound stays fluid long enough to find its own level without losing its hydration to a thirsty slab. This process eliminates pinholes and creates a glass-smooth surface ready for any floor covering from carpet to luxury vinyl. People think waterproof LVP means they can ignore the subfloor. They are wrong. While the material itself might not rot, the locking joints are fragile. If the floor is not flat within 3/16 of an inch over ten feet, those joints will flex every time you walk on them. That flexing causes the material to fatigue. Eventually, the joints separate. Now you have gaps. Now you have a floor that moves under your feet. The spray bottle test is the first step in ensuring that doesn’t happen. It tells you exactly how the concrete will react to the primer and the leveler. It is the most important five minutes of the entire installation process. Without a proper bond, you are just laying a expensive rug made of plastic or wood. Treat the floor like an engineering project. Respect the chemistry of the concrete. Check the porosity or expect a failure. The grit under my fingernails and the soreness in my back are the prices I pay for doing it right, but I never have to go back to a job to fix a floor that I leveled correctly. The final result is a surface that is silent, solid, and built to last longer than the house itself.