The ‘Bubble Test’ for Checking if Your Floor Leveler Primer Actually Worked
The physics of subfloor preparation and the bubble test
Most guys skip the leveling compound. They think the underlayment will hide the dip. It won’t. I spent three days grinding concrete on a job last month just so the floor wouldn’t click like a castanet. That job was a nightmare because the previous installer ignored the porosity of the slab. When you pour self-leveling underlayment over a dry, thirsty concrete floor without a proper seal, the concrete acts like a sponge. It sucks the hydration right out of the leveler mixture before the chemical reaction can complete. This creates a weak, powdery bond and a surface riddled with pinholes. If you want to avoid a floor that sounds like a hollow drum every time you walk on it, you have to master the bubble test. It is the only way to verify that your primer has actually done its job of sealing the substrate. This is not about aesthetics. This is about the structural integrity of the bond between the old world and the new floor you are about to lay down.
The science of concrete thirst and primer failure
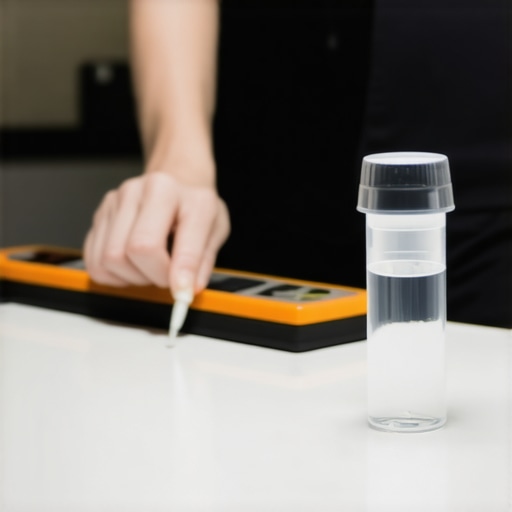
The bubble test for floor leveler primer works by placing a single drop of water on the dried primer surface to observe its surface tension. If the water remains as a bead for over ten minutes, the primer has successfully sealed the concrete pores. If it disappears, the primer failed. Concrete is a porous material. It is a network of microscopic capillaries and voids that were formed when the original water in the mix evaporated. When you apply a primer, you are not just painting the floor. You are attempting to plug those capillaries with a polymer resin. If those holes stay open, air escapes from the slab as the heavy leveler moves in. This air travels upward through the liquid leveler, creating bubbles that pop and leave craters. Worse, the slab steals the water necessary for the leveler to achieve its rated compressive strength. You end up with a brittle shell that will eventually crack under the weight of furniture or foot traffic. Understanding this chemical interaction is the difference between a floor that lasts thirty years and one that fails in thirty days.
“A floor is only as good as the subfloor beneath it; deflection is the enemy of every joint.” – Master Flooring Axiom
Why the slab drinks your profits
The rate of absorption in a concrete slab depends on its density and its age. An old, soft slab can be incredibly thirsty. You might apply a coat of primer and watch it disappear in seconds. This is where most installers fail. They assume one coat is enough because the bottle says so. The bottle does not know your floor. The bubble test is the only objective metric for success. You take a dropper or a small straw and place three or four drops of water in different areas of the room. Look for the areas near the walls and the center of the room. If the water maintains its hemispherical shape, you have achieved a mechanical seal. If the water spreads out and changes the color of the concrete, you are looking at a failed seal. You need another coat. This is a game of saturation. You are fighting the physics of capillary action. If you lose this fight, the self-leveling compound will not flow correctly. It will get sticky and stiff too fast, leaving you with ridges and humps that no amount of sanding can easily fix.
The 1/8 inch that ruins everything
Modern flooring tolerances are tighter than they have ever been. Whether you are prepping for showers or a massive laminate install, the industry standard is usually an eighth of an inch of variation over ten feet. This sounds like a lot until you realize that a single unsealed patch of concrete can cause a dip of twice that depth due to improper leveling flow. In the world of laminate, this variation leads to joint fatigue. Every time you step on a high spot, the tongue and groove mechanism of the plank flexes. Eventually, that plastic or fiberboard lock will snap. You will hear a clicking sound. That click is the sound of your bank account draining because the only fix is to tear the whole floor up. This is why the subfloor prep is ninety percent of the work. The actual laying of the planks is just the victory lap. If you do not spend the time grinding the high spots and filling the low spots with a properly primed leveler, you are just building a house on sand.
| Substrate Type | Porosity Level | Required Primer Coats | Bubble Test Goal |
|---|---|---|---|
| New Power-Troweled Concrete | Low | 1 Coat | 15 Minute Bead |
| Old Absorbent Concrete | High | 2 to 3 Coats | 10 Minute Bead |
| Plywood Subfloor | Medium | 1 Coat (Specific Primer) | No Absorption |
| Gypsum Based Underlayment | Extreme | 2 Coats | Immediate Beading |
The chemical bond of modified thinset in showers
When we talk about showers, the stakes get even higher. You are dealing with constant moisture and temperature fluctuations. If your floor leveling for a shower pan is not perfectly bonded, the waterproof membrane on top will eventually delaminate. A shower floor needs to be rock solid. When you use a modified thinset or a leveling compound in a wet area, the primer acts as a bridge. It stops the concrete from stealing the moisture from the thinset. Without that moisture, the polymer chains in the thinset cannot link up. You end up with a mechanical bond that is nothing more than dried mud. I have seen entire tile floors in high end bathrooms pop off the slab like a scab because the installer did not prime the floor correctly. They thought the concrete looked clean enough. Clean is not the same as sealed. The bubble test ensures that the surface energy of the substrate is prepared to accept the adhesive. It is a simple check that prevents a five figure insurance claim.
“Surface preparation is the most critical step in any tile installation; failure to address substrate porosity leads to bond breakage.” – TCNA Handbook Standards
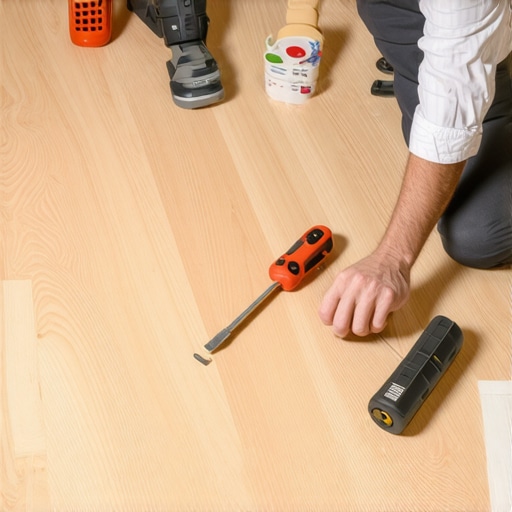
A checklist for subfloor preparation mastery
- Inspect the slab for any sealers or waxes that might prevent primer from penetrating.
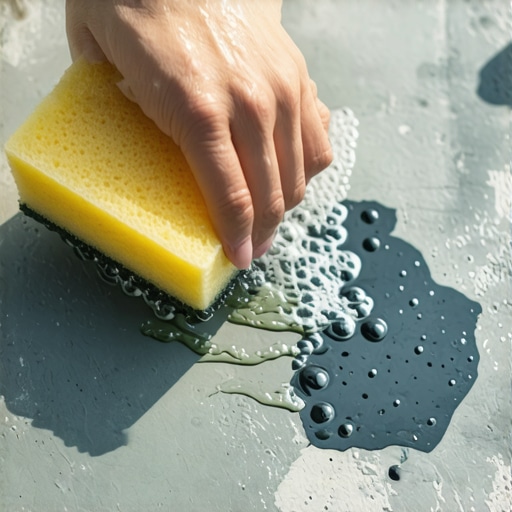
- Vacuum the floor three times to remove every speck of dust that could act as a bond breaker.
- Mix the primer according to the manufacturer specifications for your specific slab porosity.
- Apply the primer evenly using a soft bristle broom or a 3/8 inch nap roller.
- Allow the primer to dry until it is tacky but does not transfer to your finger.
- Perform the water drop bubble test in at least five locations per 500 square feet.
- Observe the water for ten minutes to ensure no absorption occurs.
- Reapply a second coat if the water vanishes or the slab looks dull and dry.
The click of death under laminate and carpet install
Many people think carpet install is the exception to the rule. They think the thick pad will hide the imperfections of a subfloor. While a pad might hide a small dip, it will not hide a structural failure. If the leveler underneath the carpet pad starts to crumble because it was not primed properly, you will feel the grit under your feet every time you walk across the room. It feels like sand under the carpet. For laminate and LVP, the danger is even more immediate. Contrary to popular belief, the thickest underlayment is not always the best. Too much cushion actually causes the locking mechanisms on LVP to snap under pressure because it allows for too much vertical movement. You want a flat, hard surface. The bubble test is the gatekeeper of that hardness. If the leveler is bonded perfectly to the slab, it becomes part of the structure. If it is not, it is just a layer of loose crackers under your expensive new floor.
The regional climate factor and moisture vapor
In high humidity environments, the way concrete behaves changes. If you are working in a swampy area, the moisture vapor transmission through the slab can be immense. This vapor wants to push the leveler off the floor. A high quality primer acts as a vapor retarder to some degree, but its primary job is still the bond. If you fail the bubble test in a humid climate, you are essentially trapping air and moisture under a layer of leveler that is not attached to anything. When the temperature shifts, that air expands. You will see bubbles the size of silver dollars appearing under your floor. You have to understand the physics of the site. Every slab is a living, breathing thing. You are there to tame it. The bubble test is your primary tool for communication with the concrete. It tells you when the slab is satisfied and when it is still hungry for more polymer. Do not ignore what the water is telling you. A single drop of water is the cheapest insurance policy you will ever buy.