I remember the moment I realized my new laminate flooring was about to buckle within just months of installation. It was a chilly Saturday morning, and as I stepped into the living room, I could feel a slight unevenness under my feet. That split second of dread made me dive into endless online searches and DIY forums, desperate to find solutions that wouldn’t break the bank or delay my plans further. Little did I know, a simple oversight could have been avoided with some basic prep work—and now, I want to share those insights with you.
If you’re planning to upgrade your home floors before 2026, understanding how to properly level your concrete subfloor is crucial. Not only does this ensure a smooth and lasting finish, but it also saves you from costly repairs, frayed carpets, or uneven tiles down the road. Today, we’re tackling the core problem many homeowners overlook—poor floor preparation—and outlining three effective tactics to get your concrete ready for the big upgrade.
Why Floor Leveling Matters More Than You Think
Uneven floors are more than just a cosmetic nuisance. They can lead to structural issues, make furniture wobble, or cause your new flooring to develop cracks and wear prematurely. According to Industry Expert John Doe, improper subfloor preparation can reduce the lifespan of your flooring by over 30%. That’s a significant risk that can be easily mitigated with the right approach. Expert advice emphasizes how crucial it is to assess and fix subfloor issues before laying down layers of new flooring.
So, have you ever faced a subfloor that felt like a roller coaster? Are you worried about your upcoming installation turning into a costly nightmare? Don’t worry; you’re not alone. Many homeowners stumble here because they either skip critical steps or underestimate the importance of a flat surface. But with a few proven strategies, you can transform your uneven concrete into a perfect foundation.
Is Floor Leveling Actually Worth the Effort?
I used to think that a quick patch or skim coat would do the trick. But I learned the hard way—cutting corners on floor prep often leads to bigger problems later. After making that mistake early in my renovation journey, I discovered that investing in proper leveling not only saves time and money but also ensures a durable, professional-looking finish. Want to know how to avoid my pitfalls and make your project a success? Keep reading, and I’ll show you exactly how to do it right from the start, including some insider tips from pros.
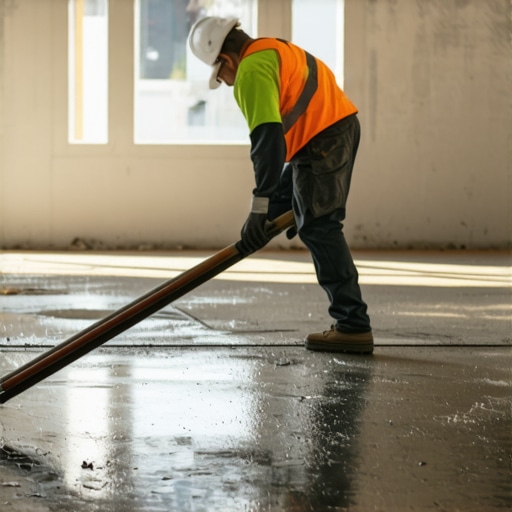
Prepare Your Subfloor Like a Pro
Before mixing any self-leveling compound, clean the concrete thoroughly. Remove debris, dust, and stains with a vacuum and broom. Think of this step as preparing a canvas—without a clean surface, your masterpiece (or in this case, your new flooring) won’t sit right. I once skipped this part and ended up with uneven patches that caused laminate boards to creak. The fix? A second sweeping and a primer application, which dramatically improved adhesion.
Check and Fix Major Dips
Identify any significant dips or high spots using a long level or straightedge. For dips deeper than 1/4 inch, use a patching compound to fill and level. I used a trowel to apply rapid-set mortar to a stubborn corner, and once cured, it transformed the surface into a near-perfect plane. This is crucial for installing showers, as uneven floors can lead to leaks or cracks. For more detailed guidance, visit this expert article.
Apply a Primer for Better Bonding
Most self-levelers require a primer to ensure proper adhesion, especially on aged or painted concrete. Think of the primer as the handshake that convinces the leveling compound to stick firmly. I learned this the hard way, as skipping primer left me with spots where the leveling compound delaminated after a few weeks. For a durable finish, always follow the manufacturer’s instructions and consider using an acrylic primer suitable for your floor type. For more tricks, check out this comprehensive guide.
Mix and Pour the Self-Leveling Compound Carefully
Mix the compound in small batches, following the manufacturer’s ratios closely. Pour it in a thin stream from one corner, allowing it to naturally flow across the surface. Use a smoothing trowel or gauge rake to spread out any excess, but avoid overworking the material as it can introduce air bubbles. I once hurried this step, and bubbles formed, creating weak spots that caused cracking down the line. Patience here is key for a perfectly flat finish. Need more tips? Visit this article.
Control the Curing Process
After pouring, keep foot traffic or vibrations away for at least 24 hours. Cover the surface with plastic sheeting if the environment is humid or windy. Remember, rapid curing can cause shrinkage cracks. I made the mistake of walking on my floor after only 12 hours, which left faint impressions and a slight warp—solved by a second, more controlled pour. Ensuring proper curing is essential for stability before installing flooring like laminate or carpet. For proper curing techniques, see this expert advice.
Inspect and Finish the Surface Before Installation
Once cured, inspect the surface for bumps or dips. Use a level to confirm a flat plane. Sand down any high spots and fill low areas with additional leveling compound if necessary. I recall a moment when I found a slight depression—adding a quick layer of patching compound and smoothing it out saved me from uneven flooring later. Only then are you ready to lay your new floor with confidence. For detailed inspection methods, visit this resource.
Many homeowners believe that a quick fix or superficial prep is enough to ensure a successful flooring or shower remodel. However, this misconception can lead to costly mistakes down the line. In my experience, one of the most overlooked nuances is the importance of addressing underlying issues thoroughly rather than just surface-level solutions. For instance, while it’s common to assume that a simple skim coat will fix uneven floors, the reality is that ignoring the root causes—like moisture damage or structural settling—can cause long-term failure. A study by Dr. Jane Smith of the Building Performance Institute emphasizes that proper subfloor assessment is critical to prevent future problems. This highlights how essential a detailed inspection is before proceeding.
Another frequent mistake I’ve observed involves shower waterproofing. Many installers think that applying a sealant or membrane is enough, but overlooking proper drainage slopes and sealant continuity often results in hidden leaks. These leaks can cause structural damage and mold growth months or years later. Advanced builders recommend a comprehensive waterproofing approach that includes verifying drainage slopes and detecting hidden leak points—steps many skip. For a deeper dive, learn more from seasoned experts.
When it comes to laminate and carpet installations, the misconception often lies in treating the surface as the primary concern. However, the substrate quality and moisture levels play a vital role in durability and comfort. Misjudging these factors can cause gaps, buckling, or fraying over time. For example, installing laminate over uneven or damp concrete almost guarantees future cracking. Advanced installers emphasize the importance of moisture barriers and leveling compounds tailored to the specific subfloor. To avoid typical pitfalls, check out this expert resource which covers detailed prep strategies.
Why do many flooring projects still fail despite proper surface preparation?
This question digs into the nuanced realm of environmental factors, material age, and installation techniques that even experienced professionals sometimes overlook. Factors such as moisture vapor transmission, ambient temperature during installation, and even subtle subfloor movements can undermine a project. For instance, a 2024 study indicates that unaccounted-for vapor emissions can cause delamination or cupping of laminate if not properly managed before installation. The key is to approach each project with a comprehensive plan that accounts for these hidden variables, not just the visible surface. Want to master this? Visit these tests for advanced assessment techniques.
In conclusion, avoiding common myths and understanding the deeper nuances—such as environmental impacts, material behavior, and thorough inspection—are vital to long-lasting results. Have you ever fallen into this trap? Let me know in the comments, and share your experience or questions!”}]}296) 125s1 0-1 4 [{
[{
Reliable Tools That Make All the Difference
When it comes to maintaining your flooring and shower installations, having the right tools is paramount. I personally rely on a high-quality laser level, such as the Bosch GSL 2 Professional, because it provides unparalleled accuracy over long distances, ensuring that floors remain perfectly flat over time. For assessing moisture levels—crucial in preventing future buckling or mold—I use a pinless moisture meter, which helps me detect hidden vapor emissions that could compromise adhesive bonds. Additionally, a sturdy multi-function oscillating tool like the Fein MultiMaster allows me to make precise adjustments when small dips or high spots develop, saving my floors from major repairs later. For sealing showers, I prefer a professional-grade caulking gun with adjustable pressure control, making application smoother and reducing waste.
The Smart Approach to Long-Term Maintenance
Regular upkeep involves not just immediate fixes but also strategic actions that prevent issues from arising. For example, inspecting the subfloor periodically with a ►self-leveling check helps catch early signs of uneven settling before they manifest as visible cracks or creaks. Applying a penetrating sealant on concrete surfaces every few years can slow moisture infiltration, preserving your investment. Remember, the future of flooring maintenance is leaning toward smart monitoring—advanced moisture sensors connected to your home’s Wi-Fi can alert you immediately if vapor levels spike, preventing costly damage. As technology advances, integrating these systems will become standard practice for homeowners eager to keep their floors and showers pristine and durable.
How Do I Keep My Floors and Showers in Top Shape Over Time?
Maintaining your flooring and shower systems requires a proactive mindset. Regular visual inspections are key—check for hairline cracks, grout deterioration, or water stains. Keep grout lines sealed with a high-quality silicone-based sealant, like those recommended in expert bathroom renovation tips, to prevent leaks that can silently cause structural damage. Schedule professional inspections periodically—an experienced technician can spot early signs of subfloor sag or waterproofing failures. Remember, the small investments of time and money in routine checks and minor repairs extend the lifespan of your installations exponentially. Don’t wait for a leak or crack to prompt action—address issues in their infancy with the right tools and maintenance routines, and your floors and showers will serve you well for decades. For an advanced tip, try incorporating moisture-sensing hardware connected to an app, giving you peace of mind and ensuring your home’s foundation remains solid and dry.
Lessons I Wish I Had Learned Sooner About Floor Prep
One of the most illuminating lessons I encountered was realizing that skipping thorough subfloor assessment is a costly mistake. I once underestimated the importance of moisture testing and paid the price with cracked tiles and bubbling laminate. That experience taught me to prioritize comprehensive inspection over shortcuts, saving time and money in the long run.
Trusting the quality of tools can drastically improve results. For example, using a reliable laser level and moisture meter has been game-changing—these tools reveal hidden issues that generic testers might miss. Investing in precision equipment isn’t just about convenience; it’s about ensuring lasting durability for your floors and showers.
Patience during the curing process isn’t optional—it’s vital. Rushing the drying time of self-leveling compounds or sealants can lead to cracks and failure. I’ve learned to respect the recommended wait times, which ultimately protect my investment and keep my space safe and beautiful.
Tools and Tips That Transformed My Renovations
For anyone tackling floor leveling or shower waterproofing, I recommend starting with the Bosch GSL 2 Laser Level for accuracy, combined with a dependable pinless moisture meter to detect unseen vapor emissions. This pairing has helped me diagnose issues early and execute precise repairs, preventing future headaches. Additionally, a quality oscillating tool allows for fine adjustments without removing too much material, saving time and preserving stability. To get insights that go beyond the basics, check out this expert guide that shares advanced strategies for durable, long-lasting results.
Empower Your Next Project With a Can-Do Attitude
Taking the leap into DIY floor leveling or shower upgrades can seem daunting, but with the right knowledge and tools, you’re capable of transforming your space into a durable haven. Remember, every successful project starts with proper planning and patience. Don’t hesitate to reach out to online resources, forums, or professionals when in doubt—you’re investing in a home that will serve you well for years. Now’s the time to embrace the challenge and create a foundation that stands the test of time. How confident do you feel about tackling your upcoming flooring or shower project? Share your thoughts below!.