Why Your Shower Waterproofing Needs to Go Higher Than the Head
I spent three days grinding concrete on a job last month just so the floor wouldn’t click like a castanet. Most guys skip the leveling compound. They think the underlayment will hide the dip. It won’t. I have seen it time and again, homeowners spending thousands on high-end tile only to have the entire system fail because they ignored the substrate. This same negligence applies to the walls. People assume that because water flows down, the protection only needs to go as high as the spray. They are wrong. A shower is a pressurized environment. Between the steam, the vapor drive, and the capillary action of grout, your waterproofing is the only thing standing between a beautiful bathroom and a structural rot disaster. My hands are scarred from years of ripping out moldy studs that were protected by nothing but a layer of greenboard and a prayer. If you want a floor or a wall to last thirty years, you stop thinking about aesthetics and start thinking about physics. You have to understand how water moves on a molecular level before you even pick up a trowel.
The critical height requirements for modern shower waterproofing
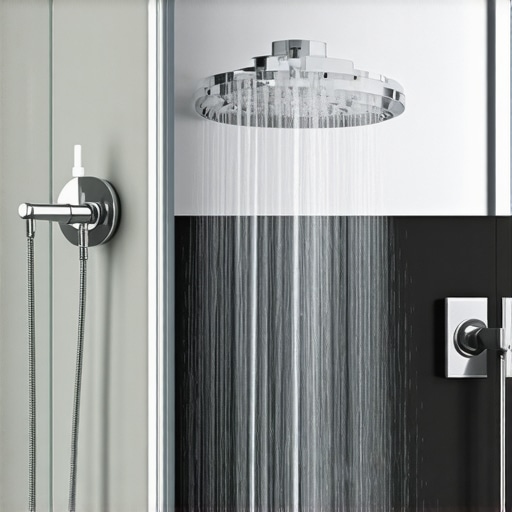
Shower waterproofing should extend to the ceiling to prevent vapor damage. Most building codes require a minimum height for water-resistant barriers, but professional standards suggest full coverage. Extending the membrane above the showerhead protects against steam accumulation and moisture penetration into the drywall, preventing hidden mold growth and structural decay. It is not just about the liquid water hitting the wall. When you take a hot shower, the air becomes saturated. This vapor carries moisture into every microscopic crack in your grout. If your waterproofing stops at six feet, that steam is hitting raw drywall or poorly primed plaster for the top two feet of the room. Over time, that moisture settles. It finds its way behind the tile flange. It begins to rot the top plate of your framing. I have seen headers that looked like wet cardboard because the installer wanted to save sixty dollars on a roll of membrane. You don’t cut corners on the envelope. You run that protection all the way up and across the ceiling if you are building a steam shower. The cost of the extra material is a fraction of the cost of a mold remediation team.
“A floor is only as good as the subfloor beneath it; deflection is the enemy of every joint.” – Master Flooring Axiom
Why your subfloor is lying to you
Subfloor flatness is the single most important factor in a successful flooring installation. Even a minor dip of 1/8 inch over ten feet can cause locking mechanisms to snap or grout lines to crack. Using floor leveling compounds ensures a stable substrate that prevents vertical movement and long term structural failure. You walk across a room and it feels solid. You think it is ready for tile or hardwood. It isn’t. Wood subfloors are notorious for crowning at the joists and sagging in the bays. If you are doing a carpet install, you can get away with some of that. The pad hides the sins of the builder. But if you are putting down laminate or large format tile, that subfloor has to be dead flat. I use a ten foot straight edge on every single job. If I see daylight under that bar, out comes the primer and the self-leveling underlayment. Floor leveling is a science. You have to calculate the volume, ensure the damming is tight so the liquid doesn’t pour into your basement, and mix it to the exact ratio specified by the manufacturer. If you add too much water, the polymers break down and the surface becomes chalky. If you add too little, it won’t flow and you end up with a mountain instead of a valley. You are fighting gravity and chemistry at the same time.
| Material Type | Moisture Resistance | Subfloor Requirement | Typical Lifespan |
|---|---|---|---|
| Solid Hardwood | Low | 3/4 Inch Plywood | 50+ Years |
| Engineered Wood | Medium | Level Plywood/Concrete | 25-30 Years |
| LVP (Vinyl) | High | Dead Flat Substrate | 10-20 Years |
| Porcelain Tile | Extreme | Deflection-Free Subfloor | 50+ Years |
The 1/8 inch that ruins everything
Expansion gaps are mandatory for all floating floors to allow for seasonal movement. Neglecting the perimeter gap causes buckling and peaked joints when the material expands due to humidity changes. A 1/4 inch gap hidden by baseboards is the standard for preventing structural tension in the floor. I once walked into a house where the laminate was peaking so hard it looked like a mountain range. The installer had jammed the planks tight against the drywall. When the humidity hit seventy percent in July, the floor had nowhere to go but up. It is basic physics. Wood and composite materials are hygroscopic. They breathe. They grow and shrink. If you don’t give them room, they will destroy themselves. This is why floor leveling is so tied to expansion. If the floor is wavy, the planks are already under tension. Add a little moisture and a lack of a perimeter gap, and you have a recipe for a total tear-out. I always use spacers. I never trust my eyes. I want to see a clear channel around the entire room before the baseboards go down. This is the difference between a floor that lasts and a floor that fails in the first season.
- Always check the moisture content of the subfloor with a pin-meter.
- Ensure the room has been acclimated for at least 72 hours.
- Vacuum the substrate twice before applying any adhesive or underlayment.
- Use a perimeter isolation strip for all self-leveling pours.
- Check the manufacturer specifications for maximum run lengths without T-moldings.
The ghost in the expansion gap
Vapor barriers are essential when installing flooring over concrete slabs to prevent moisture migration. Without a proper poly-film or moisture-mitigating primer, hydrostatic pressure can push water through the slab, destroying adhesives and warping wood. Protecting the underside of the floor is as vital as the top. Concrete looks dry. It feels dry. It is almost never dry. Concrete is a sponge. It pulls moisture from the earth and breathes it out into your home. If you slap laminate or hardwood over a slab without a barrier, you are asking for trouble. The moisture gets trapped between the slab and the floor. It creates a microclimate where mold thrives. Eventually, the floor starts to cup or the glue loses its bond. This is what we call vapor drive. It is a slow, silent killer of showers and living rooms alike. I have pulled up floors where the underside was black with rot while the top looked brand new. You have to seal the slab. Whether it is a 6-mil poly-sheet or a high-end epoxy moisture vapor barrier, you have to break the connection between the ground and your finished surface.
“Waterproofing is not a suggestion; it is a structural mandate for any wet area.” – Tile Council of North America Standard
The physics of vapor drive and steam
Steam behaves differently than liquid water and requires specialized barriers to prevent wall cavity saturation. In high-moisture environments, vapor-tight membranes must be used to stop gas-phase water from condensing inside the studs. Proper ventilation combined with full-height waterproofing is the only way to ensure longevity. Most people think of a shower like a bucket. They think as long as the bottom is sealed, they are fine. But a shower is more like a steam engine. That hot air is under pressure. It wants to escape. It will find the path of least resistance, which is usually the unsealed gap between the top of your tile and the ceiling. Once it gets back there, it condenses. Now you have liquid water sitting on your top plates and insulation. It can’t evaporate because it is trapped. This leads to dry rot, which is a bit of a misnomer because it requires moisture to start. By the time you see the brown spots on your ceiling, the damage is already done. This is why I advocate for taking your waterproofing higher than the head. It creates a controlled environment where the moisture stays on the surface of the tile and eventually goes down the drain or out the exhaust fan.
The mistake of putting laminate or carpet near wet zones
Moisture-sensitive materials like carpet and laminate should never be installed in close proximity to high-moisture areas. Transition zones between bathrooms and hallways are frequent failure points where water wicks into fibers or cores. Choosing waterproof transitions and maintaining tight seals prevents subfloor rot at the threshold. I see it all the time during a carpet install. The owner wants the plush feel right up to the edge of the bathroom tile. Then they step out of the shower dripping wet. The water hits the carpet, soaks the pad, and sits on the subfloor. Over time, that tack strip rots out and the floor starts to smell like a locker room. Same thing with laminate. Even the stuff they call waterproof usually only refers to the top surface. If water gets into the joints or under the edge at the transition, the core will swell like a sponge. You have to be smart about your transitions. Use a solid surface threshold. Seal the butt-ends of your flooring with silicone. Think about where the water is going to go when it inevitably leaves the shower. If you don’t plan for the water, the water will plan its own route through your house. “