The ‘Soap Suds’ Test for Finding Leaks in a New Shower Liner
I spent three days grinding concrete on a job last month just so the floor would not click like a castanet. Most guys skip the leveling compound because they think the underlayment will hide the dip. It will not. I have seen fifteen thousand dollar wide-plank walnut floors turn into potato chips because of moisture issues. When it comes to showers, the stakes are even higher. A single pinhole in a PVC liner can rot a subfloor in eighteen months. My hands are stained with thin-set and my knees have the permanent ache of a man who respects the TCNA handbook more than the homeowner’s budget. You can not build a masterpiece on a swamp. You have to verify the integrity of the waterproofing before the first tile is even buttered. That is where the soap suds test and the hydrostatic flood test become your best friends. We are talking about the molecular reality of water molecules finding the path of least resistance through a poorly welded corner or a mismanaged weep hole.
The structural reality of a leaking shower
A leaking shower liner is caused by improper slope, punctured membranes, or failed drain seals that allow water to bypass the primary drainage system and saturate the subfloor. Identifying these leaks requires a hydrostatic flood test where the pan is filled with water for twenty-four hours to check for level drops. If the water level stays put, you are usually in the clear. But when that level drops even a fraction of an inch, you have a ghost in the system. Most installers just stare at the curb and hope for the best. I do not hope. I use physics. Water is a relentless solvent. It will find a way to the joists. If you are dealing with a wooden subfloor, that moisture leads to fungal growth and structural failure. On a concrete slab, it leads to efflorescence and bond failure for your thin-set. You need to know exactly where the failure occurs before you cover it with several hundred pounds of mortar and stone.
The 1/8 inch that ruins everything
Floor leveling is a non-negotiable step because any deviation greater than one eighth of an inch over ten feet creates stress points in the shower liner and tile assembly. Using a self-leveling underlayment ensures the pre-slope is accurate and the final drainage surface prevents standing water. When I walk onto a job site and see a subfloor that looks like the rolling hills of Kentucky, I know we have work to do. You cannot just slap a liner over a hump. The liner will stretch and eventually thin out or tear. If you are installing carpet or laminate in the adjacent room, that levelness is just as vital. Laminate flooring requires a flat substrate to prevent the click-lock mechanisms from snapping under foot traffic. In a bathroom, if your subfloor is not level, your shower pan will not drain correctly. You will end up with stagnant water sitting in the corners, slowly eating away at the adhesive bond. I use a long straightedge and a laser level to map out the high spots. Then I get to work with the grinder. It is loud, it is dusty, and it smells like a rock quarry, but it is the only way to ensure the floor lasts thirty years instead of three.
“A floor is only as good as the subfloor beneath it; deflection is the enemy of every joint.” – Master Flooring Axiom
The soap suds protocol for waterproof integrity
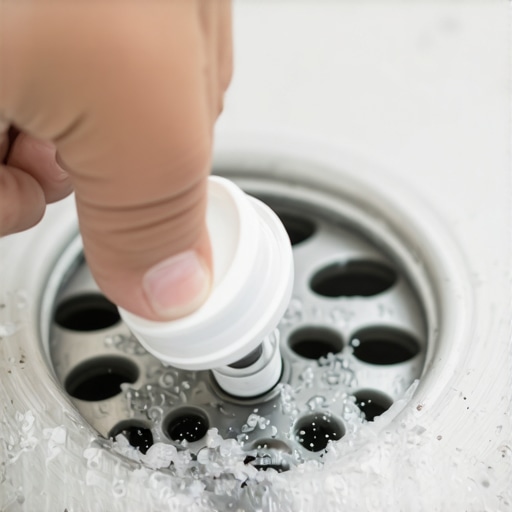
The soap suds test identifies leaks by applying a concentrated soap solution to the seams and drain connections of a pressurized or flooded shower liner. Bubbles form where air or water escapes, pinpointing the exact location of a puncture or a weak weld in the PVC or CPE material. First, you plug the drain with a mechanical test plug. Do not use the cheap plastic ones. Get the heavy-duty rubber expansion plugs. Fill the pan to at least two inches deep. If you suspect a leak around the curb or the transition to the wall, you take a spray bottle with a high concentration of dish soap and water. You spray the perimeter. You look for the tension change. In a pressurized test, you would see active bubbling. In a standard flood test, the soap helps break the surface tension, allowing you to see the vortex where water is escaping. This is especially useful around the bolts of the clamping ring drain. If those bolts are not tightened to the correct foot-pounds, water will seep through the threads. It is a tiny leak, but over a year, it will dump gallons of water into your crawlspace.
| Material Type | Standard Thickness | Acclimation Time | Primary Failure Mode |
|---|---|---|---|
| PVC Liner | 40 mil | 24 Hours | Corner Weld Failure |
| CPE Membrane | 40 mil | 48 Hours | Adhesive Breakdown |
| Liquid Membrane | 20-30 mil (Dry) | 12-24 Hours | Pinholing |
| Laminate Flooring | 8mm to 12mm | 72 Hours | Joint Peaking |
The chemistry of thin-set and liners
Modified thin-set creates a chemical bond between the tile and the membrane using polymers that allow for slight movement and thermal expansion. Choosing the wrong mortar for your specific liner material can lead to delamination and cracked grout lines within the first year of use. If you are using a topical waterproofing membrane like Kerdi, you need un-modified thin-set for the bond to the fleece. If you are going over a traditional mud bed with a PVC liner, you are looking at different mechanics. The soap suds test proves the liner is solid, but the mortar holds the aesthetic together. I have seen guys use the wrong mastic in a shower. Mastic is basically organic glue. It is food for mold. In a wet environment, it turns back into mush. You need a polymer-modified mortar that meets ANSI A118.4 standards. This stuff is engineered at a molecular level to resist water penetration. It creates a crystalline structure that locks the tile to the substrate. When I mix my thin-set, I am looking for the consistency of peanut butter. If it is too runny, it shrinks. If it is too thick, it skin-overs before you can set the tile. It is a delicate balance of hydration and chemistry.
Why your subfloor is lying to you
Subfloors often hide moisture and structural damage behind a seemingly solid surface, requiring professional tools like moisture meters and impedance scanners to verify dryness. An unlevel subfloor can cause laminate to bounce and carpet padding to wear unevenly over time. You might look at a plywood subfloor and think it is dry. It is not. Wood is a sponge. If the humidity in the house has been high, that wood has expanded. If you lock it down with a floor now, it will shrink in the winter and leave gaps. I always check the moisture content. For hardwood, I want to see less than a four percent difference between the flooring and the subfloor. For showers, the subfloor must be rigid. If there is any bounce, the grout will crack. I do not care how much soap you use to test the liner; if the joists are undersized, the floor will fail. We often have to sister joists or add a layer of 1/2 inch cement board to stiffen the assembly. It is about the deflection rating. The TCNA says L/360 for ceramic and L/720 for natural stone. That is a measurement of how much the floor bends under load. If you skip this, your beautiful tile job will look like a spiderweb of cracks in six months.
“Surface preparation is not a suggestion; it is the foundation of every successful installation.” – TCNA Handbook Standards
The regional climate expert perspective
Regional humidity levels dictate the type of underlayment and acclimation period required for any flooring installation near a wet area. In high-humidity zones, vapor barriers are mandatory to prevent the subfloor from absorbing moisture from the crawlspace or slab. If you are in a place like Houston, the air is thick enough to drink. Your subfloor is constantly under attack from ambient moisture. In those climates, I never install a shower without a secondary moisture barrier on the studs. In the dry heat of Phoenix, the wood will shrink so fast it will pull the baseboards off the wall. You have to acclimate your materials. I leave the boxes of laminate or hardwood in the room for a full week before I even open a tool bag. I want the material to reach equilibrium with the house. If you do the soap suds test and find a leak in a dry climate, the water will vanish so fast you might miss the damage until the mold starts smelling. In humid areas, the water just sits there, festering. Always account for your local weather when choosing adhesives and membranes.
- Check the subfloor for levelness using a 10-foot straightedge
- Install a pre-slope of 1/4 inch per foot toward the drain
- Ensure the PVC liner extends at least 3 inches above the finished curb
- Perform a 24-hour flood test before installing the mortar bed
- Use a soap solution to check all corner folds and drain bolts
- Verify that weep holes in the drain assembly are clear of mortar
Precision is the difference between a master and a handyman. It will buckle if you do not respect the expansion gaps. It will rot if you do not test the liner. It will fail if you do not level the floor. Do the work. Use the soap. Save the subfloor. Every 1/8 inch matters. When I finish a job, I know that floor is a structural fortress. I can sleep at night because I know the physics are on my side. Do not let a simple leak ruin your reputation or your home. Get on your knees, check the bubbles, and build it to last a lifetime.