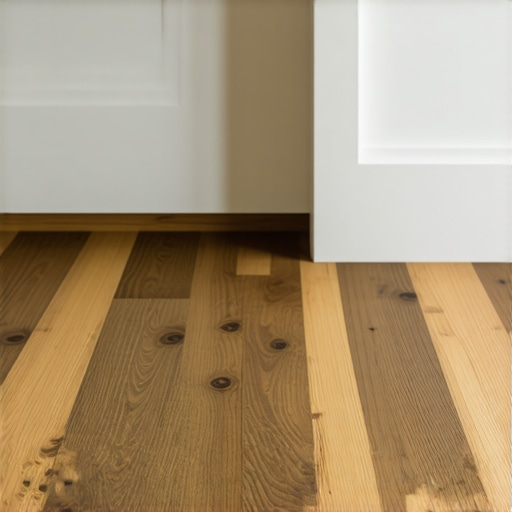
Why Your Kitchen Island Should Not Be Anchored Through Laminate
The physics of the floating floor system
Laminate flooring acts as a single, unified raft that moves in response to temperature and humidity changes. When you anchor a kitchen island through this material, you create a permanent dead spot that prevents the natural expansion and contraction of the planks, leading to buckling, joint separation, and structural failure across the entire room.
I have spent twenty five years with sawdust under my nails, and I have seen it all. Homeowners always ask why their waterproof vinyl or laminate is buckling. Usually, it is because they locked it under a heavy kitchen island, killing the floor’s ability to breathe. I remember a job last year where a client installed a massive quartz-topped island directly over a beautiful wide-plank laminate. Within three months, the floor had peaked so badly in the hallway that it looked like a speed bump. The weight of that island, roughly eight hundred pounds, acted like a giant thumbtack, pinning the floor to the subfloor. As the humidity rose, the floor tried to grow, but it had nowhere to go except up. It is a costly mistake that ignores the fundamental engineering of floating floors. When we talk about laminate, we are talking about a High-Density Fiberboard (HDF) core. This core is essentially compressed wood fibers held together with resins. Even though it is engineered, it still behaves like wood. It is hygroscopic. It drinks moisture from the air. When the relative humidity in your kitchen jumps from thirty percent in the winter to sixty percent in the summer, every single plank grows by a fraction of an inch. Across a twenty foot room, those fractions add up to a significant amount of movement. If the floor is allowed to slide freely under the baseboards, you never notice it. If you pin it down with an island, you are asking for a catastrophe.
The structural danger of the fixed point
A fixed point in a floating floor installation acts as an anchor that concentrates all mechanical stress into the surrounding locking mechanisms. By screwing a kitchen cabinet through the laminate and into the subfloor, you bypass the expansion gap requirements and force the floor to pivot around a static object, which inevitably snaps the tongue-and-groove joints during seasonal shifts.
Think about the mechanics of a click-lock joint. It is a precision-engineered piece of profile milling, often less than two millimeters thick at its thinnest point. It is designed to hold planks together while they lay flat. It is not designed to withstand the shear force of an entire floor trying to shift against a fixed island. When the floor expands, it pushes against the screws holding your island in place. Since the screws won’t move, the pressure transfers back into the joints. This is when you start hearing those annoying clicks and pops when you walk across the kitchen. That sound is the sound of your floor dying. It is the sound of the HDF core slowly disintegrating under pressure. Most guys skip the leveling compound and then wonder why their floors feel bouncy. They think the underlayment will hide the dip. It won’t. I spent three days grinding concrete on a job last month just so the floor wouldn’t click like a castanet. If you add the weight of an island on top of an uneven subfloor, the laminate will flex into the voids and eventually crack under the static load. The floor needs to be flat to within three-sixteenths of an inch over a ten foot radius. Anything less is a gamble with your investment.
“A floor is only as good as the subfloor beneath it, deflection is the enemy of every joint.” – Master Flooring Axiom
[image placeholder]
Molecular zooming into HDF core chemistry
The internal bond strength of a laminate core determines its ability to resist the internal pressures of expansion without delaminating. High-quality HDF cores use melamine-impregnated resins to provide stability, but even these cannot overcome the physical reality of hydro-thermal expansion when the perimeter is locked by heavy cabinetry or improper anchoring techniques.
We have to look at the density of the material. A standard laminate might have a density of eight hundred kilograms per cubic meter. Premium products go higher. This density is achieved through heat and pressure, but the wood fibers remain. When moisture molecules enter the HDF matrix, they wedge themselves between the fibers. This causes the individual cells to swell. If you have a thousand planks in a large open-concept kitchen and living area, and each one expands by just 0.05 percent, the total movement is massive. This is why we leave a quarter-inch or even a half-inch expansion gap at the walls. But if the island is sitting in the middle of the room, anchored through the floor, that gap at the wall is useless. The floor is pinned in the center. The expansion is then forced to happen between the island and the wall, which is a much shorter distance, leading to localized buckling. This is the physics of flooring that most DIY videos ignore because they want to show you how easy the click-lock system is. They don’t tell you about the shear strength of the locking profile or the ASTM F2170 moisture testing you should have done on your concrete slab before you even opened a box of flooring.
| Core Type | Density (kg/m3) | Moisture Resistance | Typical Expansion Rate |
|---|---|---|---|
| MDF Core | 600-800 | Low | 0.15% |
| HDF Core | 800-1000 | Medium | 0.08% |
| Enhanced HDF | 1000+ | High | 0.05% |
The correct sequence for island installation
The only professional way to install a kitchen island with laminate flooring is to mount the island directly to the subfloor first. You then install the laminate around the island, treating the cabinetry as a fixed wall and leaving the required expansion gap around the entire perimeter of the island base, which is later covered by shoe molding.
This is where the “Mechanic” in me gets frustrated with modern kitchen design. People want that clean, zero-threshold look. They don’t want to see a piece of molding at the base of their beautiful island. But you have to choose between a tiny piece of trim and a failing floor. If you are building a new kitchen, you bolt the cabinets to the subfloor. If you have a concrete slab, you use Tapcons. If it is wood, you use lag bolts. Then, you lay your underlayment and your laminate. You cut the laminate a quarter inch away from the cabinet legs or the toe kick. This allows the floor to slide under the toe kick area. When the floor moves, the island stays put, and the floor moves freely around it. If you must have the floor under the island for some aesthetic reason, you have to use a floating island design or use a specific type of glue-down engineered wood instead. But for laminate, the rules are written in stone. You cannot pin a floating floor. It is in the NWFA guidelines, and it is in every manufacturer’s warranty. If you screw through that floor, you have just voided your warranty. If the floor fails, the manufacturer will send an inspector out, they will see the screws in the island, and they will close the file before they even stand up from their knees.
“Wood and wood-based products are hygroscopic, they will expand and contract with the gain and loss of moisture regardless of the installation method.” – NWFA Technical Guidelines
Subfloor preparation and the leveling myth
Subfloor leveling is the most overlooked phase of flooring and is the primary reason for click-lock joint failure. Underlayment is designed for cushioning and sound dampening, not for filling structural dips, if a subfloor is not flat within industry tolerances, the laminate will bridge the gaps and eventually snap under the weight of foot traffic.
I have seen guys try to use three layers of foam underlayment to hide a low spot. That is a recipe for disaster. While most people want the thickest underlayment, too much cushion actually causes the locking mechanisms on LVP or laminate to snap under pressure. It creates a trampoline effect. Every time you step on the joint, it bends. The tongue is forced up and the groove is forced down. Eventually, the fiberboard fatigues and breaks. Then you get a soft spot. Then the planks start to separate. If you are over concrete, you need a high-quality self-leveling compound. You need to prime the floor first, then pour the leveler. It is a messy, difficult job, but it is the difference between a floor that lasts thirty years and one that lasts three. If you are over a wood subfloor, you might need to sand down the high spots at the seams or add a layer of plywood underlayment. We are talking about structural engineering here. The floor is a system. The subfloor is the foundation, the underlayment is the decoupler, and the laminate is the wear surface. If any part of that system is weak, the whole thing fails. For those in humid regions like Houston or New Orleans, this is even more critical. The high humidity means your floor is going to move more than a floor in a dry place like Phoenix. In the desert, your planks might shrink so much that the gaps become visible. In the swamp, they might swell so much they hit the wall and buckle. You have to account for your local climate.
The information gain on underlayment density
Most big-box retailers sell cheap, open-cell foam underlayment. It is garbage. It loses its loft within a year, leaving your floor flat and lifeless. You want a high-density, closed-cell foam or a heavy rubber underlayment. These provide actual structural support. They have a high PSI rating, meaning they won’t compress under the weight of your furniture. They also provide better Sound Transmission Class (STC) and Impact Insulation Class (IIC) ratings. This is especially important if you are in a condo or a multi-story home. You don’t want to hear every footstep from the floor above. But remember my warning, never use too much. If the manufacturer specifies a three millimeter underlayment, do not go to six millimeters thinking it will be twice as good. You will ruin the floor. The vertical movement allowed by thick underlayment is the silent killer of laminate joints. It is better to have a thin, dense underlayment on a perfectly flat floor than a thick, soft underlayment on a bumpy one.
Installation checklist for long-term success
- Verify subfloor flatness is within 3/16 inch over a 10 foot radius.
- Conduct moisture testing on concrete slabs using an RH probe.
- Ensure the laminate has acclimated to the room’s temperature for at least 48 hours.
- Install the kitchen island directly to the subfloor before laying the planks.
- Leave a minimum 1/4 inch expansion gap at all vertical obstructions including cabinets.
- Use a high-density underlayment with a vapor barrier for concrete installations.
- Undercut door jambs so the floor can slide freely underneath them.
The 1/8 inch that ruins everything
In the flooring world, we live and die by tiny measurements. An eighth of an inch might not seem like much when you are framing a house, but in flooring, it is a mile. If your expansion gap is an eighth of an inch too small, the floor will hit the wall. If your subfloor is an eighth of an inch out of level, the joint will fail. This precision is why I distrust “handyman” installs. They don’t carry the right tools. They don’t have the six-foot levels or the moisture meters. They just slap the floor down and leave. You need to be a stickler for the details. You need to check the moisture content of your wood subfloor and make sure it is within four percent of the laminate’s moisture content. You need to use a tapping block, not a hammer, to join the planks. If you hit the edge of a laminate plank directly with a hammer, you will damage the internal structure of the joint, even if you can’t see it immediately. It will manifest six months later as a peaked seam. The physics of impact are unforgiving. We are working with brittle materials that are designed for compression, not impact or tension. Treat the material with respect and it will perform. Treat it like a cheap commodity, and it will fail you when you least expect it. Floors are the most used surface in any home. They take the most abuse. Don’t let a kitchen island be the reason your investment goes to waste.