Why Your Kitchen Floor Tiles Are Cracking Right in Front of the Sink
Why Your Kitchen Floor Tiles Are Cracking Right in Front of the Sink
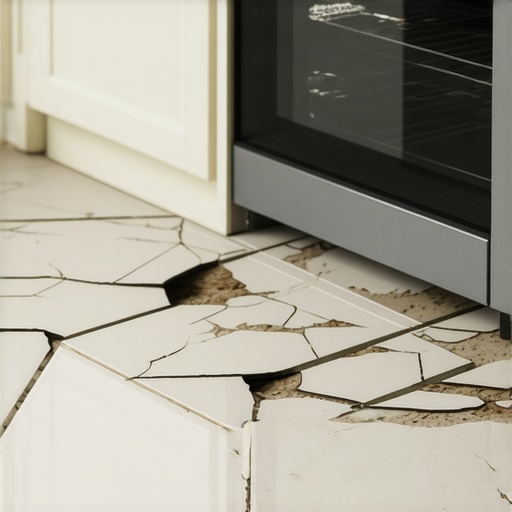
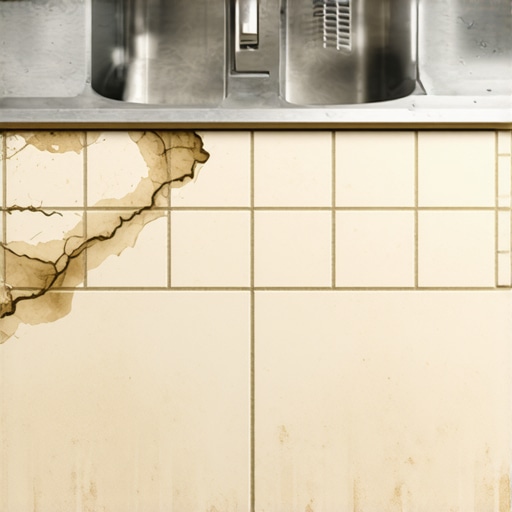
Most guys skip the leveling compound. They think the underlayment will hide the dip. It won’t. I spent three days grinding concrete on a job last month just so the floor wouldn’t click like a castanet. I have seen it a thousand times. You walk into a beautiful kitchen with high end granite and custom cabinets, but right there, in the high traffic zone where the homeowner stands to wash dishes, a hairline fracture spiderwebs across a twelve inch porcelain square. It is not bad luck. It is not a defective tile. It is a failure of structural engineering at the subfloor level. After twenty five years of kneeling on plywood and concrete, I can tell you that a tile is only a brittle skin. If the skeleton underneath moves, the skin breaks. This is the reality of the mechanical bond. When I smell the wet sawdust of a new build, I know exactly where the shortcuts were taken. The area in front of the sink is the most common failure point because it combines three killers of masonry: moisture, concentrated live loads, and subfloor deflection.
The structural ghost at the kitchen island
Kitchen floor tiles crack because of subfloor deflection, excessive moisture, or improper thinset coverage. The joist span often lacks the structural stiffness required for porcelain or ceramic tile. When the dead load of cabinets and the live load of a human meet, shear stress occurs. Most residential floors are built to a L/360 standard, which is simply too flexible for rigid stone. The physics of the kitchen are unique. You have a heavy dishwasher, a sink full of water, and potentially a massive island all pressing down on the same few joists. When you stand at the sink, you are adding a concentrated load to a spot that is already under stress. If your subfloor is only 5/8 inch OSB, you are asking for a catastrophe. I have seen installers try to hide these dips with extra mortar, but that just creates a pivot point. The tile becomes a see-saw. Eventually, the tension exceeds the tensile strength of the clay, and you hear that sickening pop.
“A floor is only as good as the subfloor beneath it; deflection is the enemy of every joint.” – Master Flooring Axiom
The math of deflection ruins everything
Subfloor deflection is the measured vertical movement of a floor system under a specified load. For ceramic tile, the International Residential Code and TCNA standards require a deflection limit of L/360. This means the span of the joist divided by 360. If you have a ten foot span, the floor should not move more than one third of an inch. However, for natural stone, that requirement doubles to L/720. Most builders do the bare minimum. They use floor leveling compounds to make things look flat, but flatness is not the same as stiffness. You can have a floor as flat as a pool table, but if it bounces when you walk, the grout will turn to powder and the tiles will snap. I always check the joist spacing first. If I see 24 inch on center spacing with a single layer of plywood, I refuse to lay tile until a second layer of underlayment grade plywood is glued and screwed down. We are talking about the moment of inertia in the wood. Adding a second layer of 3/8 inch plywood does not just add thickness, it creates a composite structure that resists the bending forces of your weight.
Moisture creates a chemical divorce
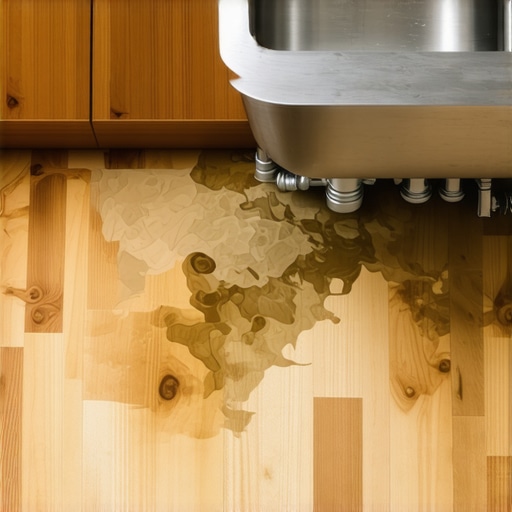
Water infiltration near the kitchen sink weakens the adhesive bond between the tile and the subfloor. When liquid water or high humidity penetrates the grout lines, it causes the plywood subfloor to expand and contract. This hygroscopic movement creates shear forces that break the mechanical bond of the thinset mortar. I have pulled up cracked tiles in front of sinks where the thinset was still stuck to the tile but had completely released from the wood. The wood fibers actually sheared off because they were swollen. This is why waterproof membranes or uncoupling mats like Ditra are mandatory in my book. They act as a shear stress break. They allow the wood to move slightly without telegraphing that movement into the tile. If you are just slapping thinset onto plywood in a wet area, you are building a timer that will eventually go off. The chemistry of modified thinset relies on polymer chains to create flexibility. But even the best polymer cannot withstand the hydrostatic pressure of a slow leak under a sink base.
The concrete lie that ruins ceramic
Concrete slabs are not the stable foundations most homeowners believe them to be. A concrete subfloor requires moisture testing and leveling before any tile installation. If the calcium chloride test shows a vapor emission rate higher than 3 pounds per 1,000 square feet, the thinset bond will fail. Many times, the crack you see in the tile is just a reflection crack from a control joint or a settlement crack in the slab below. In the kitchen, the slab is often thinner near the plumbing rough-ins. This creates a weak point. I use crack isolation membranes on every single slab job. It is an extra cost that homeowners hate until I explain that it prevents the house’s natural settling from snapping their expensive floor. Unlike a carpet install where the padding hides everything, or laminate which floats, tile is adhered masonry. It has zero tolerance for movement. If the concrete moves a hair, the tile moves a hair. And tile does not like to bend.
| Material Type | Janka Hardness / Density | Deflection Tolerance | Acclimation Time |
|---|---|---|---|
| Solid White Oak | 1360 lbf | High | 7-14 Days |
| Porcelain Tile | Extremely Dense | Zero (L/360 Min) | None |
| Engineered Wood | Varies | Medium | 3-5 Days |
| Laminate Flooring | HDF Core | Flexible | 2 Days |
| Luxury Vinyl Plank | Stone Polymer Core | Moderate | 24 Hours |
The 1/8 inch rule saves your grout
Expansion gaps at the perimeter of the room are vital for preventing tile tenting and cracking. A tile floor is a dynamic surface that expands when the ambient temperature rises. If the tile installation is tight against the kitchen cabinets or the baseboards, there is nowhere for the thermal expansion to go. The pressure builds up until the weakest point, usually the area in front of the sink where the floor is most stressed, buckles upward. I leave a 1/4 inch gap at every vertical obstruction. People ask me why I do not just grout all the way to the cabinet toe kick. I tell them that grout is not a sealer, it is a rock. You need 100 percent silicone caulk in those perimeter joints. Silicone is flexible. It allows the floor to breathe. When I see grout cracked and crumbling at the edge of a kitchen island, I know the installer did not leave a movement joint. It is basic physics of materials. You cannot fight thermodynamics with more cement.
“Movement joints are not optional; they are the pressure relief valves of a structural floor.” – TCNA Handbook Reference
The chemistry of the bond and thinset failure
Modified thinset mortar contains liquid latex or dry polymers that increase bond strength and flexural movement. If the installer uses unmodified mortar over a plywood subfloor, the tile will crack within a year. The wood subfloor sucks the moisture out of the mortar too quickly, preventing the Portland cement from forming a complete crystalline structure. This results in a chalky bond that cannot handle the weight of a person standing at the sink. I also see guys who spot bond tiles, placing five big globs of mortar on the corners and center. This leaves voids. When you stand on a tile with a void under it, you are putting point load stress on an unsupported bridge of ceramic. It will snap. Professional standards require 95 percent mortar coverage in wet areas like kitchens and showers. I back-butter every single tile to ensure that the vacuum bond is complete. It takes longer. It hurts the back more. But it is the only way to ensure the floor survives twenty years of morning coffee runs.
The master installation protocol
- Verify the joist span and subfloor thickness against L/360 requirements.
- Check the subfloor for flatness, ensuring no more than 1/8 inch deviation over 10 feet.
- Install a cement backer board or uncoupling membrane using the correct mortar.
- Apply a waterproof transition at the sink and dishwasher zones to prevent wood rot.
- Ensure 95 percent mortar coverage by back-buttering each porcelain tile.
- Leave 1/4 inch expansion gaps at all walls and cabinet perimeters.
- Use color matched silicone caulk at all change of plane transitions.
The kitchen is the heart of the home, but it is also a mechanical environment. You have vibrating appliances, fluctuating temperatures from the oven, and moisture spikes. If you treat your floor like a carpet install where you can just stretch it over mistakes, you are going to fail. You have to think like an architect. Every layer matters. From the blocking between joists to the mil thickness of the anti-fracture membrane, the details are what prevent the cracks. If your tiles are already cracking, the bad news is that there is no easy fix. You can swap one tile, but the underlying deflection will just break the next one. You have to address the structural integrity of the floor leveling and subfloor support. It is a hard truth, but in this business, the truth is usually found in the demolition pile. Do it right the first time, or you will be doing it again when the grout starts to crunch under your feet.