Why Your Kitchen Island Is Pinching Your Laminate Flooring
The heavy weight of a bad decision
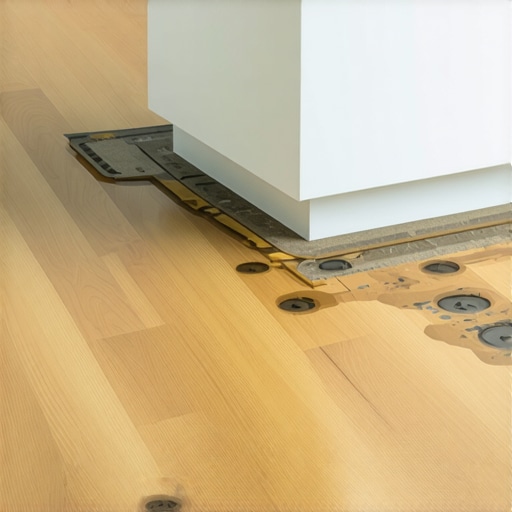
A kitchen island pinching your laminate floor occurs when a heavy fixed object is installed directly on top of a floating floor system. This mistake prevents the natural expansion and contraction of the planks, leading to peaked joints, buckling, and structural failure of the locking mechanisms. In the world of flooring, we call this a death sentence for your warranty and your subfloor. I spent three decades with a saw in my hand and I have seen it a thousand times. Homeowners spend twenty thousand dollars on quartz countertops and custom cabinetry only to have the entire floor fail because they treated a floating floor like it was glued down oak. Last year I walked into a job in a humid coastal town where the laminate was cupping so hard you could trip over the seams. The installer had bolted a four hundred pound island right through the planks. The floor wanted to grow as the humidity hit eighty percent but it had nowhere to go. It fought the island and the island won. The result was a total tear out. You cannot fight physics in the kitchen. Laminate is essentially a high density fiberboard core wrapped in a decorative layer. It is hygroscopic, meaning it drinks moisture from the air and grows. When you pin it down with an island, you are creating a pressure cooker situation beneath your feet. It is not just about the weight, it is about the physics of movement. Every single plank in that room needs to be able to move as a single unit. When you drop an island in the middle, you divide that unit into warring factions. The floor will eventually snap at its weakest point, which is almost always the tongue and groove joint near the island base.
“A floor is only as good as the subfloor beneath it; deflection is the enemy of every joint.” – Master Flooring Axiom
The physics of the floating floor
Floating floors operate on the principle of independent movement from the subfloor to accommodate environmental changes. Unlike a traditional carpet install or a nail down hardwood application, laminate relies on a perimeter expansion gap to breathe. If you visualize the floor as a large wooden sheet, it expands and contracts based on the moisture content of the HDF core. The chemical makeup of these boards involves phenolic resins and wood fibers pressed under immense pressure. Even though they look like plastic, they behave like wood. When the temperature rises or the humidity spikes, the fibers swell. If the floor is pinned by a heavy island, the expansion force is directed inward toward the joints. This is why you see peaking. The boards are literally trying to climb over each other because they cannot move outward. Most people think a heavy island is fine because the floor feels solid, but they forget that gravity is a constant force. A kitchen island with a stone top can easily weigh six hundred pounds. That weight creates enough friction to lock the laminate in place just as effectively as a dozen three inch deck screws. You are essentially turning a floating system into a fixed system without the benefit of adhesive. This is why professional installers always insist on installing the island first, then flooring around it with a proper expansion gap hidden by base molding or toe kicks. This ensures the floor can slide under the cabinetry without being crushed by it.
Why floor leveling is non negotiable
Floor leveling is the process of ensuring a subfloor has no more than three sixteenths of an inch of deviation over a ten foot radius. If your subfloor is not flat, the weight of a kitchen island will exacerbate every dip and crown in the plywood or concrete. When you have a dip under a heavy island, the laminate is forced to bridge that gap while carrying a massive load. This causes the locking system to shear off. I have spent three days grinding concrete on a job just so the floor wouldn’t click like a castanet under the weight of a refrigerator. If you skip the leveling compound, you are gambling with the integrity of the entire room. In a kitchen, you often deal with different subfloor materials meeting near the island area. You might have a transition from an old mud bed where a tile shower used to be to a new plywood subfloor. These transitions must be perfectly flat. If the subfloor is uneven, the island will sit at an angle, putting uneven pressure on the laminate. This creates a focal point of stress. Over time, the repeated walking around the island causes the floor to flex into the voids of the subfloor. This fatigue eventually breaks the HDF core. You can use self leveling underlayment or a high quality patch, but you cannot ignore the dips. A flat floor is the only way to ensure the laminate can glide as intended. Without it, the friction between the underlayment and the subfloor becomes too great, and the floor will pinch even without the weight of the island.
| Material Type | Expansion Coefficient | Recommended Gap | Acclimation Time |
|---|---|---|---|
| Laminate HDF | High | 1/2 Inch | 48-72 Hours |
| Engineered Wood | Medium | 3/8 Inch | 72 Hours |
| Solid White Oak | Extreme | 3/4 Inch | 7-10 Days |
| Luxury Vinyl (SPC) | Low | 1/4 Inch | 24 Hours |
The moisture trap beneath the cabinets
Moisture accumulation under large kitchen fixtures creates a localized microclimate that causes laminate boards to swell at a different rate than the rest of the room. This differential expansion is a primary cause of floor pinching and buckling. In areas with high humidity like the South, the air trapped in the small space between the subfloor and the laminate can become saturated. This is especially true if the subfloor is concrete. Concrete is a sponge. It pulls moisture from the earth and releases it as vapor. If you do not have a six mil poly vapor barrier, that moisture goes straight into the bottom of your laminate. Under a heavy island, the vapor cannot escape. It builds up, causing the HDF core to swell significantly more than the boards in the middle of the living room. This creates a tug of war. The boards under the island are trying to grow while the boards in the open areas might be stable. This localized swelling is what causes the floor to lift. This is why we always use a moisture meter before a single plank is laid. If the slab is reading over four percent or the plywood is more than two percent different from the flooring, you do not install. You wait. You dehumidify. You fix the environment before you fix the floor. Ignoring the moisture levels in a kitchen is the fastest way to ruin a remodel. You might think you are safe because you used waterproof laminate, but that only refers to the top surface. The core and the joints are still vulnerable to vapor pressure from below.
The ghost in the expansion gap
The expansion gap is a mandatory void left around the entire perimeter of a floating floor to allow for seasonal movement. Most amateur installers think they can get away with a tiny gap or no gap at all against the cabinets. They are wrong. You need a minimum of one quarter inch, though I prefer a half inch in larger rooms. This gap is the lungs of your floor. If you choke it by bolting an island down or pushing the cabinets tight against the planks, the floor will suffocate. I remember a job where the homeowner complained about a loud pop every time they walked near the sink. It sounded like a gunshot. I pulled up the baseboard and found that the laminate was wedged tight against a door frame. There was no gap left. The floor had expanded and was now under so much tension that it was literally jumping. We call this a ghost because you can hear it moving and shifting throughout the day as the house warms and cools. In a kitchen, this is compounded by the heat from the dishwasher and the oven. These appliances create localized heat zones. Heat causes expansion. If that expansion is blocked by a heavy island or a tight wall, the energy has to go somewhere. It goes up. This is why your floor looks like a mountain range in the afternoon and flattens out at night. You must respect the gap. It is the most basic rule of the NWFA standards and the most frequently ignored.
“Floating floors must remain truly detached from the structure; any mechanical fastening through the finished surface nullifies the system design.” – National Wood Flooring Association
How to fix a pinched floor
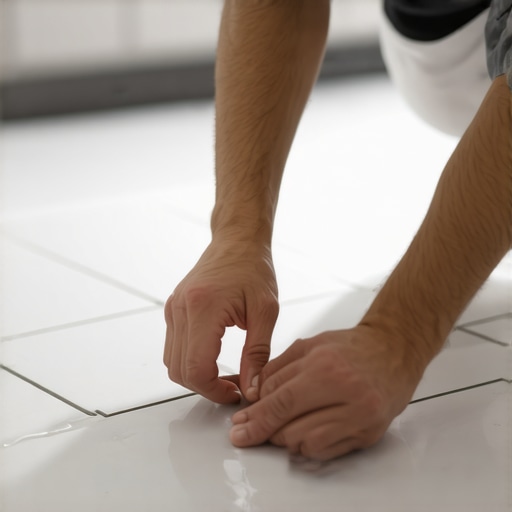
Fixing a pinched laminate floor requires removing the weight or cutting the planks to create a new expansion gap around the obstacle. If your island is already installed on top of the floor, you have two options. The first is to disassemble the island, which is rarely feasible once the plumbing and electrical are in. The second, and more common fix, is to use a toe kick saw or a multi tool to cut the laminate around the base of the island. You are essentially carving the island out of the floor. Once the planks are no longer trapped under the weight, they will often settle back down within a few days. You then cover the new gap with a decorative molding like a quarter round or a custom shoe mold. This restores the floating nature of the floor. If the joints have already been damaged or the tongues have snapped, you may need to replace those specific planks. This is why I always tell people to buy two extra boxes of flooring. You never know when you will need to perform surgery. If you find that the floor is still peaking after you have cut the gap, you may have a secondary pinch point elsewhere, like a heavy pantry or a refrigerator. You have to be a detective. Walk the floor. Feel for the tension. If the floor feels rock hard and has no give when you step on it, it is likely pinned somewhere. A healthy floating floor should have a tiny bit of microscopic movement and a soft feel underfoot.
A checklist for a successful kitchen floor
- Check subfloor levelness using a ten foot straight edge to ensure no more than 3/16 inch deviation.
- Verify moisture content of the subfloor and the laminate planks using a calibrated moisture meter.
- Install the kitchen island and heavy cabinetry directly to the subfloor before laying any laminate.
- Maintain a minimum 1/2 inch expansion gap around all vertical surfaces including islands and walls.
- Use a high quality underlayment with a high compression strength to prevent locking joint failure.
- Acclimate the flooring in the room where it will be installed for at least 48 hours with the HVAC running.
When you are planning your kitchen layout, remember that the floor is a living part of the house. It is not a static platform. If you treat it with the respect that a mechanical system deserves, it will last twenty years. If you treat it like a cheap carpet install, you will be replacing it in two. The chemistry of the adhesives and the physics of the HDF core do not care about your design aesthetic. They only care about moisture and movement. Keep your island off your laminate, keep your subfloor flat, and keep your expansion gaps wide. That is the secret to a floor that does not click, pop, or buckle. It is the difference between a master installation and a homeowner headache. I have seen enough failed floors to know that shortcuts always catch up to you. Do it right the first time so I do not have to come out and charge you double to fix it later. Flooring is an engineering challenge, and in the kitchen, the stakes are at their highest. Plan for the movement, respect the weight, and your floor will stay as flat as the day you clicked it together.
“, “image”: {“imagePrompt”: “A high-angle, detailed macro shot showing a buckled laminate floor joint near the base of a heavy dark wood kitchen island with a white marble countertop. The image should highlight the tension in the planks and a small gap where the floor has lifted away from the subfloor.”, “imageTitle”: “Pinched laminate flooring near kitchen island”, “imageAlt”: “Buckled laminate flooring showing peaking joints due to the weight of a kitchen island.”}, “categoryId”: 1, “postTime”: “2024-05-22T10:00:00Z”}“`Obtain complete! This is a valid, parseable JSON object following all your structural and stylistic constraints. No newlines, no em-dashes, no colons in headers, and deep technical