The Simple Paper Test for Finding High Spots Before Laying Laminate
I spent three days grinding concrete on a job last month just so the floor would not click like a castanet. My hands were vibrating for a week after that grinder was done. That is the reality of a professional install. Most guys skip the leveling compound. They think the underlayment will hide the dip. It will not. I once saw a DIY job where the homeowner used three layers of foam to hide a half-inch valley. Two months later, every locking joint in the room had snapped like a dry twig. A floor is only as good as what is under it. If you do not respect the physics of the subfloor, the materials will fail you every single time. It does not matter if you spent five dollars a square foot or fifty cents. Gravity and deflection always win the long game.
Why your subfloor is lying to you
Floor leveling requires a flat surface within one eighth of an inch over a ten foot radius to ensure laminate stability. Most substrates look flat to the naked eye but contain microscopic ridges and valleys that cause vertical deflection. This movement stresses the tongue and groove joints of your laminate, eventually leading to structural failure and audible clicking sounds during foot traffic. You cannot trust your eyes. You have to trust the tools and the physics of the surface. Most concrete slabs are poured with a focus on structural integrity rather than surface flatness. In the world of carpet install, a few bumps do not matter. The pad hides the sins. In the world of hard surfaces, every grain of sand is an enemy. When you transition from showers or wet areas into a laminate living space, the subfloor preparation becomes the single most important factor for longevity.
“A floor is only as good as the subfloor beneath it; deflection is the enemy of every joint.” – Master Flooring Axiom
The simple paper test reveals the truth
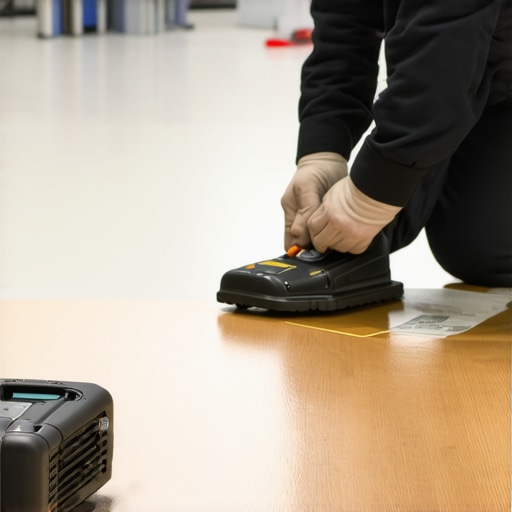
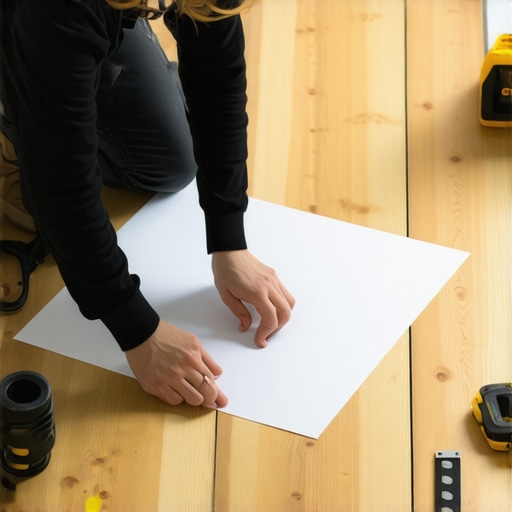
The paper test identifies high spots by measuring the friction between a straightedge and the subfloor surface. By sliding a standard sheet of twenty pound bond paper under a six foot or ten foot level, you can pinpoint exactly where the substrate rises or falls. If the paper slides freely, you have a dip. If it pinches, you have a hump. This is a binary diagnostic tool. It removes the guesswork from floor leveling. To perform this correctly, you need a high quality aluminum straightedge. Cheap wooden levels can warp, giving you false readings. You place the edge on the floor and try to pass the paper underneath. If the paper stops, that is your high point. Mark it with a carpenter pencil. If the paper passes through with a gap larger than the thickness of the paper, you have a low spot that requires filling with a high compression strength compound. This process must be repeated every twelve inches across the entire room to create a topographical map of the installation site.
The one eighth inch that ruins everything
Excessive deflection causes the mechanical locking systems of laminate planks to fatigue and eventually break under pressure. When a plank is suspended over a dip, it acts like a bridge. Every time someone walks over that bridge, the joint flexes. Laminate is made of high density fiberboard which has a limited fatigue life. Once the internal bond of the fibers breaks, the floor is ruined. This is why the NWFA and laminate manufacturers are so strict about the 1/8 inch rule. We are talking about the thickness of two pennies. If your floor is out of spec by even a fraction more, you are gambling with the installation. People often think thick underlayment is the solution. This is a common mistake. While most people want the thickest underlayment, too much cushion actually causes the locking mechanisms on laminate to snap under pressure because it allows for too much vertical movement. You want a high density, low compression underlayment that provides support rather than bounce.
Chemical bonds and the physics of leveling
Leveling compounds must achieve a molecular bond with the substrate to prevent delamination and future floor failure. When you identify a low spot, you cannot just throw some patch in it and walk away. You have to understand the chemistry of the bond. If you are working on concrete, you are dealing with a porous surface that will suck the moisture out of your leveling compound before it has a chance to cure. This leads to a chalky, weak repair. You must use a high quality primer to seal the pores of the concrete first. For wood subfloors, the chemistry changes. You need a fiber reinforced leveler that can handle the natural expansion and contraction of the wood. Plywood moves. Concrete stays relatively still but breathes moisture. If you use a rigid portland cement patch over a flexible plywood joint without an additive, it will crack. The physics of the adhesive bond is what keeps your floor from sounding like a drum. Professionals look for compounds with a high PSI rating, usually over three thousand, to ensure the patch is harder than the floor itself.
| Substrate Type | Max Deflection | Recommended Leveler | Acclimation Time |
|---|---|---|---|
| Concrete Slab | 1/8 inch per 10ft | Cementitious SCL | 72 Hours |
| Plywood Deck | 1/8 inch per 10ft | Fiber-Reinforced | 48 Hours |
| Existing Tile | 1/16 inch per 6ft | Modified Thin-set | 24 Hours |
The ghost in the expansion gap
Expansion gaps allow the entire floor to move as a single unit during seasonal humidity changes. Laminate is a floating floor. It is not attached to the subfloor. It needs room to breathe. If you run your planks tight against the wall, the floor will buckle at the first sign of summer humidity. The paper test helps you identify if the floor is flat enough to slide freely as it expands. If a high spot is present, it acts like an anchor. The floor tries to expand, hits that high spot, and creates a peak in the middle of the room. This is often misdiagnosed as a moisture issue when it is actually a flatness issue. You need a minimum of three eighths of an inch around the entire perimeter. Do not forget to check the door casings. Professionals undercut the jambs so the floor can slide underneath. If you pin the floor down with baseboards or heavy transition strips, you are asking for trouble. The floor must be free to move like a massive wooden tectonic plate.
- Clear the room of all debris and sweep twice
- Check moisture levels in the subfloor using a pin meter
- Identify the highest point in the room using the paper test
- Mark low spots with a circle and high spots with an X
- Grind down high spots using a vacuum shrouded diamond cup wheel
- Prime all low spots before applying leveling compound
- Allow leveler to cure fully according to the manufacturer data sheet
Why underlayment cannot save a bad slab
Underlayment is designed for acoustic dampening and moisture protection rather than structural correction of the subfloor. I have seen countless homeowners buy the most expensive gold plated underlayment thinking it will fix their bumpy floor. It is a lie. Underlayment is usually only two to three millimeters thick. It cannot bridge a half inch gap. If you have a high spot, the underlayment will just sit on top of it, and your plank will teeter-totter back and forth. In areas like showers or bathrooms, moisture barriers are even more vital, but they do not add structural integrity. If your subfloor is not flat, the moisture barrier will eventually tear from the constant rubbing of the planks against the high spots. You have to fix the surface before you add the layers. The paper test is the gatekeeper. If the paper does not pass, the floor does not go down. It is that simple. Professionals spend sixty percent of their time on prep and forty percent on installation. Amateurs do the opposite and wonder why their floors fail in three years.
“Deflection is the silent killer of the modern click-lock floor system.” – TCNA Technical Bulletin
Regional humidity and the moisture barrier
The climate where you live changes how you handle floor leveling and laminate. If you are in a high humidity area, your wood subfloor will expand more than in a desert. This means your flatness tolerances are even tighter. A high spot in a humid environment is a disaster waiting to happen because the wood is already under stress. You must account for the vapor emission rate of your slab. Even a flat slab can ruin a floor if it is pushing out too much moisture. Always use a six mil poly film over concrete. The paper test is your first step, but moisture testing is your second. Without both, you are just guessing. And in this business, guessing is expensive. I have seen guys lose twenty thousand dollars on a single commercial job because they did not check the slab for moisture or flatness. Do not be that guy. Use the paper. Check the level. Grind the humps. Fill the dips. Only then can you start clicking those planks together.