The ‘Quarter Trick’ for Ensuring Proper Slope on Your Shower Floor
The gravity of the situation in your shower
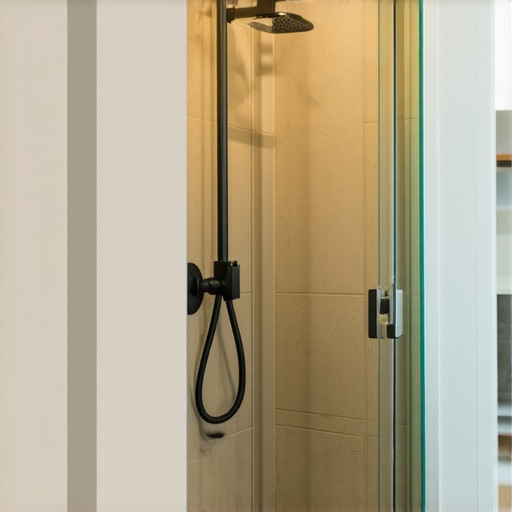
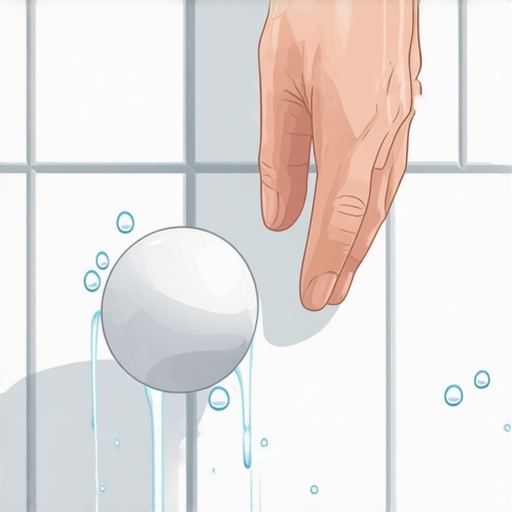
The quarter trick ensures a shower floor has a minimum slope of 1/4 inch per foot toward the drain by using the physical height of a coin as a visual gauge. Proper drainage prevents stagnant water and mold growth in the mortar bed or under tile. It validates that gravity effectively pulls moisture toward the waste line. Most guys skip the leveling compound. They think the underlayment will hide the dip. It won’t. I spent three days grinding concrete on a job last month just so the floor wouldn’t click like a castanet. That is the reality of modern flooring. People see the pretty tile, but they ignore the skeleton. If the subfloor is off by a hair, the whole system is a ticking time bomb. I have seen million dollar homes where the master bath smelled like a swamp because a contractor didn’t understand the physics of a mud bed. They think a slope is just a suggestion. It is a structural requirement. When you are standing in that shower, you are standing on a complex engineering assembly that must manage hydrostatic pressure and surface tension. A quarter is approximately 1.75 millimeters thick. In the world of shower pan geometry, that small sliver of metal represents the difference between a dry sanctuary and a petri dish. If you lay a level across your shower floor and cannot fit a quarter between the level and the tile at the drain, you have failed the most basic test of hydraulic management.
The 1/8 inch that ruins everything
A floor that lacks proper pitch will experience water pooling that degrades the chemical bonds of your thin set and grout. Even a minor deviation of 1/8 inch can stop water from reaching the drain, leading to mineral deposits and structural rot. This is not about aesthetics, it is about the molecular integrity of your home. When water sits on a flat surface, it forms a bond with the tile through surface tension. You need enough of an angle to break that tension and force the liquid into the waste pipe. I have walked onto jobs where the homeowner complained of a musty smell. I pull up one tile and the thin set underneath is the consistency of wet oatmeal. That happens because the water had nowhere to go. It sat in the valleys of the subfloor and slowly ate away at the portland cement. We talk about floor leveling as a prep step, but in a shower, it is the main event. You cannot fix a bad slope with extra glue. You cannot hide a dip with a larger tile. In fact, using large format tiles on a poorly sloped floor actually makes the problem worse because you end up with lippage that trips you every morning. Every installation must adhere to the fundamental laws of fluid dynamics. If the subfloor is not dead level before you start building your pitch, your finished product will reflect every single hump and hollow in the wood or concrete below. This is why we use self leveling underlayment. It is not a luxury, it is a foundation.
“A floor is only as good as the subfloor beneath it; deflection is the enemy of every joint.” – Master Flooring Axiom
The hidden chemistry of modified thin set
Modified thin set uses liquid latex or powdered polymers to increase bond strength and flexibility between the tile and the substrate. These polymers allow the floor to handle the microscopic shifts in the subfloor without cracking the grout lines. When we talk about the shower floor, we are talking about a sandwich of materials. You have the subfloor, then the preslope, then the waterproof liner, then the final mortar bed, and finally the tile. Each layer must be chemically compatible. If you use a cheap, unmodified thin set on a waterproof membrane, the water in the mix has nowhere to go. It cannot soak into the membrane. It stays trapped, and the cement never truly hydrates. This creates a soft bond. You want a high quality, polymer modified mortar that is rated for submerged environments. This stuff is engineered at a molecular level to hold onto the tile even when the house shifts. Think about the expansion and contraction cycles. Every time you turn on the hot water, the tile expands. When you turn it off, it cools and shrinks. Without those polymers, the bond would snap like a dry twig. I have seen beautiful marble floors turn into a jigsaw puzzle because the installer used the wrong chemistry for the environment. You need to understand the VOC levels and the cure times. A fast setting mortar might be tempting, but if the humidity in the room is too high, it will skin over before it actually bonds to the back of the tile. This is why I always carry a moisture meter. I want to know exactly how much water is in that room before I mix my first bucket.
Why your subfloor is lying to you
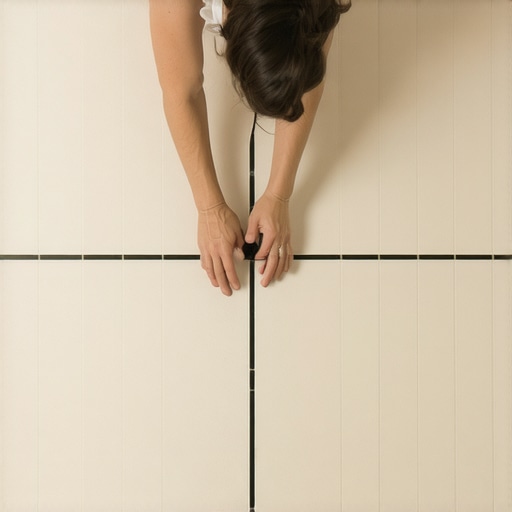
Subfloors often appear flat to the naked eye while hiding significant structural deflections that compromise tile installations. Plywood can delaminate and concrete can heave, creating hidden voids that trap moisture and cause tiles to pop. You cannot trust your eyes. You need a ten foot straight edge and a laser level. Most builders today use OSB which is basically just glued together wood chips. It is cheap and it is garbage for tile. If that OSB gets wet once during construction, the edges swell and stay swollen. You end up with a subfloor that looks like a mountain range. I spent years in the field seeing guys try to screw down 1/4 inch cement board over bouncy floors. It does not work. You need a minimum of 1 1/8 inches of total wood subfloor to meet the L/360 deflection standard for ceramic tile. If you are doing natural stone like marble or slate, you need L/720. That means the floor can only bend half as much as it would for ceramic. If your floor is bouncy, your grout will crack within six months. I don’t care how much you paid for the tile. The physics don’t change. You have to stiffen that subfloor from below or add a layer of high grade plywood on top. And don’t get me started on carpet install techniques being used for hard surfaces. You cannot just stretch tile. It is a rigid system that demands a rigid base.
| Metric | Standard Requirement | The Mechanic’s Advice |
|---|---|---|
| Minimum Slope | 1/4 inch per foot | Aim for 3/8 to account for tile texture |
| Subfloor Deflection | L/360 for ceramic | L/720 is better for any stone |
| Mortar Bed Ratio | 4 parts sand to 1 part cement | Use C33 sand only for drainage |
| Expansion Gap | 1/4 inch at perimeters | Never fill with grout, use 100% silicone |
A physics lesson in capillary action and surface tension
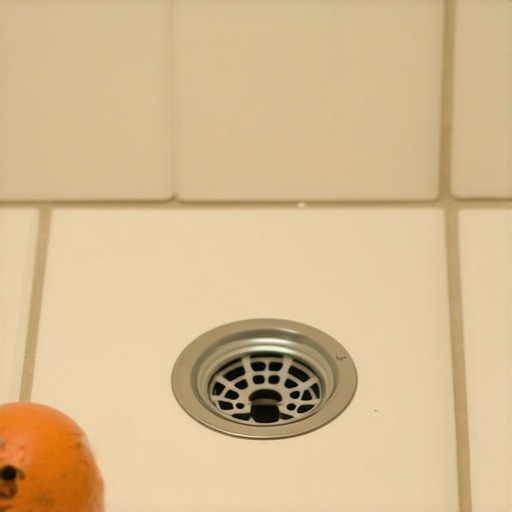
Water moves through grout and mortar beds via capillary action, where the liquid is pulled into microscopic pores regardless of the direction of gravity. This phenomenon requires a functional waterproof barrier and a consistent slope to manage the hidden moisture. Most homeowners think the tile and grout are waterproof. They are wrong. Grout is a sponge. It is full of tiny holes. When you shower, the water goes through the grout and sits in the mortar bed below. This is why the slope is so important even under the tile. If the preslope is flat, the water stays in the mud bed and breeds bacteria. This is called a saturated bed. Over time, the minerals in the water will migrate to the surface as the water evaporates, leaving white crusty deposits called efflorescence. It looks like salt and it is a nightmare to clean. If you use the quarter trick on your preslope, you ensure that even the water you cannot see is moving toward the drain weep holes. Those weep holes are the most ignored part of a shower drain. If the plumber gets PVC glue in those holes, the shower will fail. If the tile guy blocks them with thin set, the shower will fail. You need a layer of crushed stone or a plastic weep hole protector around the base of the drain. This allows the sub surface water to exit the system. It is a hidden highway for moisture, and if there is a traffic jam, your floor will rot from the inside out.
- Check the subfloor for deflection before any material arrives
- Verify the drain height matches your intended mortar bed thickness
- Ensure the waterproofing membrane extends at least 3 inches above the curb
- Perform a 24 hour flood test before laying a single tile
- Use a quarter to verify the pitch at every corner of the shower
The 1/8 inch gap that ruins transitions
Transitions between different flooring types must account for the thickness of the underlayment and the height of the finished surface to avoid tripping hazards. A difference of 1/8 inch at a doorway is enough to cause significant wear on the edges of laminate or carpet. We see this a lot when people switch from carpet to LVP. They pull up the thick carpet and pad and realize the subfloor is a mess. Then they try to lay a thin vinyl plank and they have a massive gap under the baseboards. You have to plan the finish height from the beginning. In a bathroom, the transition from the tile to the hallway carpet is where most installers fail. They leave a sharp metal edge or a height difference that catches your toe. I always use a solid marble or wood threshold to bridge that gap. It creates a definitive break and allows you to hide the expansion gap required for both materials. Remember that laminate and LVP are floating floors. They need to move. If you pin them down with a heavy transition strip or a kitchen island, they will buckle when the humidity hits in the summer. I have seen floors tent up three inches off the ground because there was no room to breathe. Use the proper T-molding and leave the gap. It is not a suggestion, it is a requirement for the warranty. If the floor cannot move, the locking mechanisms will snap like dry pasta.
“The shower receptor shall be sloped 1/4 inch per foot toward the weep holes in the floor drain.” – TCNA Handbook for Ceramic, Glass, and Stone Tile Installation
The regional reality of humidity and wood
Environmental conditions like the swampy humidity of Houston or the dry air of Phoenix dictate the acclimation time and moisture barrier requirements for any flooring project. Wood is a living material that reacts to the atmospheric water content in the room. If you are in a high humidity area, solid hardwood is a gamble. You are better off with an engineered core that has cross ply construction. This makes the wood more stable. But even then, you must acclimate the material. I don’t care if the homeowner is in a hurry. You don’t take wood from a cold warehouse and nail it down in a warm house the same day. It needs to sit in the room for at least 72 hours with the HVAC running. You have to measure the moisture content of the wood and the subfloor. They should be within 2 to 4 percent of each other. If they are not, that floor will move. It will cup or it will crown. Cupping is when the edges are higher than the center, usually because there is moisture in the crawlspace. Crowning is the opposite. Both are signs of a failed installation. I have walked into jobs where a 15,000 dollar wide plank walnut floor was ruined because the installer didn’t check the crawlspace humidity. It looked like a potato chip. You have to use a 6 mil poly film over concrete slabs to stop the vapor from coming up. Concrete is never truly dry. It is a breathing, porous rock that will push moisture into your wood until it dies. Protect the investment by respecting the environment.
{“@context”:”https://schema.org”,”@type”:”HowTo”,”name”:”How to Use the Quarter Trick for Shower Slope”,”step”:[{“@type”:”HowToStep”,”text”:”Place a long level across the shower floor from the wall to the drain.”},{“@type”:”HowToStep”,”text”:”Observe the gap between the bottom of the level and the floor surface at the drain location.”},{“@type”:”HowToStep”,”text”:”Attempt to slide a standard US quarter into the gap under the level.”},{“@type”:”HowToStep”,”text”:”If the quarter fits snugly or has slight clearance, the slope is at least 1/4 inch per foot.”},{“@type”:”HowToStep”,”text”:”Repeat the process from multiple angles to ensure consistent drainage toward the waste line.”}]}